Step-3 : Create Role / IAM User
To carry out role-based steps, a Tenant ID is required. Please consult your partner company to share tenant id before moving forward.
DigitalEx supports both types of AWS authentications,
Role Based
Access/Secret Key Based
Role-based access is generally considered to be more secure than user-based access, as it allows organizations to control access to resources and functions based on defined roles and responsibilities. We recommend using roles over individual users whenever possible
Creating Role
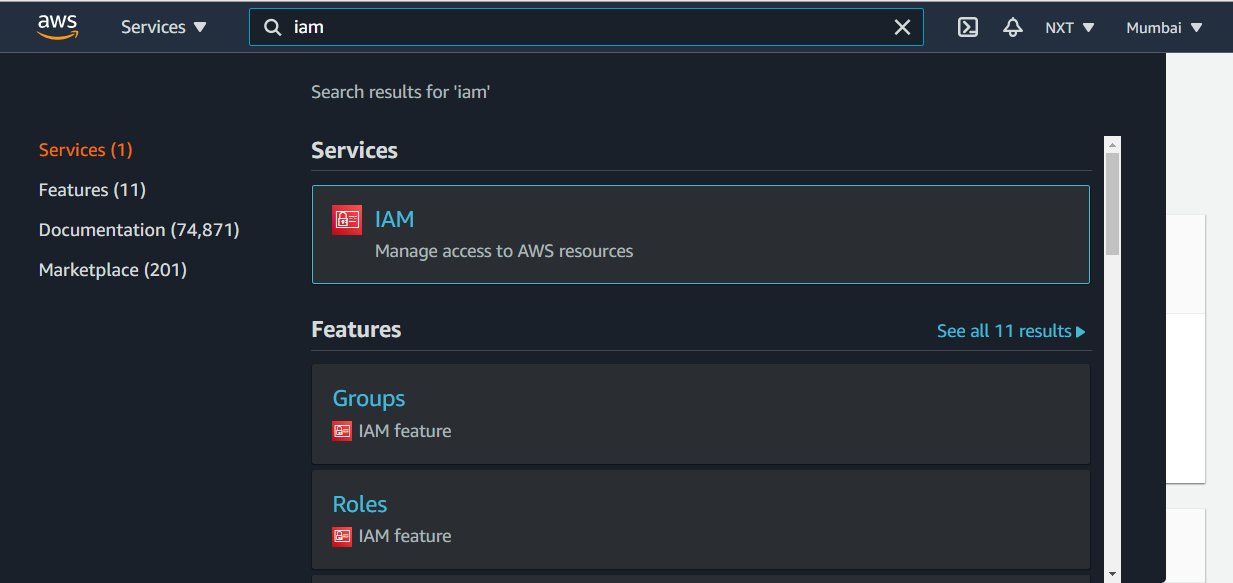
Go to IAM from the Services tab.
Click on Roles from the left menu options and Click on
Create Role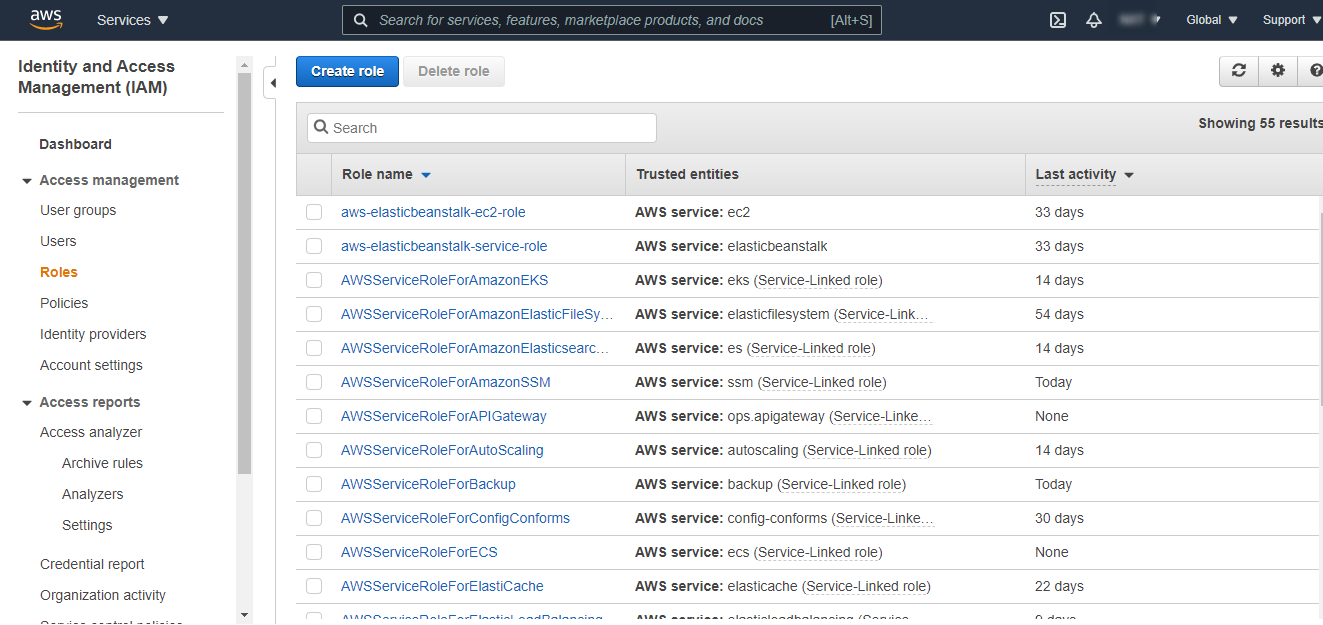
Select
AWS Accountsand selectAnother AWS Accountfroman AWS Accounttab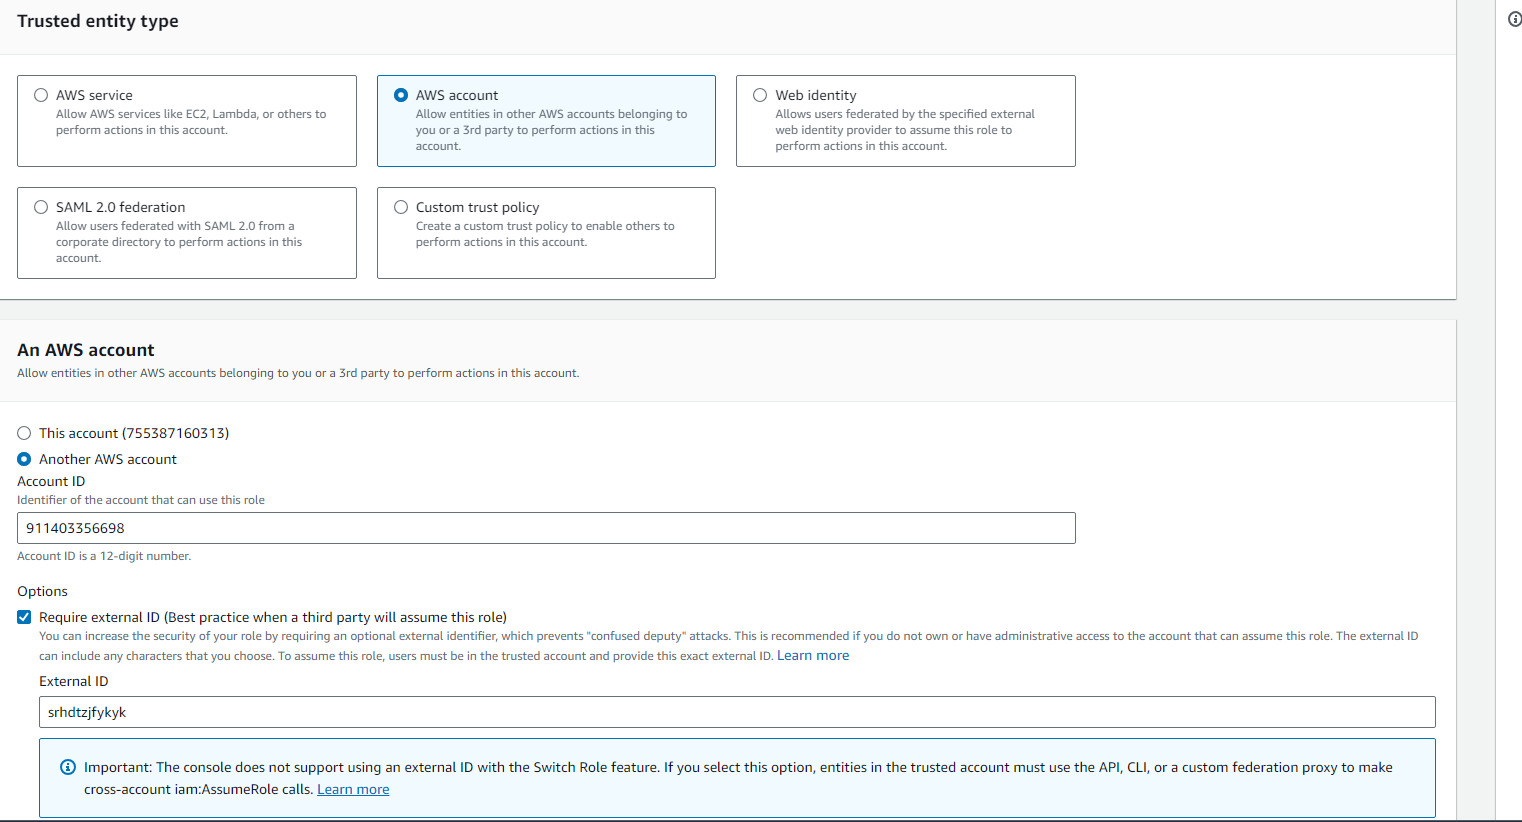
specify
Account IDas911403356698(This is the Account Id of DigitalEx which is universal)Check on options
Require external IDand enter the tenant id(Please ask your partner to share tenant-id)
Click
Next, don’t select any permissionsClick
NextEnter the Role Name of your choice and Click Create Role.
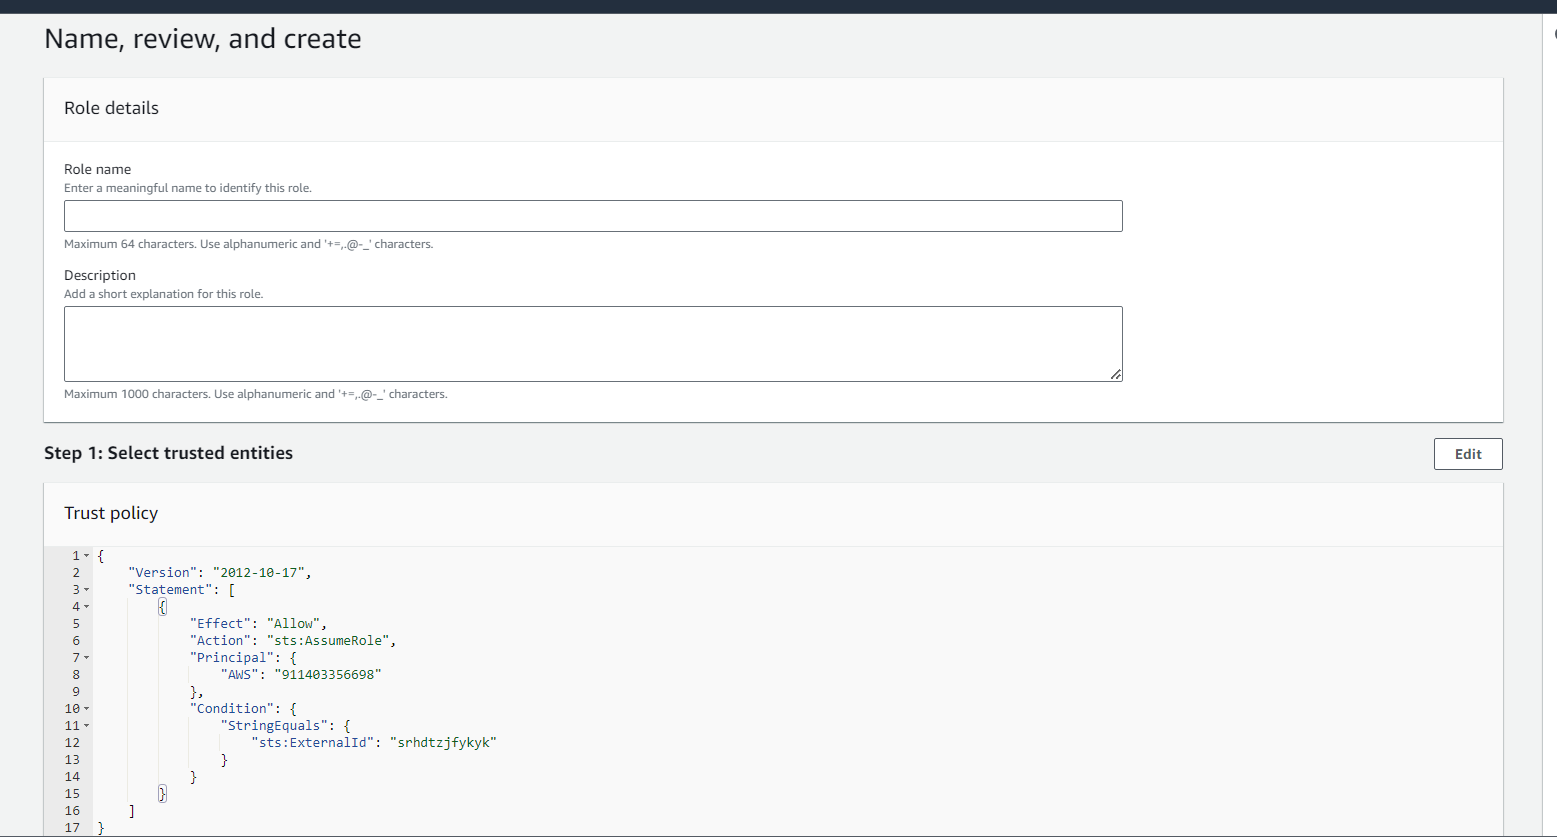
New Role should be created and displayed in the list.
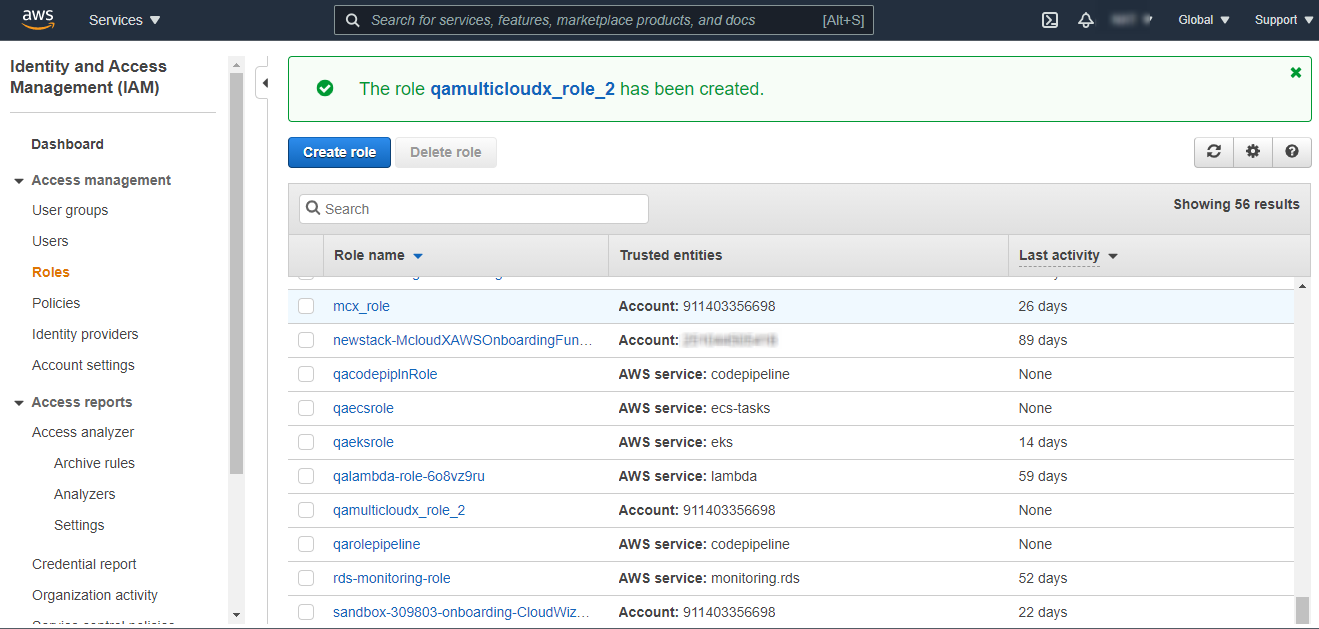
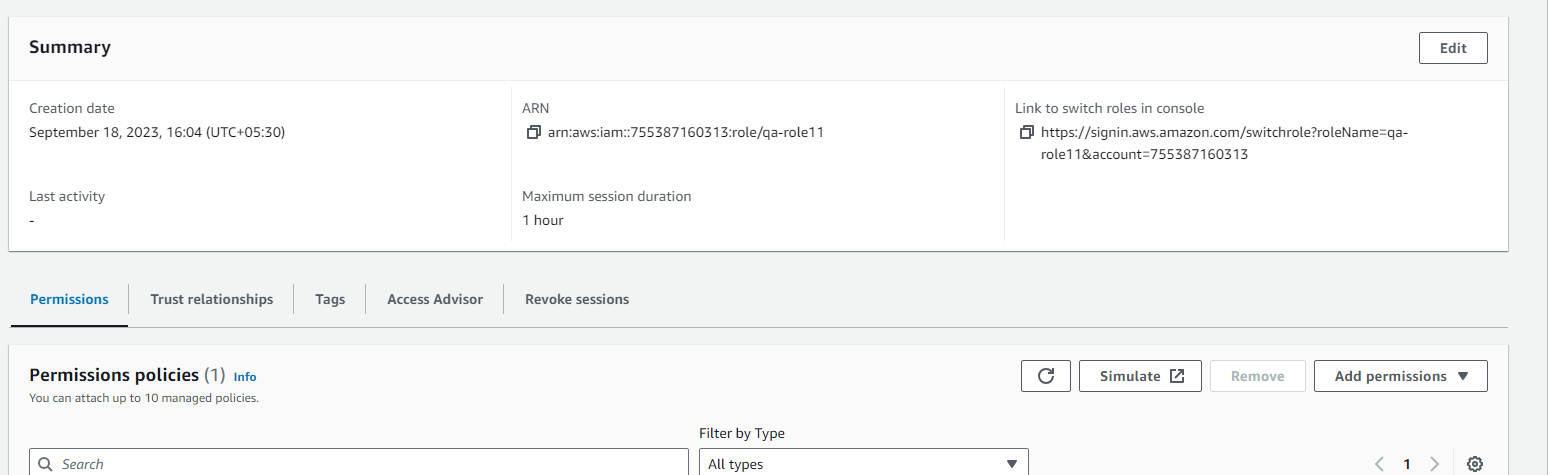
Click on the newly created Role which is navigated to the below page
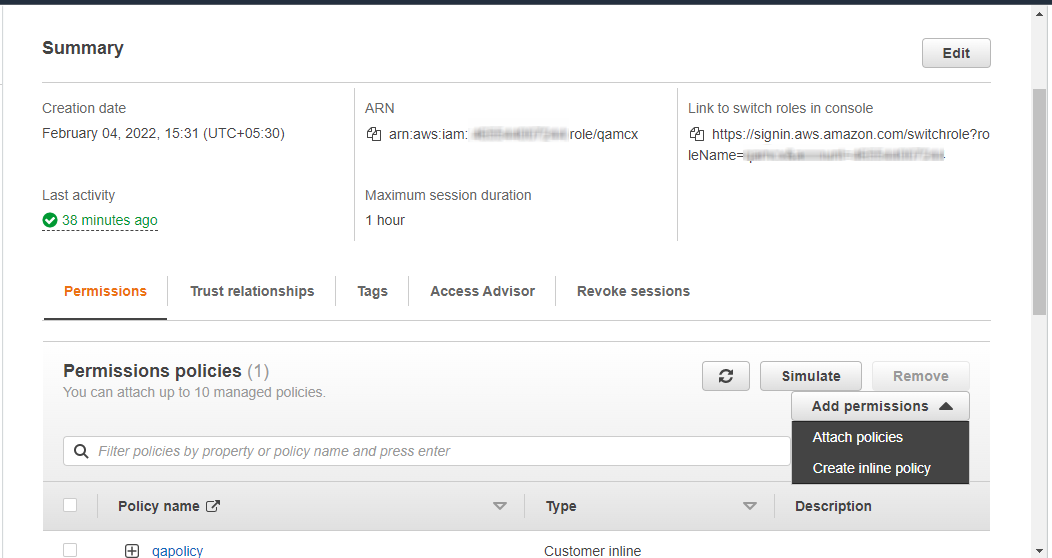
Click on
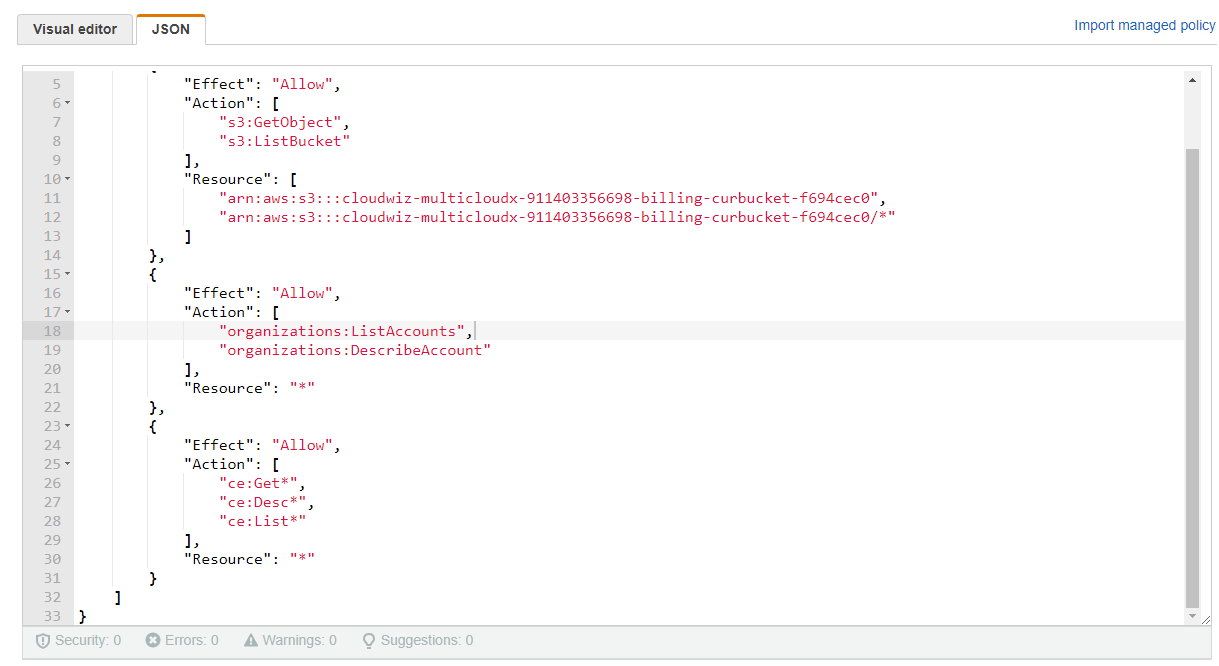
Add Permissions -> Create Inline PolicyunderPermissionsTab & Click onJSONtab & replace existing JSON with the following JSONJSON
JSON{ "Version": "2012-10-17", "Statement": [ { "Effect": "Allow", "Action": [ "s3:GetObject", "s3:ListBucket" ], "Resource": [ "arn:aws:s3:::<BUCKET_NAME>", "arn:aws:s3:::<BUCKET_NAME>/*" ] }, { "Effect": "Allow", "Action": [ "organizations:ListAccounts", "organizations:DescribeAccount" ], "Resource": "*" }, { "Effect": "Allow", "Action": [ "ce:Get*", "ce:Desc*", "ce:List*" ], "Resource": "*" }, { "Effect": "Allow", "Action": [ "iam:GenerateCredentialReport", "iam:GenerateServiceLastAccessedDetails", "iam:Get*", "iam:List*", "iam:SimulateCustomPolicy", "iam:SimulatePrincipalPolicy" ], "Resource": "*" }, { "Effect": "Allow", "Action": [ "cur:Get*", "cur:ValidateReportDestination", "cur:Describe*" ], "Resource": "*" } ] }And replace
<BUCKET_NAME>on lines 11 & 12 with the name of the bucket captured in Step-1 : Enable CUR & Cost ExplorerFinally, your window should look like the following image. Note that, the bucket name in the image is for reference, it shouldn’t be copied as is, instead you should put your own bucket name
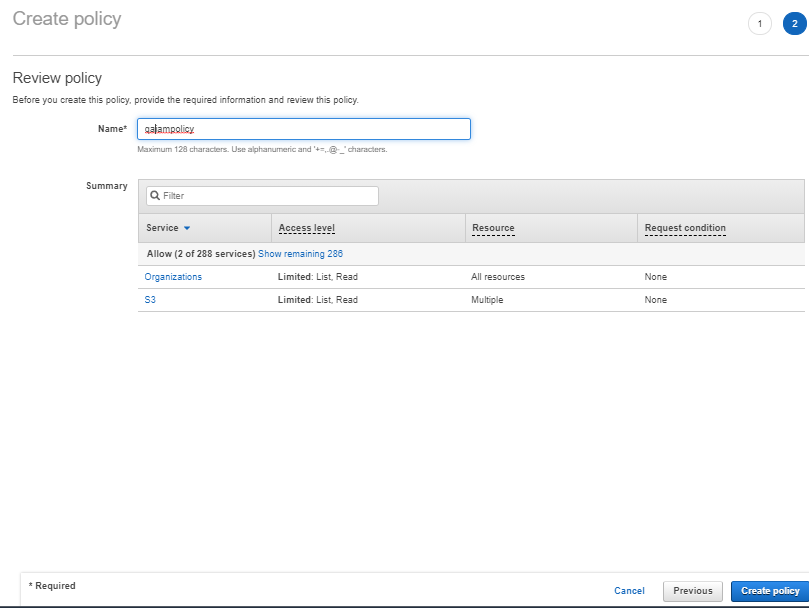
Review Policy, Name it & Click
Create policy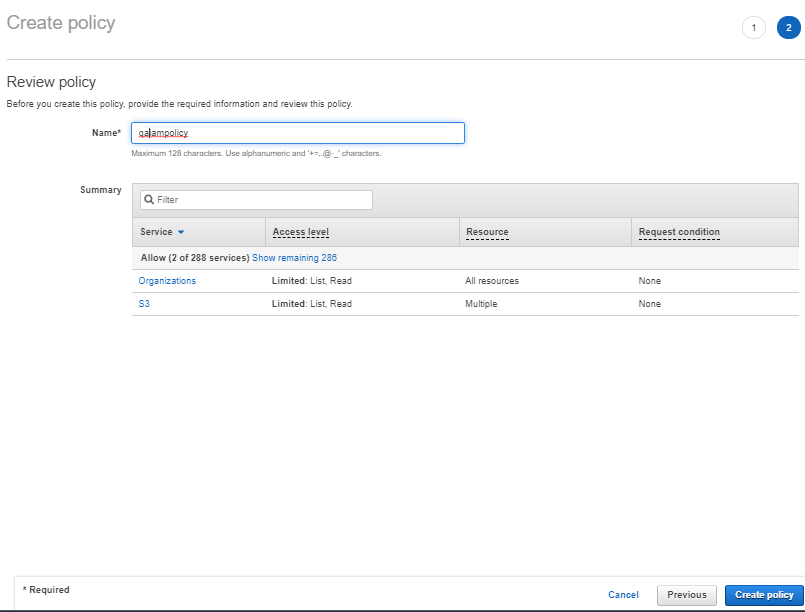
Capture
ARNof the role we created from the summary section for the next steps.
Creating IAM User & Access/Secret Keys
This step is not required if you have created a Role.
Go to IAM from the Services tab & navigate to Users tab
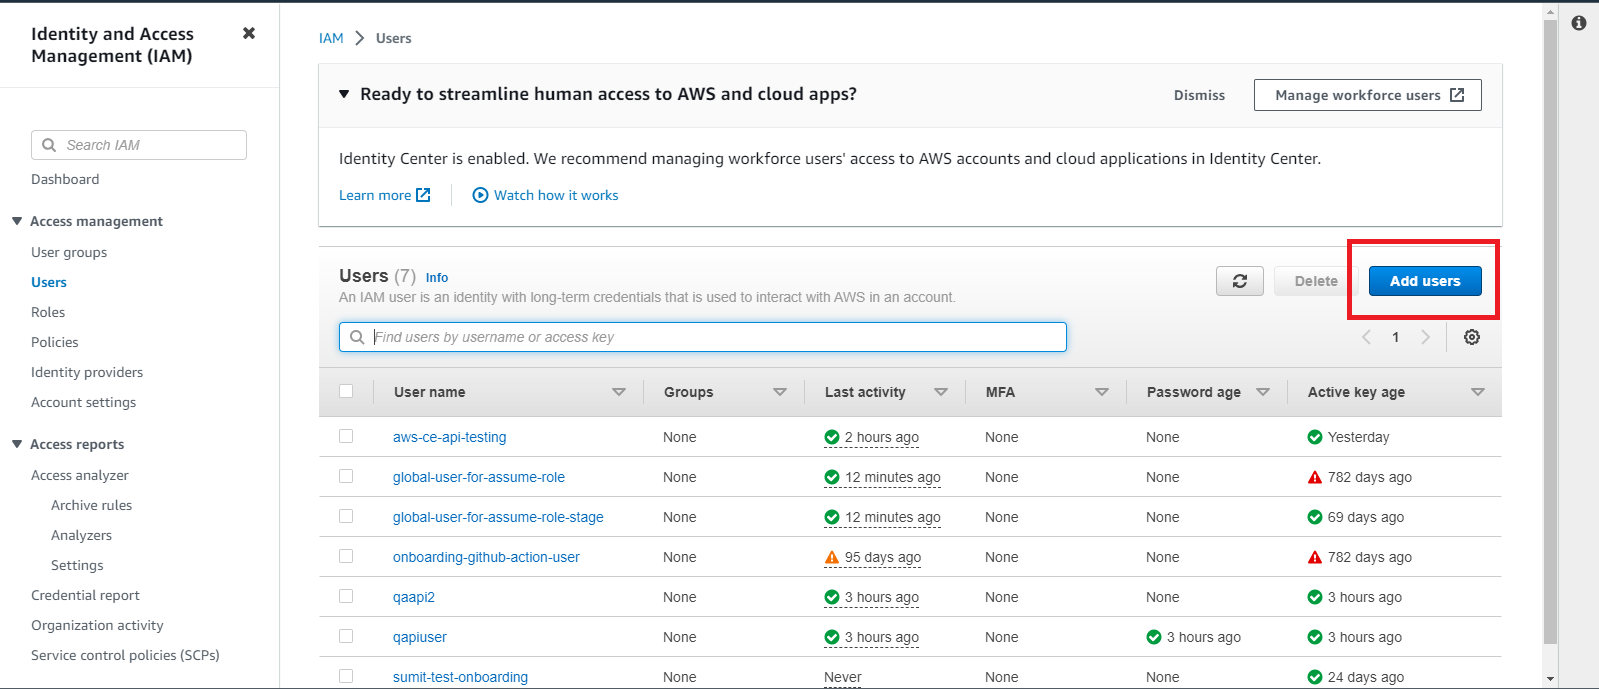
Click Add Users, enter name of your choice
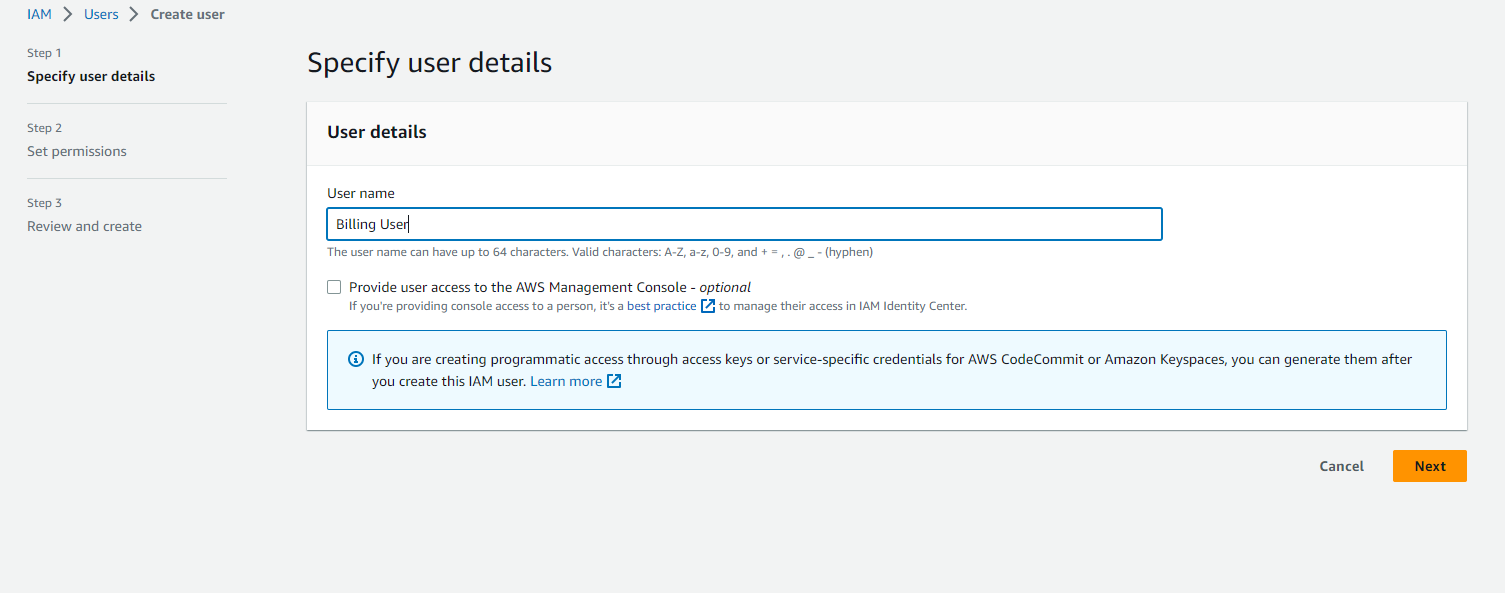
Skip permissions for now. Keep doing Next & finally Create User.
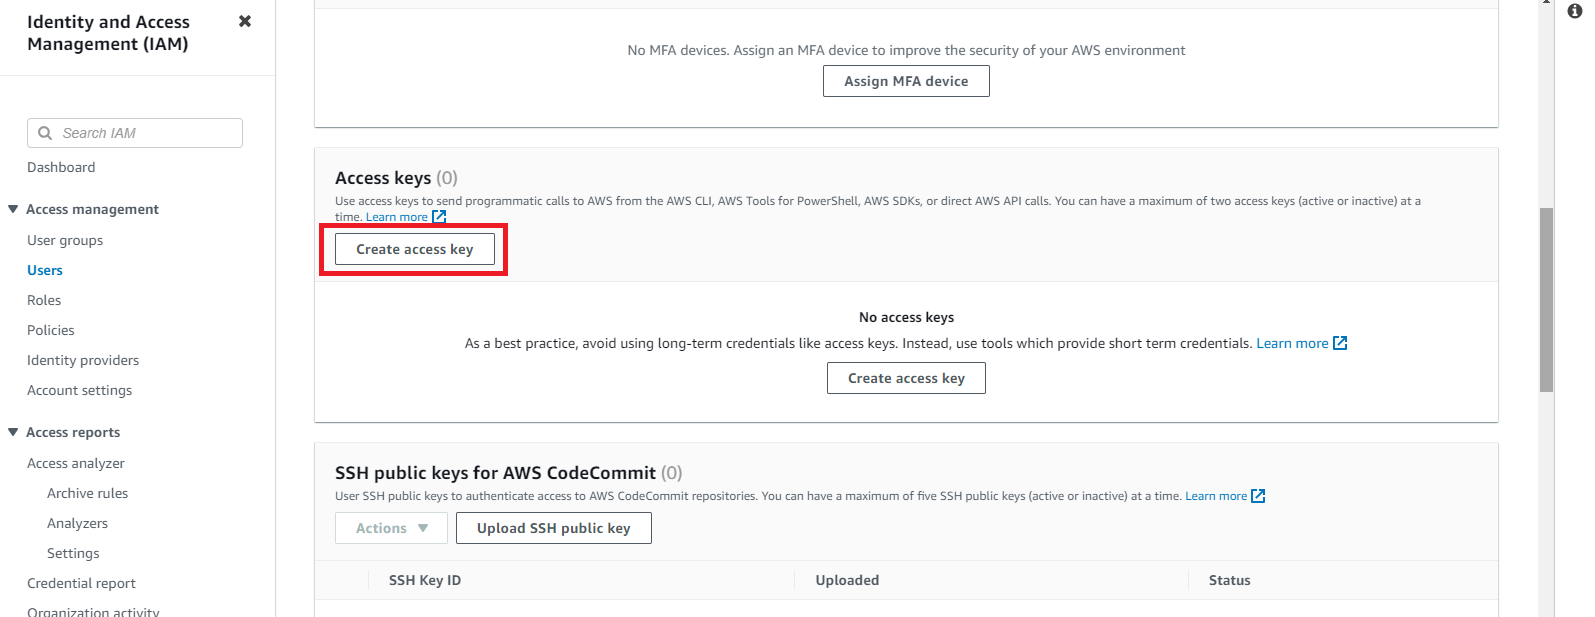
Open the User you have created & click on Security credentials.
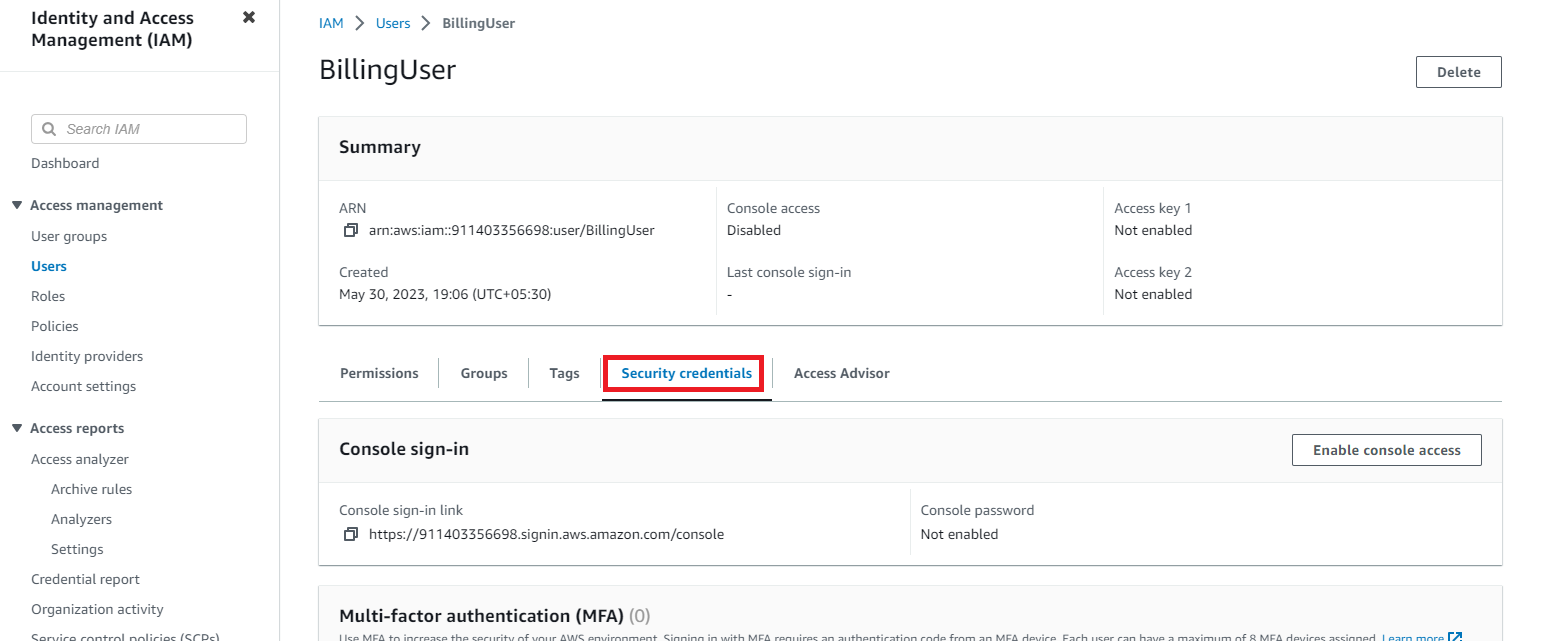
Scroll down & click on Create access key
Select Others & click on next
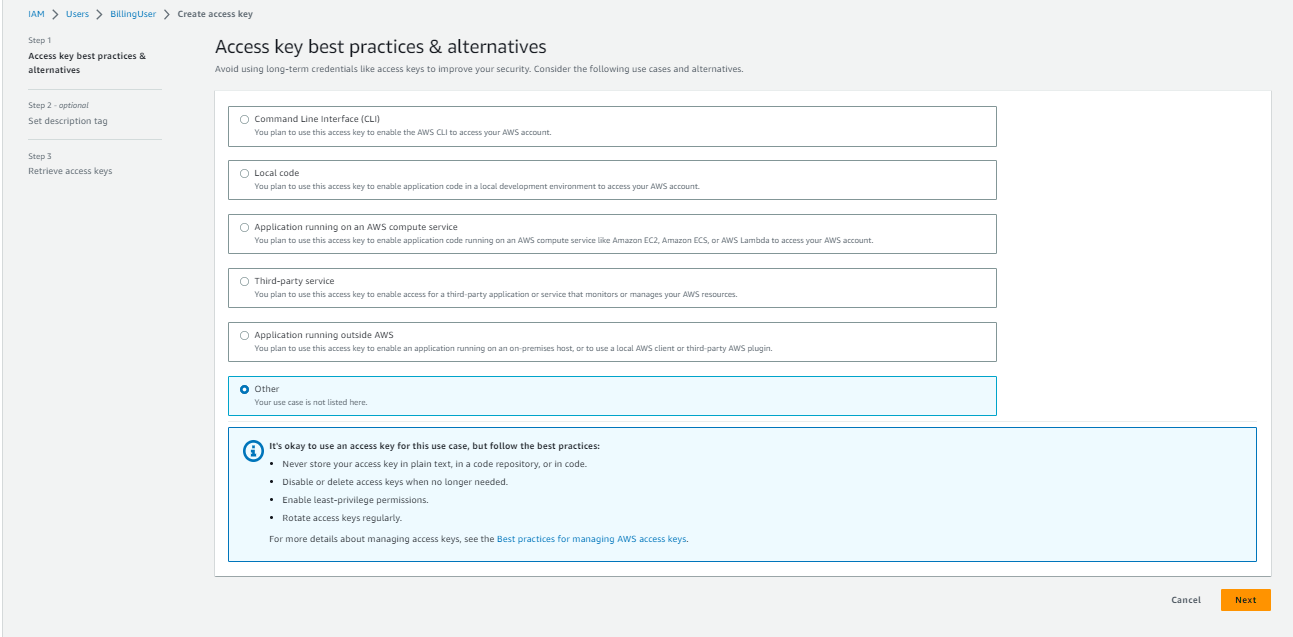
Click on Create Access Key
Save Access key ID and Secret access key for later use.
Click Done
10. Navigate to the details of the user we just created
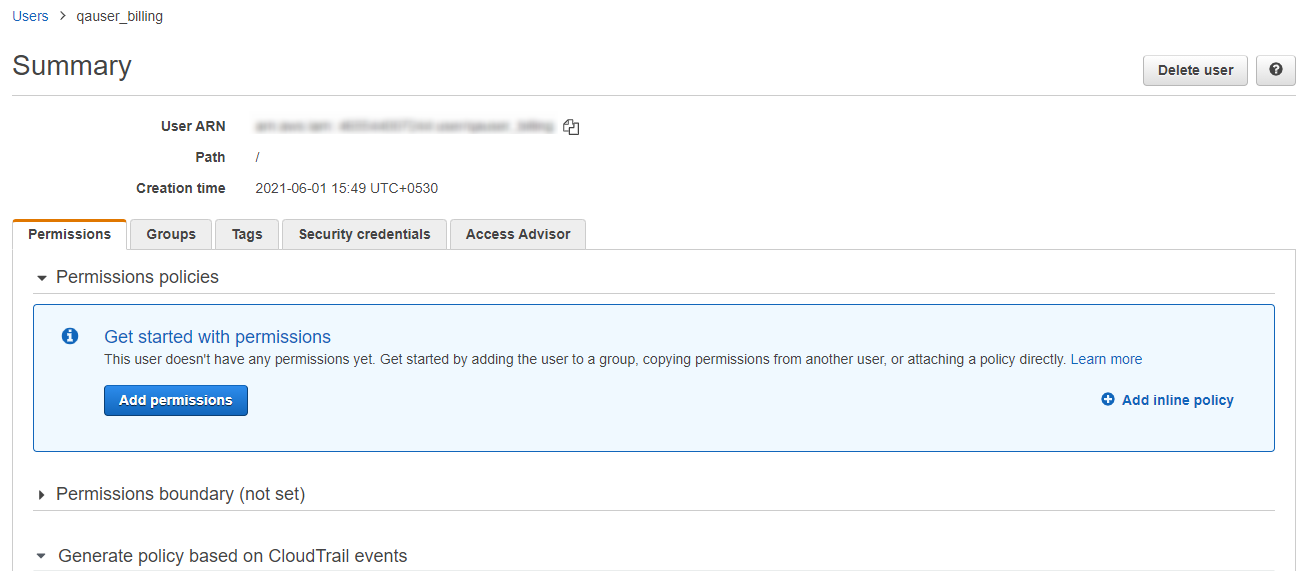
Click
Add Inline PolicyunderPermissionsTab & Click onJSONtab & replace existing JSON with the following JSONJSON
JSON{ "Version": "2012-10-17", "Statement": [ { "Effect": "Allow", "Action": [ "s3:GetObject", "s3:ListBucket" ], "Resource": [ "arn:aws:s3:::<BUCKET_NAME>", "arn:aws:s3:::<BUCKET_NAME>/*" ] }, { "Effect": "Allow", "Action": [ "organizations:ListAccounts", "organizations:DescribeAccount" ], "Resource": "*" }, { "Effect": "Allow", "Action": [ "ce:Get*", "ce:Desc*", "ce:List*" ], "Resource": "*" }, { "Effect": "Allow", "Action": [ "iam:GenerateCredentialReport", "iam:GenerateServiceLastAccessedDetails", "iam:Get*", "iam:List*", "iam:SimulateCustomPolicy", "iam:SimulatePrincipalPolicy" ], "Resource": "*" }, { "Effect": "Allow", "Action": [ "cur:Get*", "cur:ValidateReportDestination", "cur:Describe*" ], "Resource": "*" } ] }And replace
<BUCKET_NAME>on lines 11 & 12 with the name of the bucket captured in Step-1 : Enable CUR & Cost ExplorerFinally, your window should look like the following image. Note that, the bucket name in the image is for reference, it shouldn’t be copied as is, instead you should put your own bucket name
Review the policy & click create
<<Previous ---------------------------------------------------------------------------------------------------------- Next>>