Step-2: Create an IAM role for DigitalEx
DigitalEx supports both types of AWS authentications,
Role-based access is generally considered to be more secure than user-based access, as it allows organizations to control access to resources and functions based on defined roles and responsibilities. We recommend using roles over individual users
Roles
Login to AWS Member account you’re trying to onboard as an Administrator if not already logged in. And navigate to
IAMservice using AWS search bar.On a
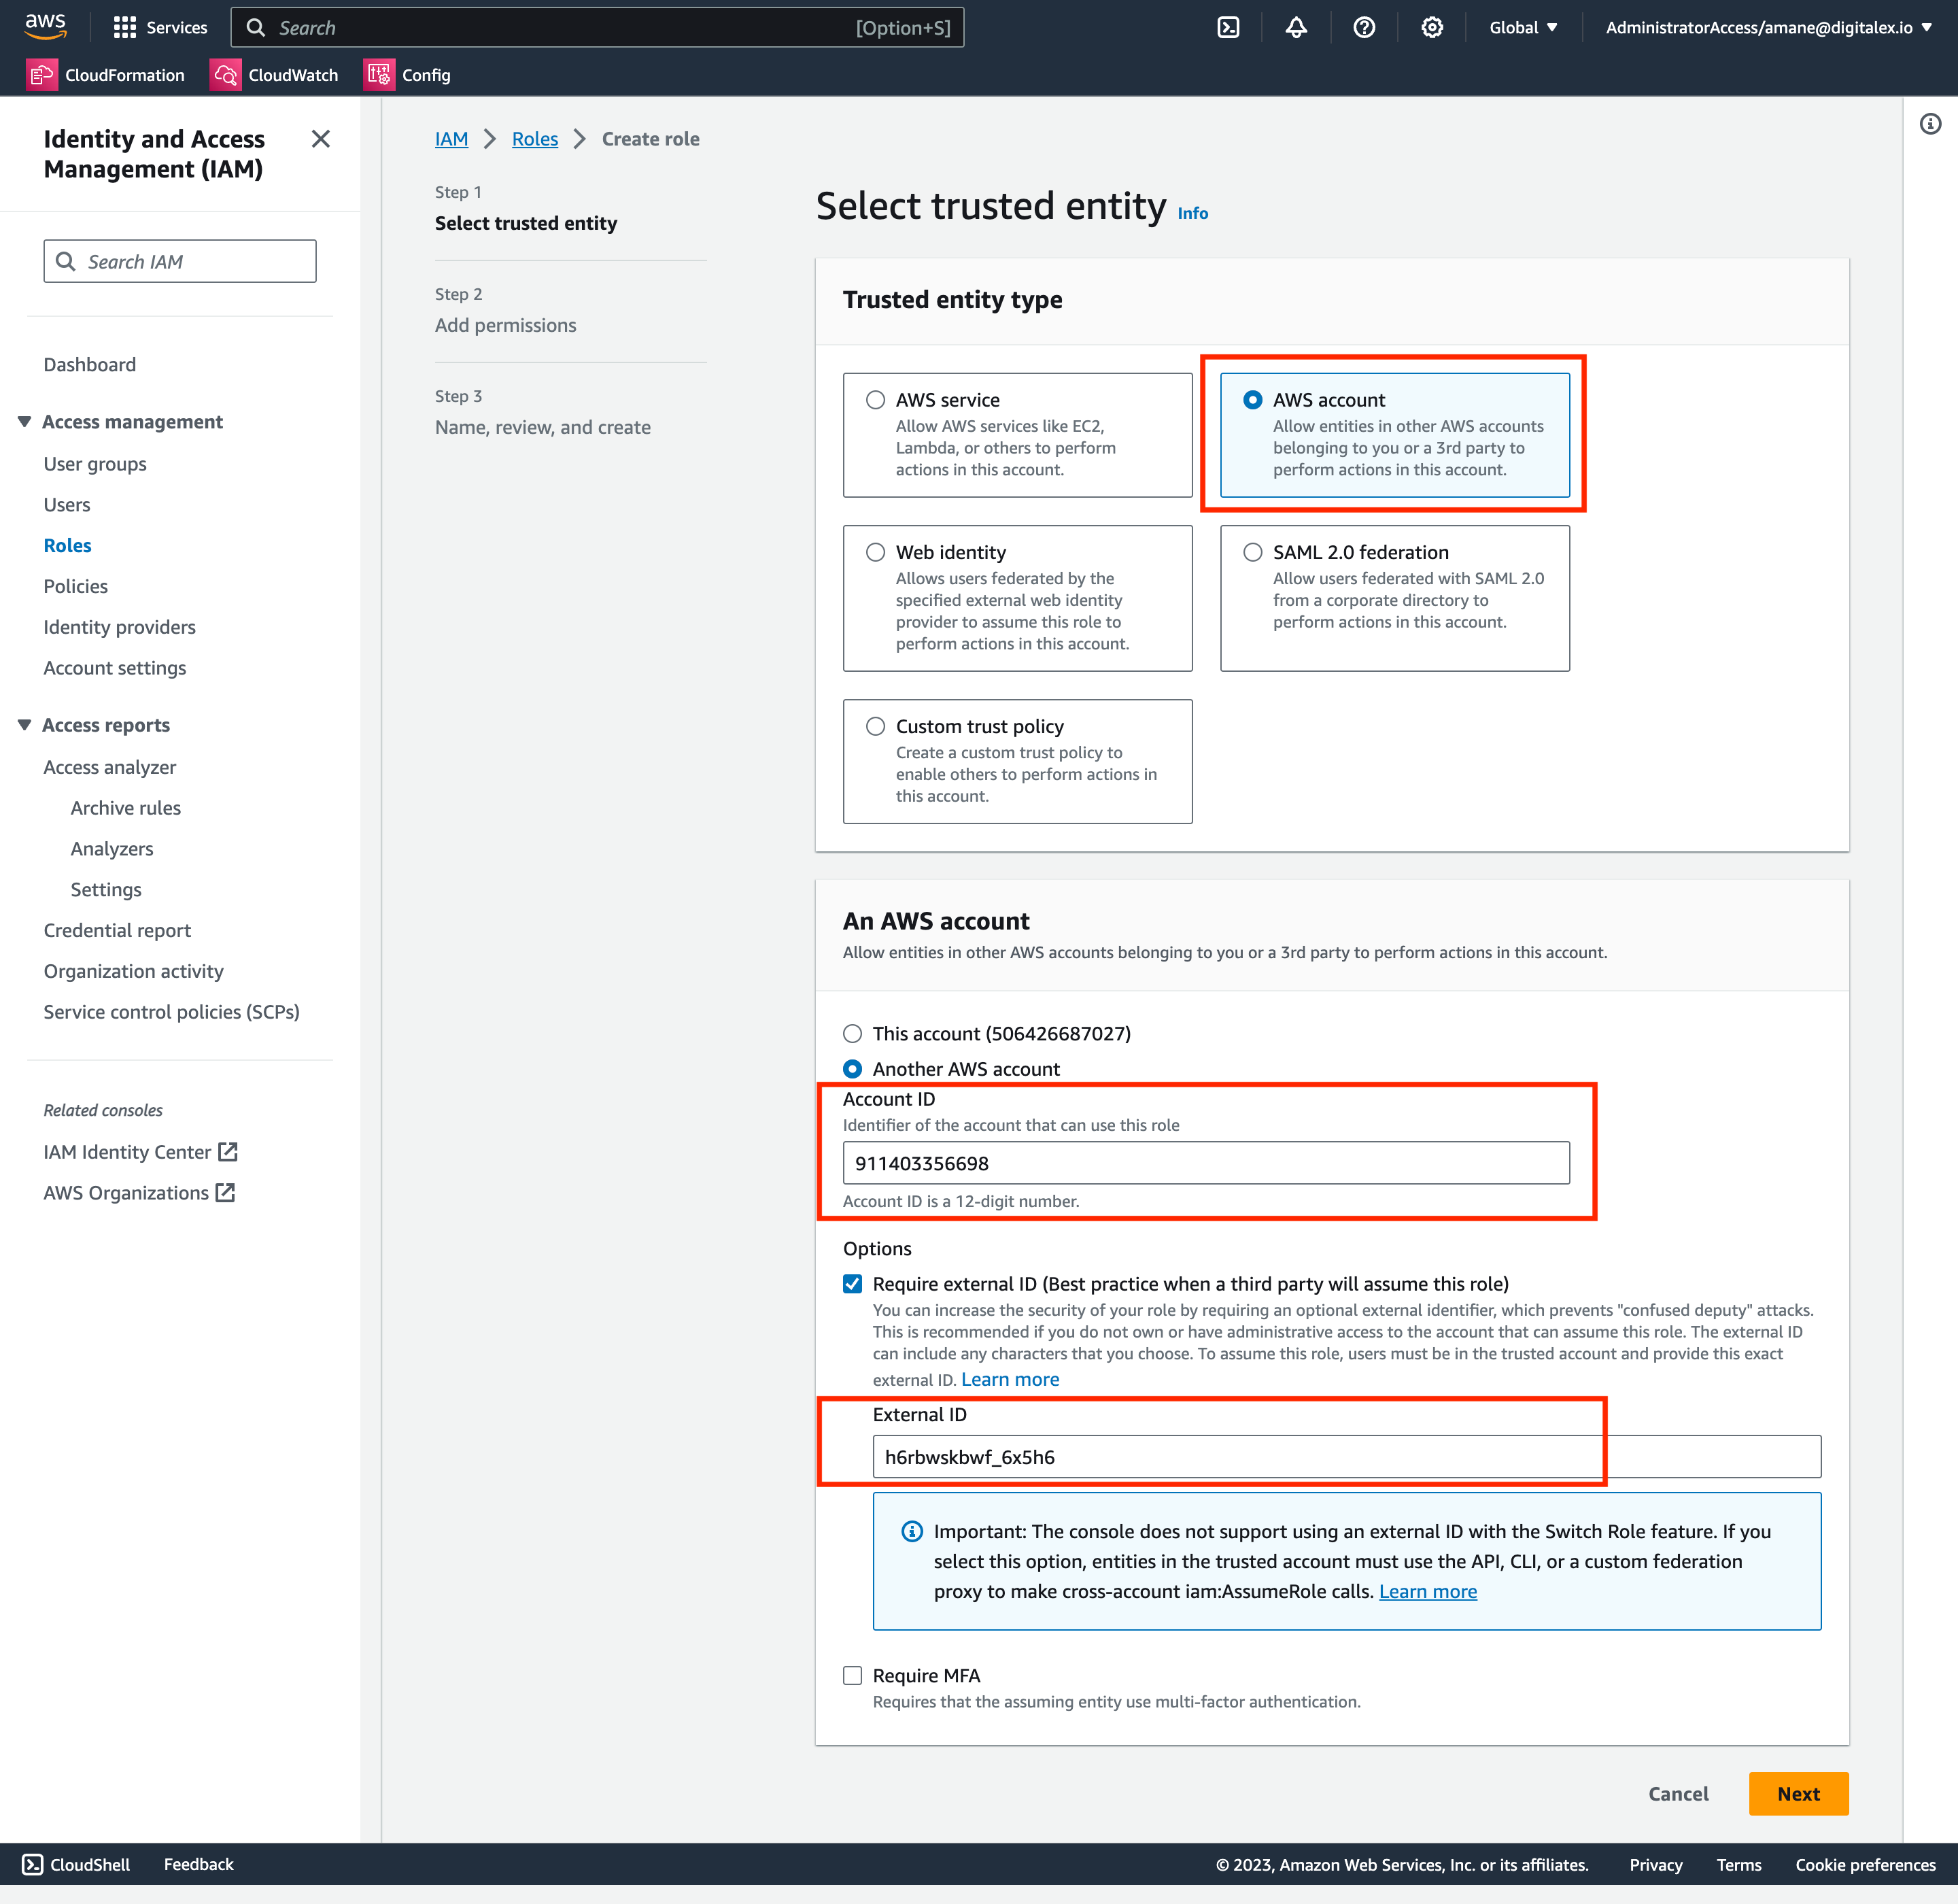
IAMConsole, SelectRolesfrom the left menu, and clickCreate role. One the create role screen please select the configuration as follows
a. Trusted entity type: AWS Account
b. An AWS account: Choose Another AWS account and fill in the account number as 911403356698
c. External ID: In this field, please put the Tenant ID for your DigitalEx account. To get the tenant id follow instructions outlined in this page Retrieve the Tenant Id
d. Click Next
Click
Next, on next screen for permissions, Choose 'AWS Managed - job function' in the filter . Search and select the listed policies below.
ReadOnlyAccessViewOnlyAccess
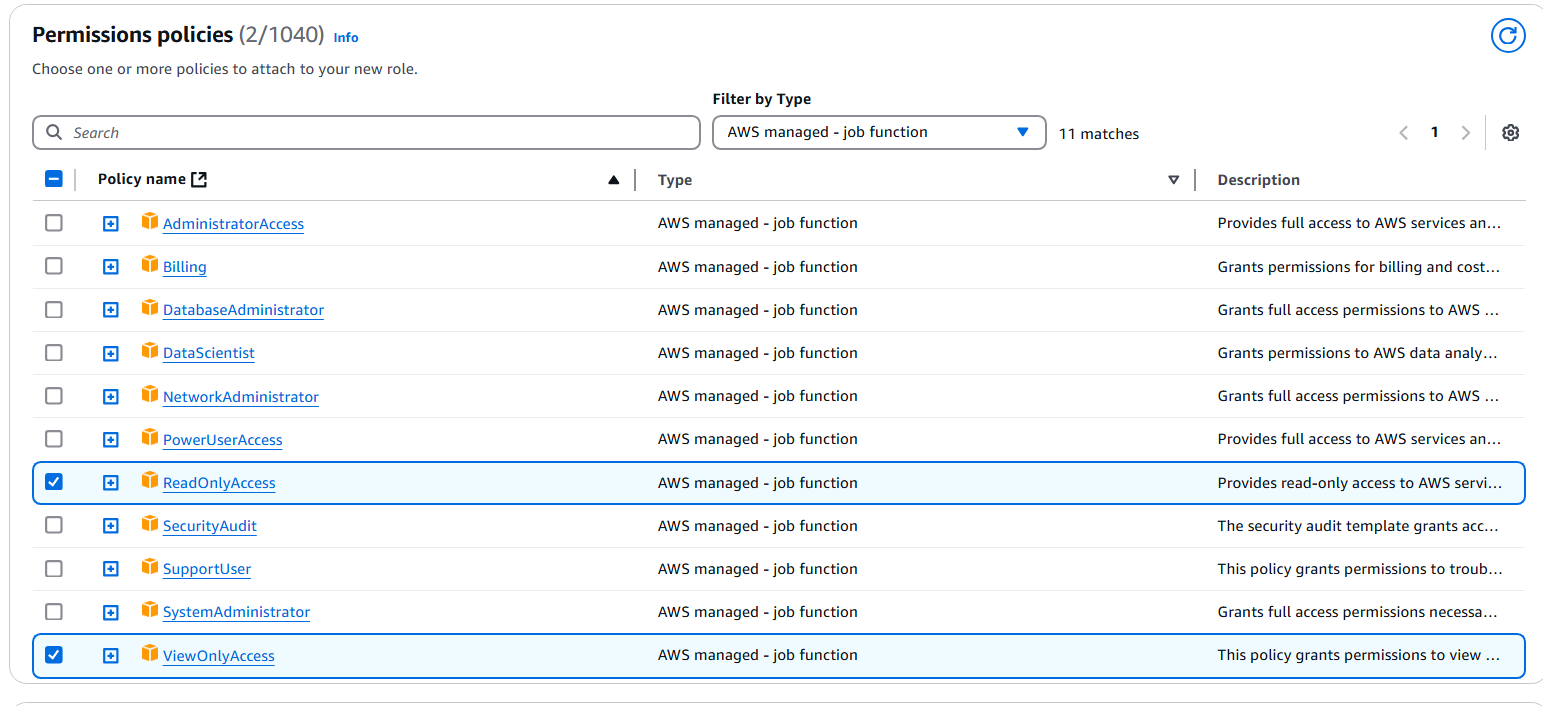
Choose 'AWS Managed in the filter. Search and select the listed policies below.
IAMReadOnlyAccessCloudWatchReadOnlyAccessComputeOptimizerReadOnlyAccessAWSOrganizationsReadOnlyAccess
Click
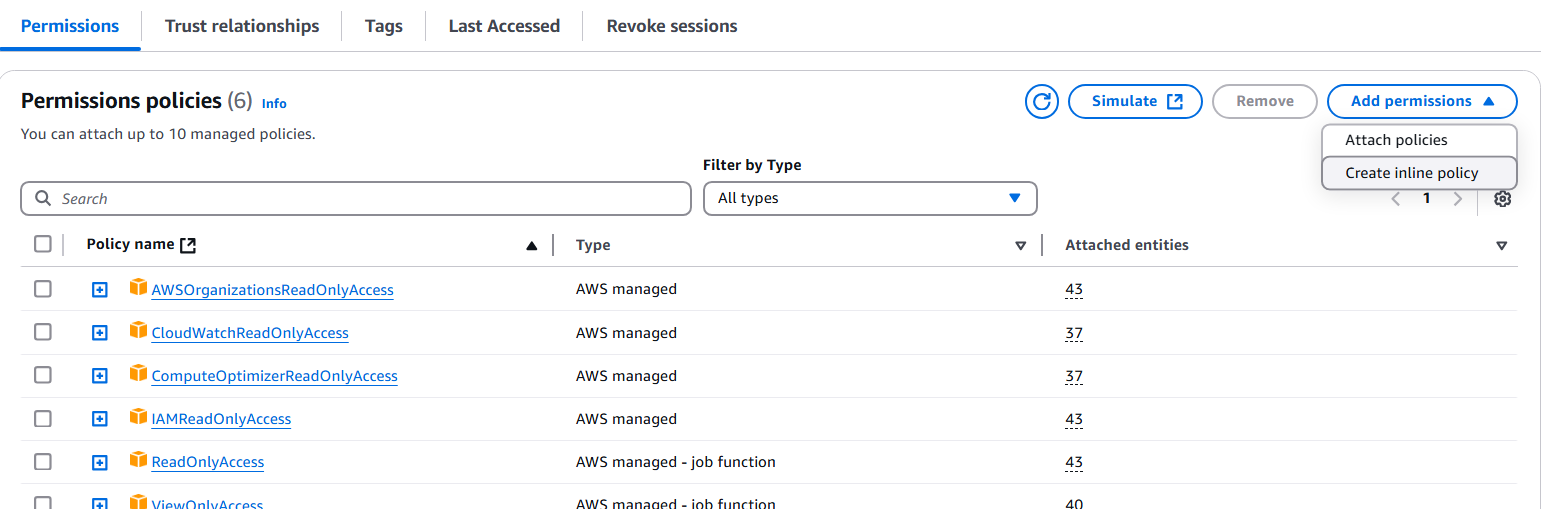
Nextagain & on a final page, enter a name to the role & clickCreate roleSearch for the newly created role
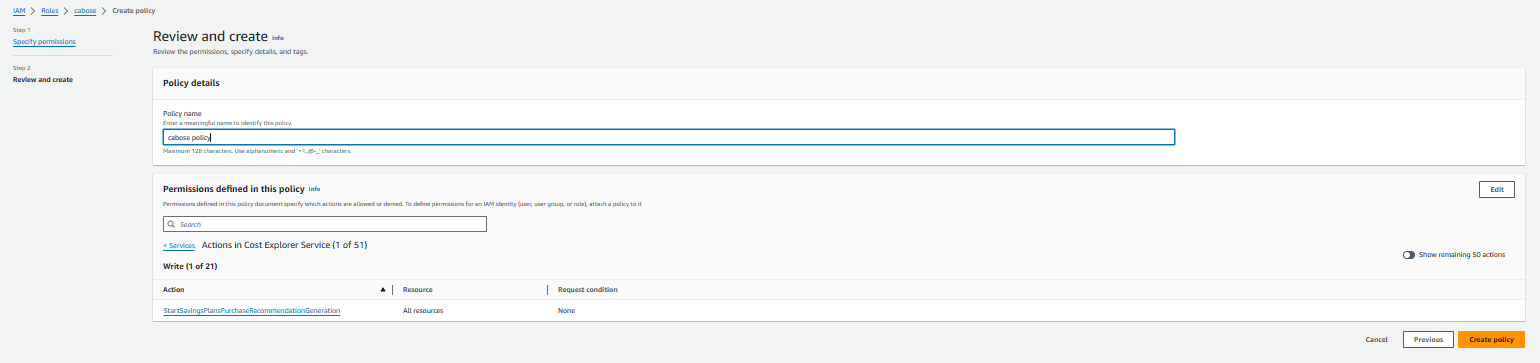
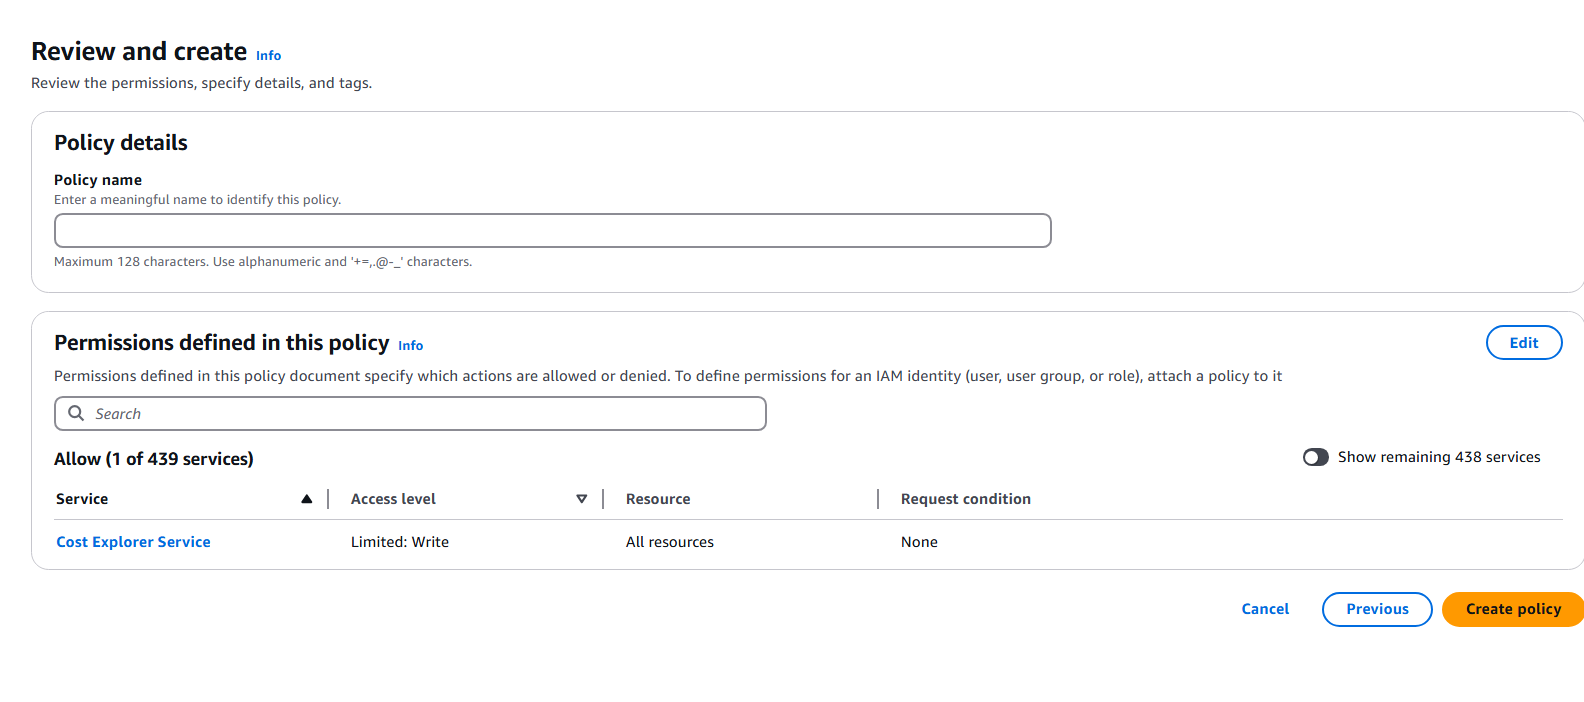
Click on Add permissions → Create inline policy.
Search for Cost Explorer Service
Click on Write → StartSavingsPlansPurchaseRecommendationGeneration →
Next
Enter the policy name.
Click on
Create policy.
Once the role is created, please note the ARN of a role, which will be required in the next step.

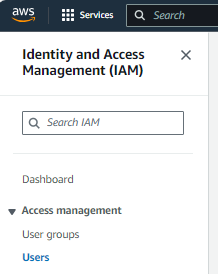
Users
Login to AWS Member account you’re trying to onboard as an Administrator if not already logged in. And navigate to
IAMservice using AWS search bar.On a
IAMConsole, SelectUsersfrom the left menu
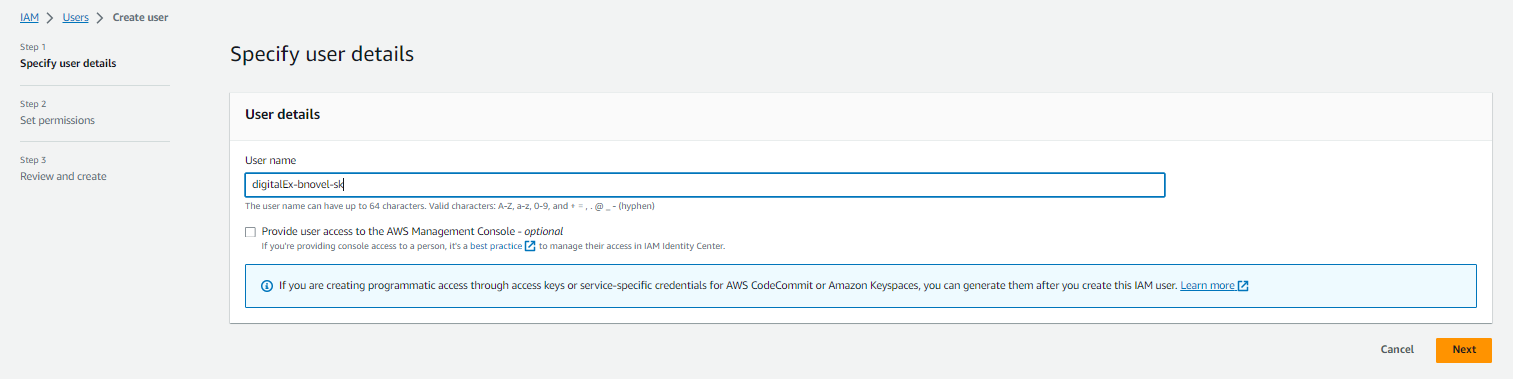
Click on Create User

Enter the Username & click Next.
Select Attach policies directly, on next screen for permissions, please choose 'All Types' in the filter and select the listed policies below.
ReadOnlyAccessViewOnlyAccessIAMReadOnlyAccessCloudWatchReadOnlyAccessComputeOptimizerReadOnlyAccessAWSOrganizationsReadOnlyAccess
Click
Nextagain & on a final page, give a name to the role & clickCreate user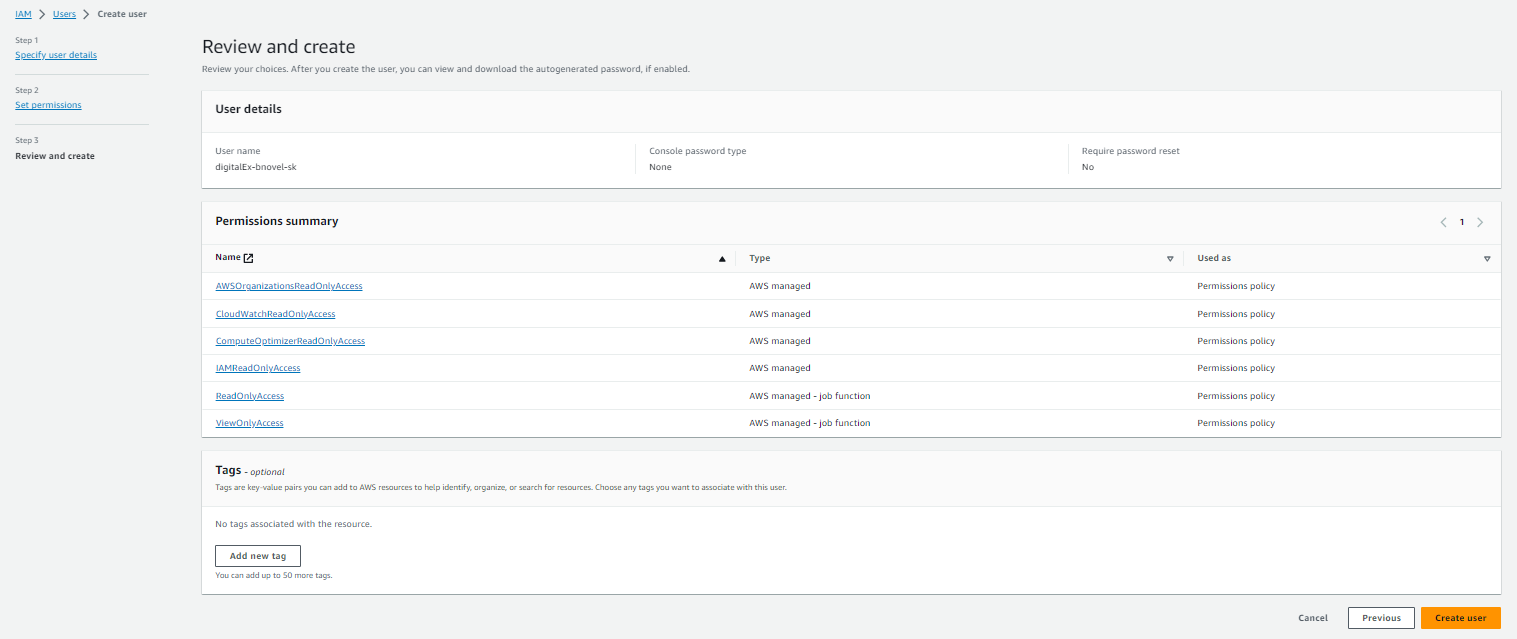
Once the user is created, please click on the user to create a Secret Key
Go to Security Credentials tab & Click on Create Access Key

Select Application running outside AWS & Click on Next
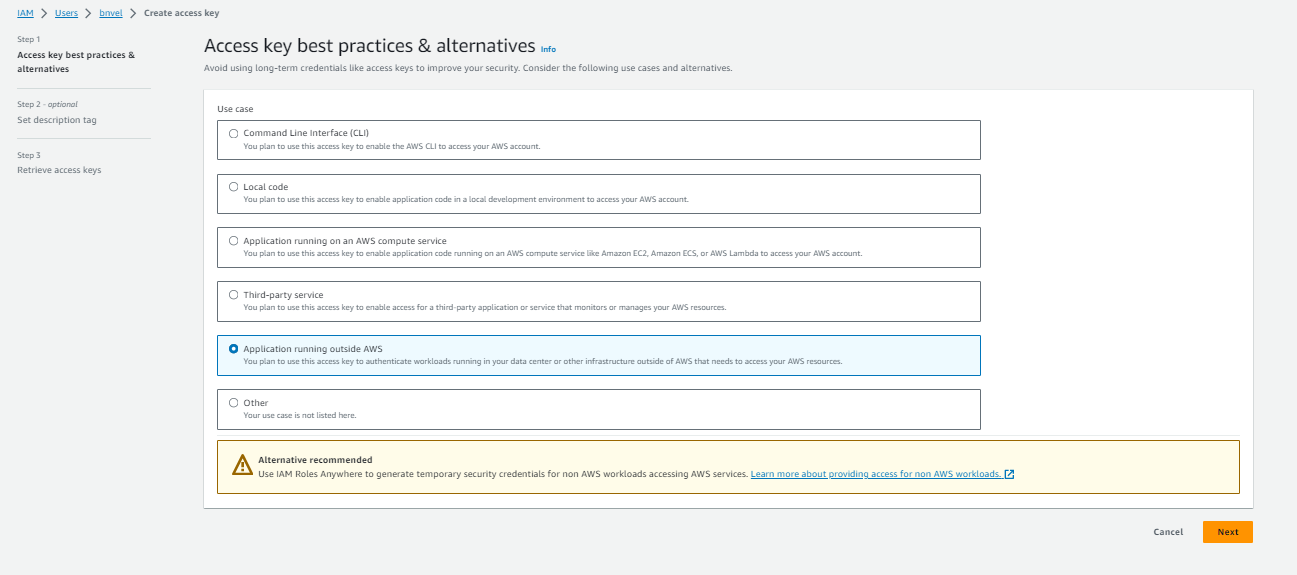
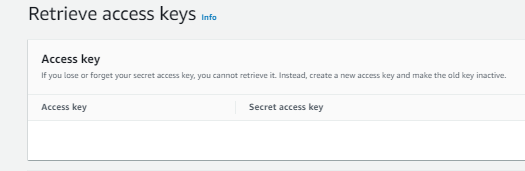
Click on Create access key.

Secret Key will get generated.
Copy the Access Key & Secret Key which will be required in the next step.
Open newly created user
Click on Add permissions → Create inline policy.

Search for Cost Explorer Service
Click on Write → StartSavingsPlansPurchaseRecommendationGeneration →
Next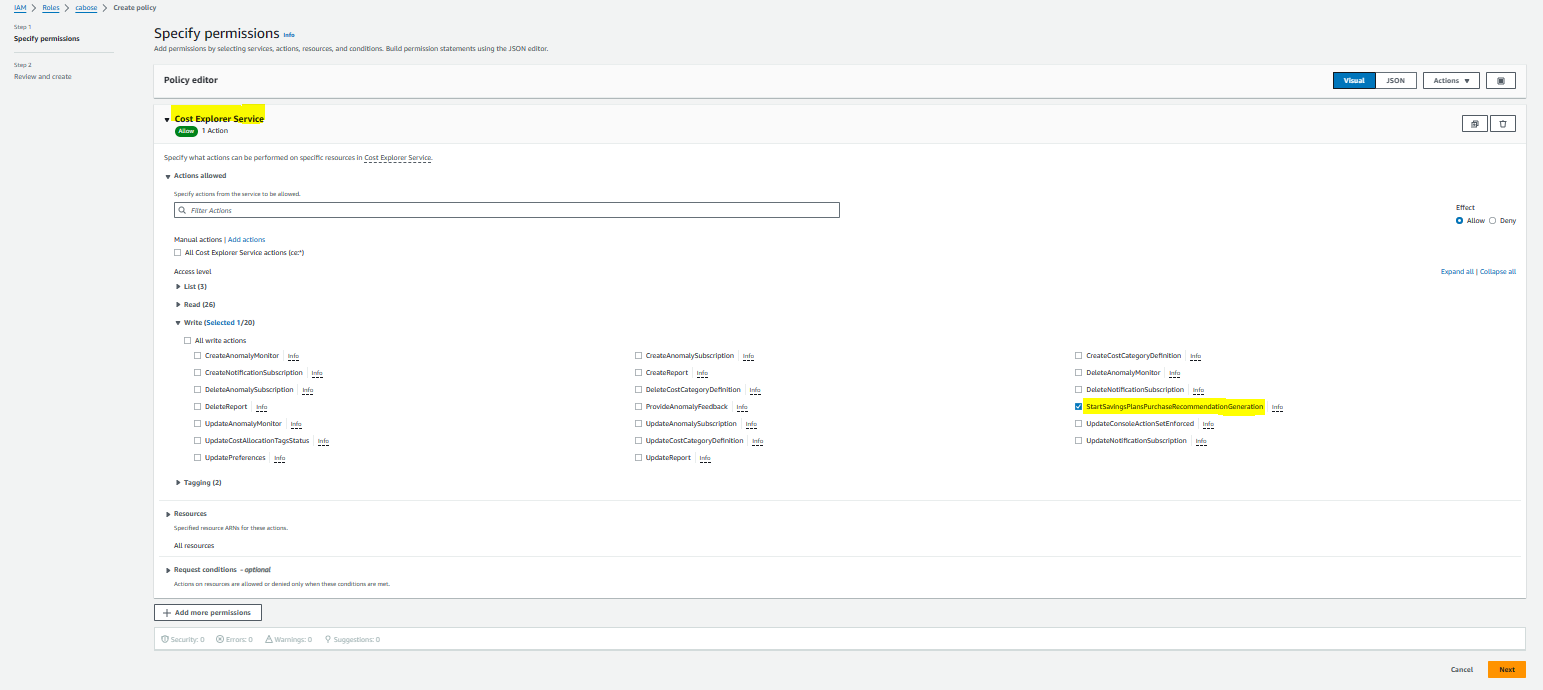
Enter the policy name.
Click on
Create policy.