Step-1: Enable CUR & Cost Explorer
If you have cost and usage reports already created follow Use existing report otherwise Use new report
Use existing report
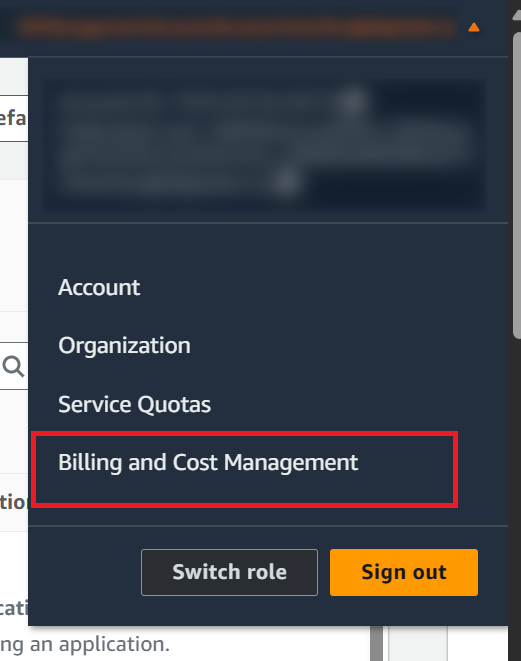
Log into AWS console and go to Billing and Cost Management under profile

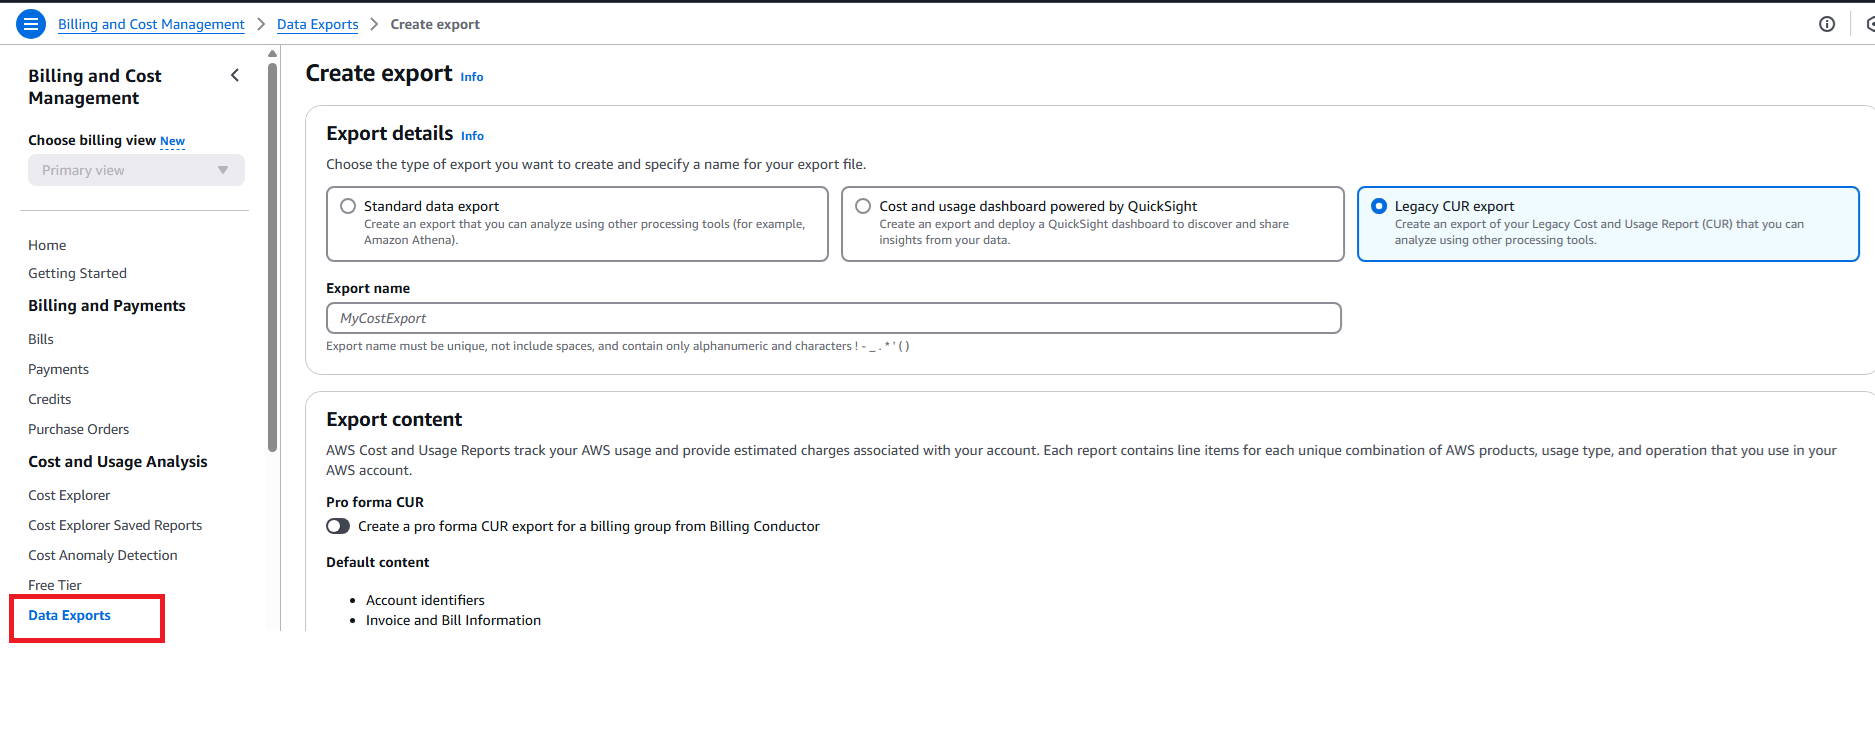
Click on Data Exports

Out of multiple available reports, choose the oldest and the one having following properties
Time granularity : Daily / Hourly
File format : text/csv
Select the report you chose in the previous step > Actions and Edit

Scroll down and capture the S3 bucket, S3 path prefix fields from the report details section for the report

Creating New Report
Log into AWS console and go to Billing and Cost Management under profile
Click on Data Exports and Select Legacy CUR export

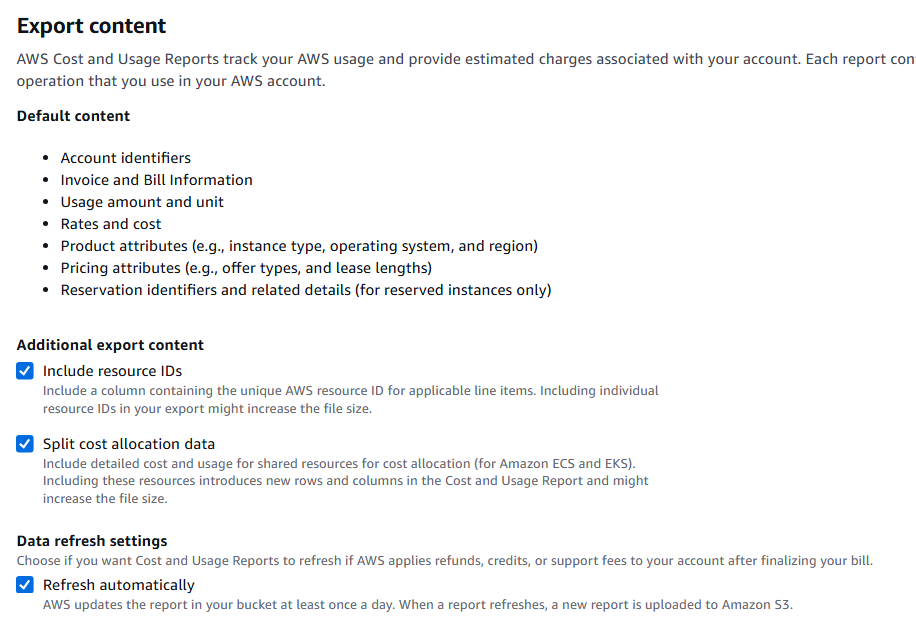
Enter the Export name of your choice and enable the below options under Export content
Include Resource IDs
Split cost allocation data
Refresh Automatically

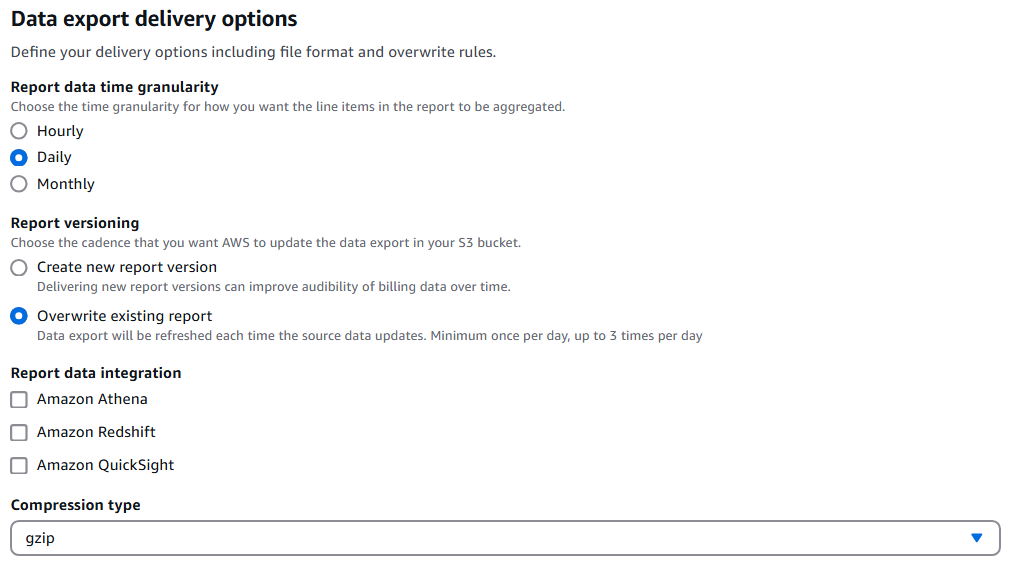
Under Data export delivery options select
Time granularity : Daily
Report versioning : overwrite existing report
Compression type : GZIP

Under Data export storage settings
Configure bucket by choosing one of the existing or creating a new one
Enter S3 path prefix and create the report
Make a note of S3 bucket and S3 path prefix as its used in subsequent steps

To enable cost explorer follow the steps mentioned here https://docs.aws.amazon.com/cost-management/latest/userguide/ce-enable.html
AWS takes up to 24 hours to create first report to the configured bucket
