Jira
Before adding Jira integration we need to generate an API token
Steps to Create API Token
Log in to https://id.atlassian.com/manage-profile/security/api-tokens.
Click Create API token.
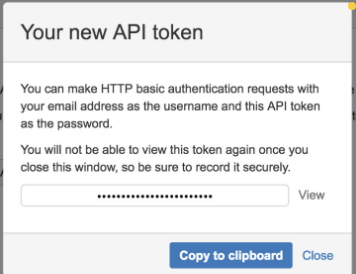
From the dialog that appears, enter a memorable and concise Label for your token and click Create.
Click Copy to clipboard, then paste the token to your script, or elsewhere to save:
The Jira project that you are connecting to DigitalEx should include the following fields: Issue type, status, summary, description, assignee, and priority.
If there are mandatory fields in your Jira project that are not listed above, ticket creation from DigitalEx will not be possible.
The username used for integration with DigitalEx should be either an admin or a company account (e.g., admin@domain.com) and should not be specific to an individual (e.g., john@domain.com)
Integration of Jira in DigitalEx
Login into DigitalEx and navigate to Integration page
Click on + Create Integration.
Click on the App and select Jira
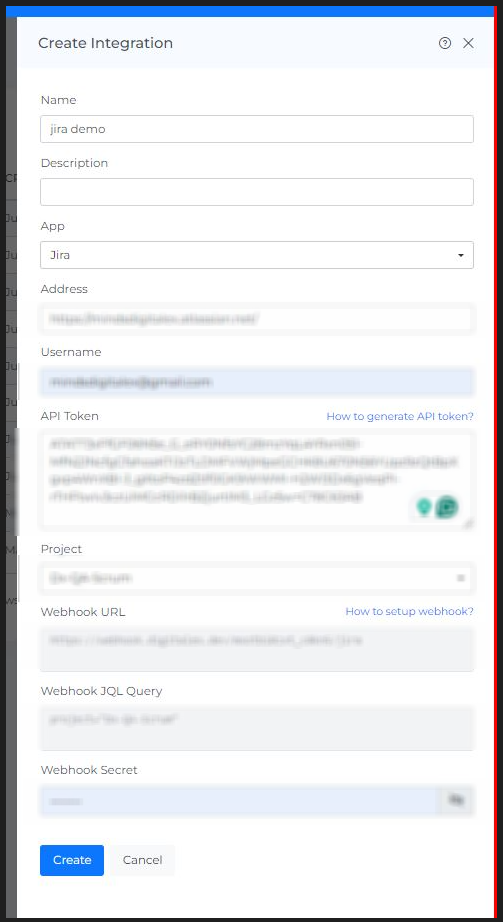
Enter all the details in the field
Integration name
Integration description
Enter the address of the Jira i.e. the Jira domain address
Enter the username of Jira on which the API key was created
Enter the Jira API token created
Click on “Test connection”

Select the project which you want to integrate i.e. if you have multiple projects.
Enter Webhook Secret. To get webhook secret follow https://digitalexio.atlassian.net/wiki/spaces/MCX/pages/edit-v2/262144072#Steps-to-Create-Webhook-secret
Click Create.
Steps to Create Webhook secret
1)Login to Jira as Admin
2)Click on System setting under Jira settings
3)Click on webhook from left menu bar
4)Click create webhook
5)Enter webhook name of your choice
6)Enter webhook URL
To get webhook URL (Navigate to DigitalEx > Admin > Integrations > Select Jira as App and copy webhook URL and paste in Jira
7)Click on Generate secret and copy it which will be used in subsequent steps
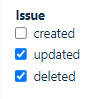
8)Check Updated & deleted under issue (Issue related events)
9)Click Create
Once a project is selected, it cannot be modified after the integration has been created.
Upon completing the integration, access the Savings Compliance Security Cost Anomaly pages to generate a ticket and assign it to the appropriate individual responsible for executing actions based on the recommendations.