VMware Datacenter Onboarding
Before you onboard VMware, we recommend you to create a user in vcenter by following this doc Datacenter User creation
Below are the steps that need to be performed if the user registers for the first time, the below page is displayed.
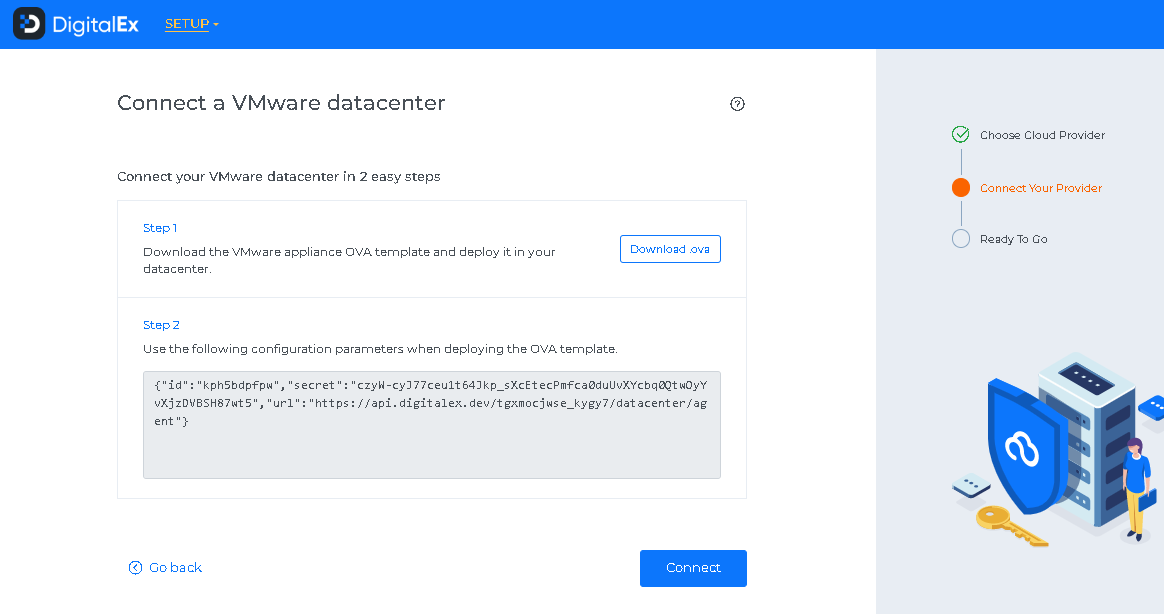
Download our VMware applianceOVA template and deploy it in your data center
Copy the JSON provided in Step 2 in DigitalEx UI.
Login to VCenter Console.
Select the Datacenter/Cluster/Host to deploy the appliance Right on the Datacenter/Cluster/Host Resource and select Deploy OVF template. (follow the steps in https://masteringvmware.com/how-to-deploy-ovf-or-ova/ )
Click on next for further steps till the Select networks.
On Customize template, Enter your Vcenter Host IP, Password, and Username(Created here Datacenter User creation ) inside the Vcenter Configuration Category
Paste the configuration parameters copied in DigitalEx UI into the Config Data field under DigitalEx Configuration
To configure static networking in the appliance, please enter your static ip address, netmask(between 24 to 36), gateway, and DNS server(if multiple add with “,“)
If you don’t want the appliance to auto-update automatically, uncheck the box.
Click on next to finish the OVF template installation.
Turn on the VM and wait for some time for Datacenter data to show up, Once successful it will start showing up on the Datacenter page.
Below are the steps to create a VMware datacenter in DigitalEx:
Login to DigitalEx
Click on Menu
Click on Admin
Click on Datacenters
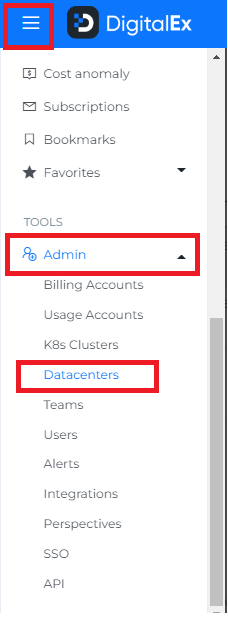
5. Click on +Datacenters in the left top corner

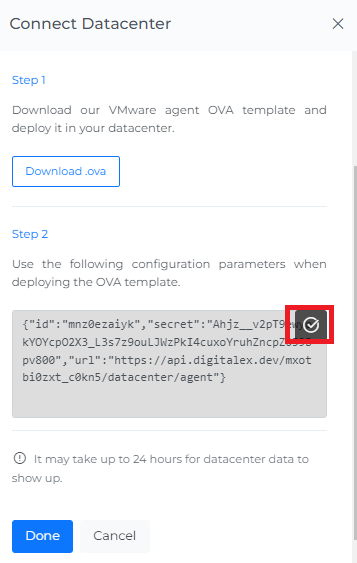
6. Download our VMware applianceOVA template and deploy it in your data center
Please follow the instructions to deploy the VMware appliance OVA template VCenter Appliance Installation
7. Copy the JSON provided in Step 2 in DigitalEx UI.
Below are the steps to edit a VMware Datacenter in DigitalEx:
Click on the edit button

2. Update the name(default name will get generated)/Enable the Cost dashboard
3. Click on Update
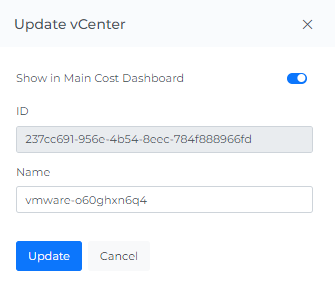
Below are the steps to reconnect a VMware Datacenter in DigitalEx:
Click on Reconnect button

2. To Reonboard the VMware Datacenter follow the steps from step 6 of the Onboarding VMware
Make sure to delete the existing VMware appliance for this datacenter before redeploying the new one.
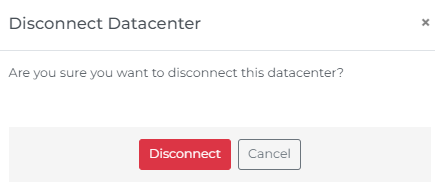
Below are the steps to disconnect a VMware account in DigitalEx:
Click on the disconnect button

2. Click on Disconnect
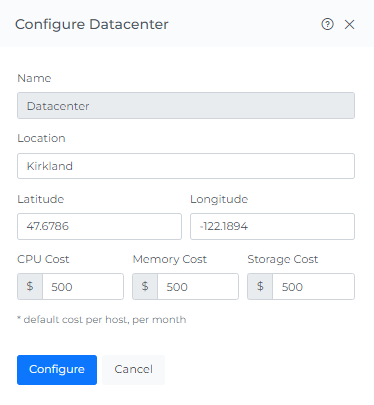
Note: Upon onboarding VMware, data centers, and hosts, the default cost will be displayed instantly. for CPU,Memory,Storage,RAM & Disk. You can adjust the cost by following the configuration steps provided below.
Configure the Datacenters:
Click on the Datacenters tab
Click on Configure Button

3. Update the changes & click on Configure button
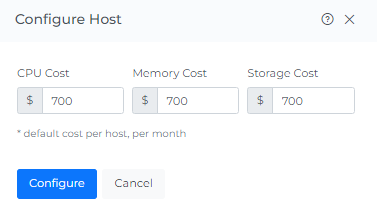
Configure the Hosts:
Configure individual Cost
Click on the Hosts tab
Click on Configure Button

3. Update the changes & click on Configure
Configure Complete Host Cost
Click on the Hosts tab
Click on Update Cost

3. Click on Cost Template(File will get downloaded )
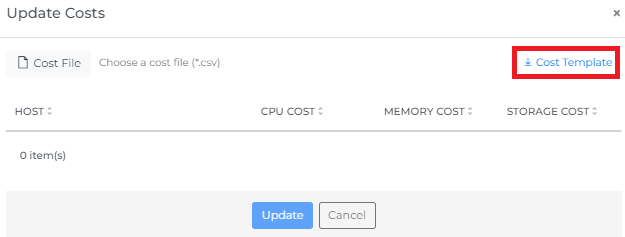
4. Update the Cost in the downloaded file
5. Click on Cost File
6. Select your updated cost file
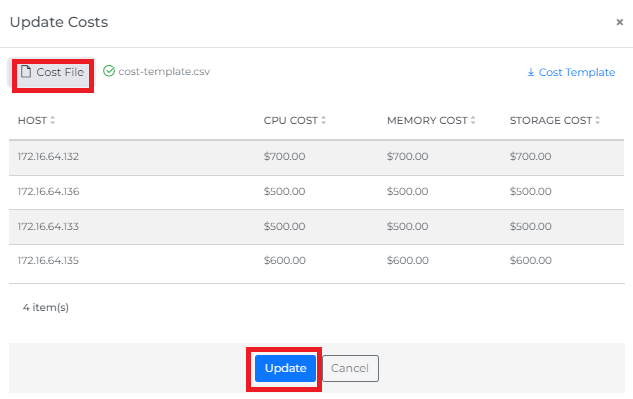
7. Click on the Update button
Configure the Datastore:
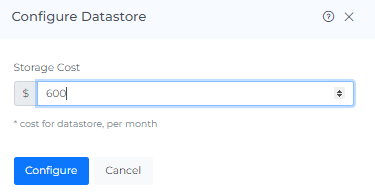
Configure individual Cost
Click on the Datastores tab
Click on Configure Button

3. Update the changes & click on Configure
Configure Complete Datastores Cost
Click on the Datastores tab
Click on Update Cost

Click on Cost Template(File will get downloaded )
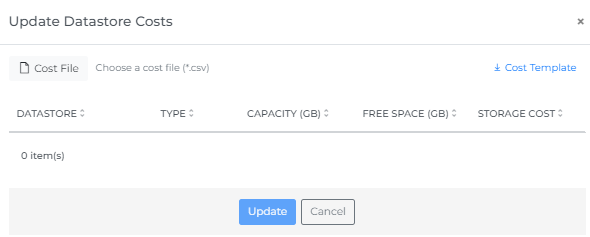
4. Update the Cost in the downloaded file
5. Click on Cost File
6. Select your updated cost file
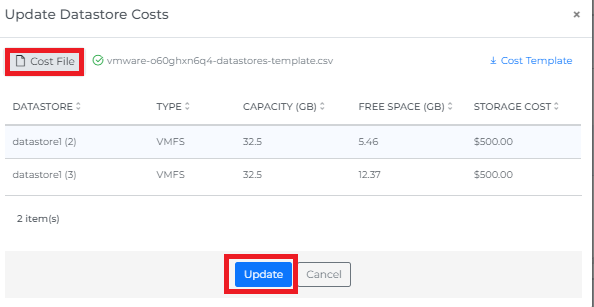
7. Click on the Update button
