Step-2: Assign Permissions to an app.
In order to grant permissions to an app, the owner role is required.
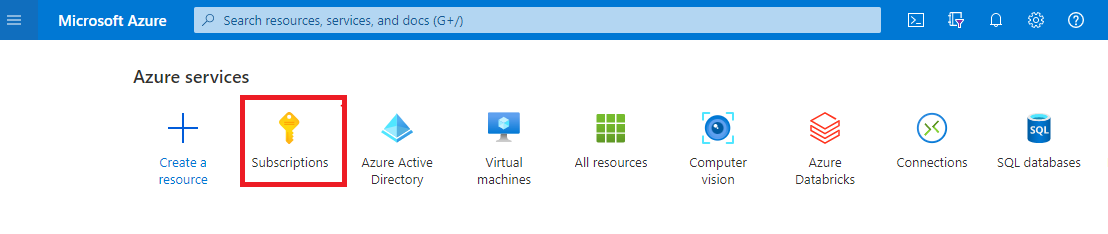
Click on Subscriptions
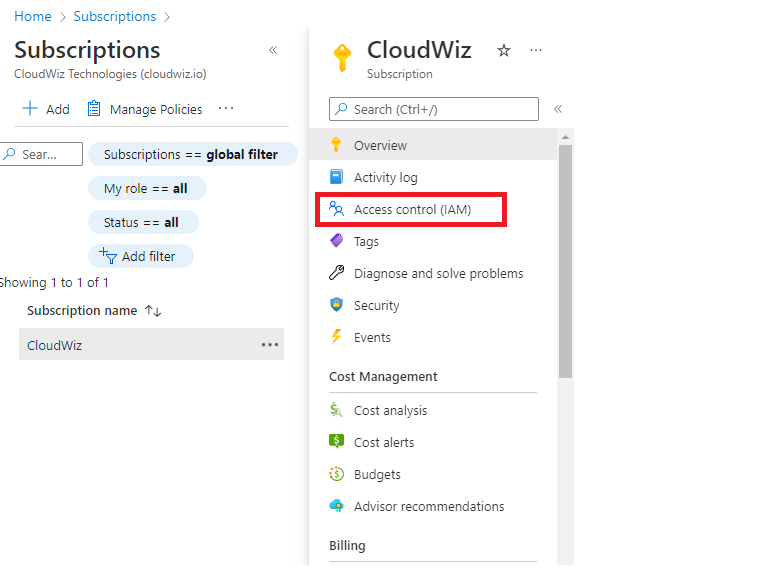
Click on your subscription.
Click on Access Control (IAM)
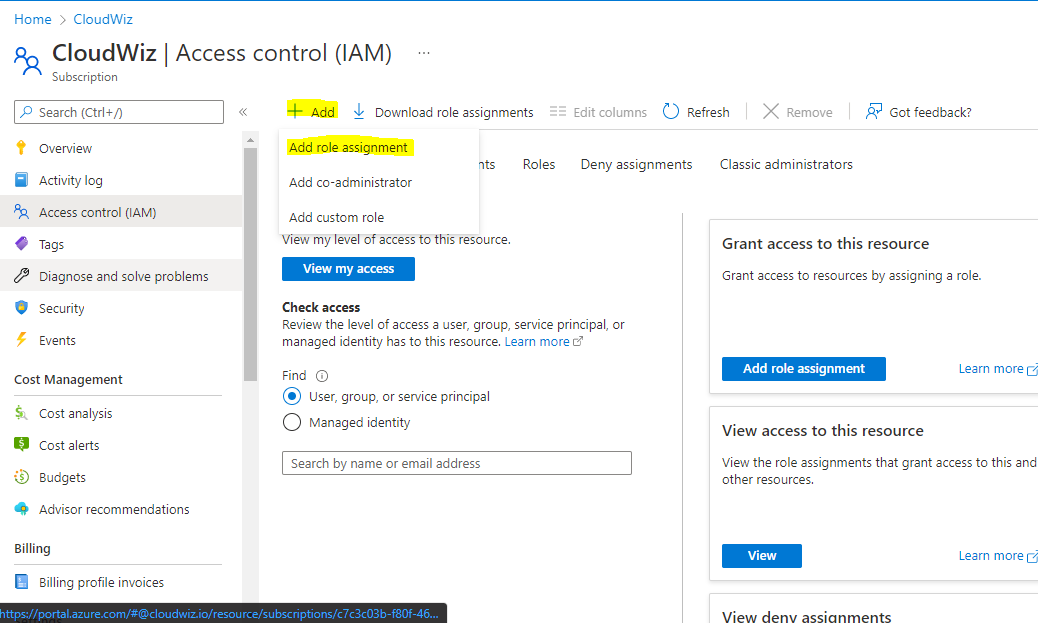
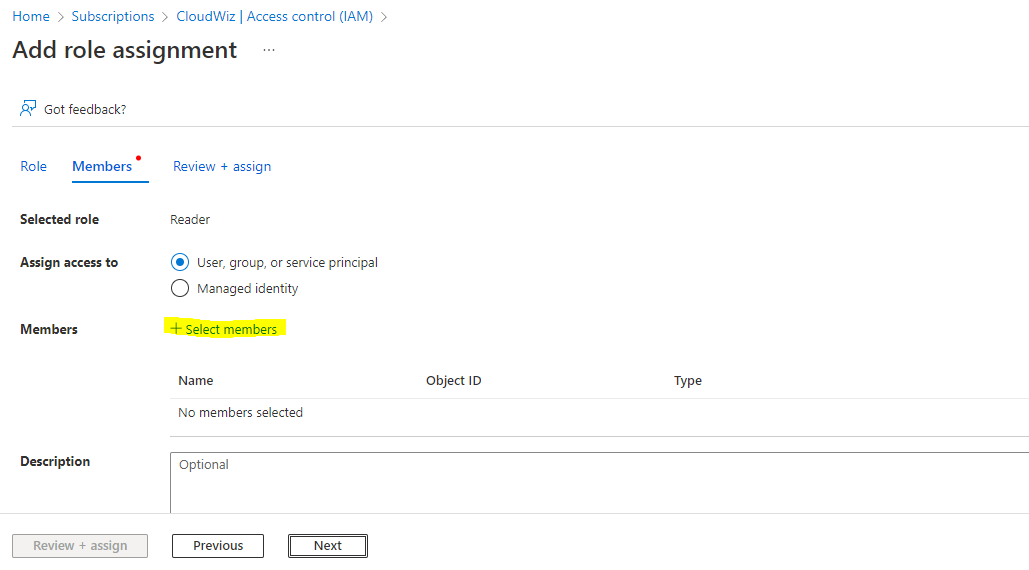
Click on Add → Add role assignment.
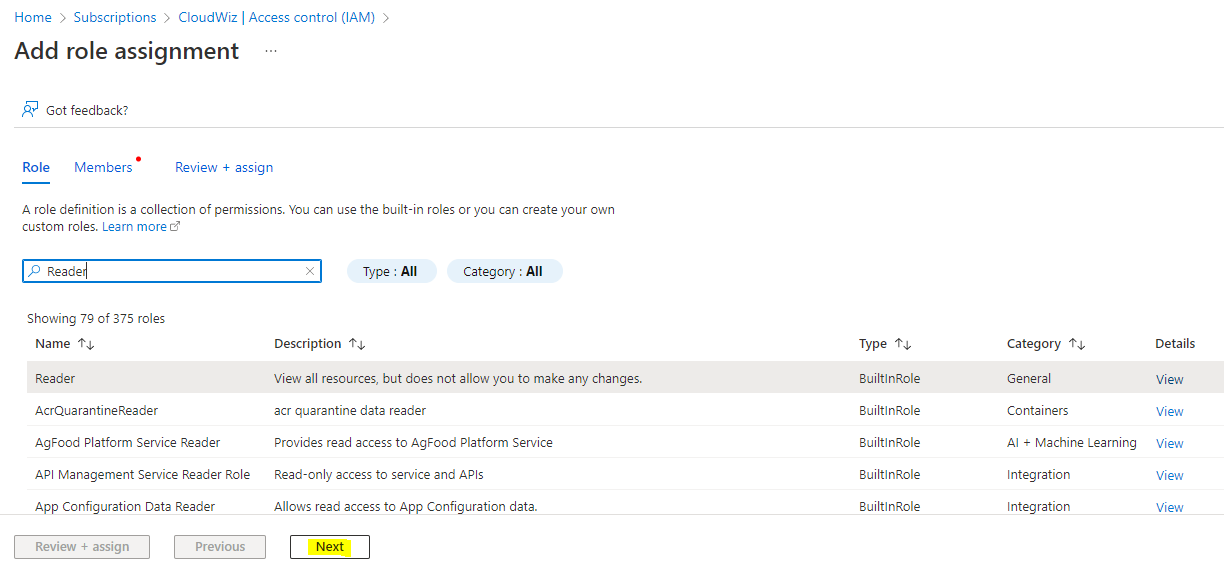
Click on the search box & enter the role name as Reader role
Select the role & click next
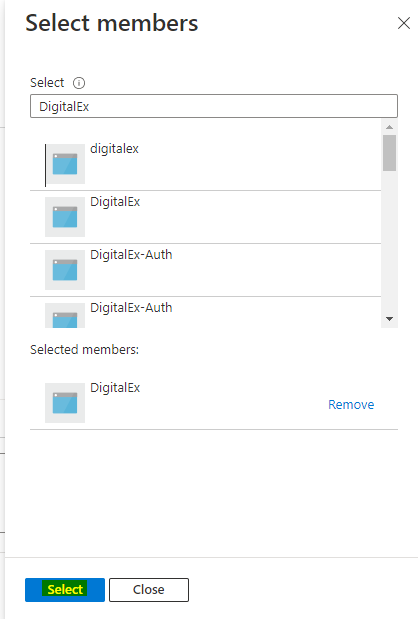
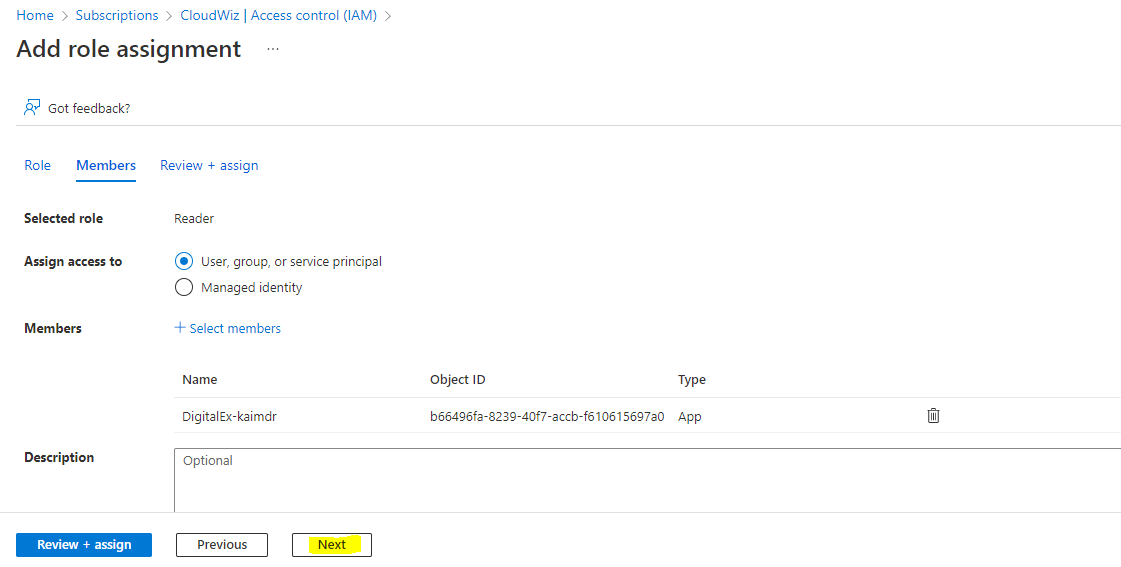
Click on Select Members
Enter the App name (which you have created in
Step-1 : Create Azure Active Directory app ) & Click Select
Click Next
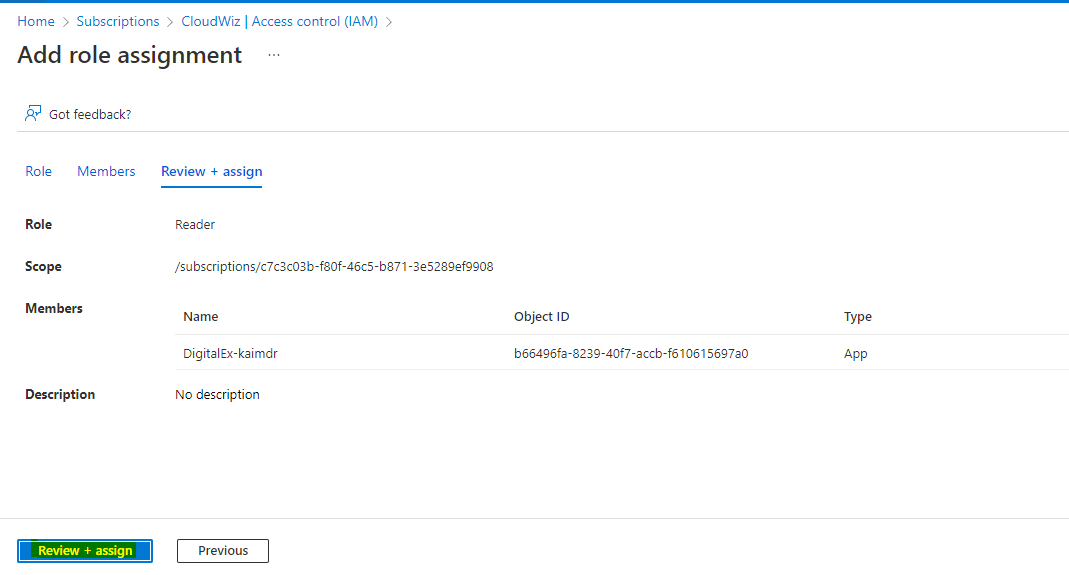
10. Click Review + assign
<<Previous ---------------------------------------------------------------------------------------------------------- Next>>