Step-1 : Create Azure Active Directory app
Steps to Create an Application
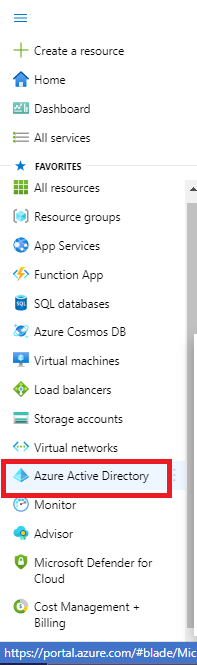
Click on Menu
Go to Azure Active directory
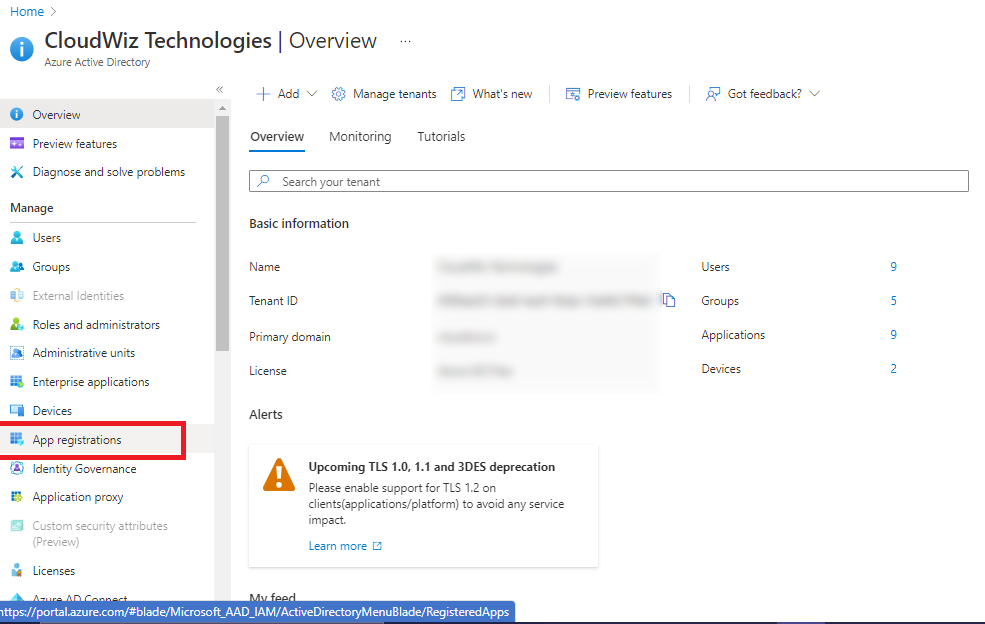
3. Click on App Registration
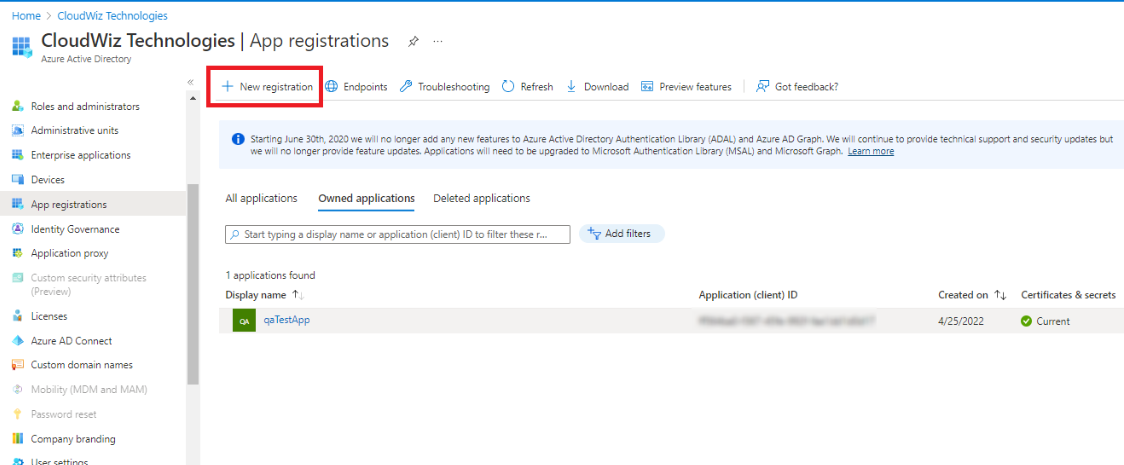
4. Click on New Registration
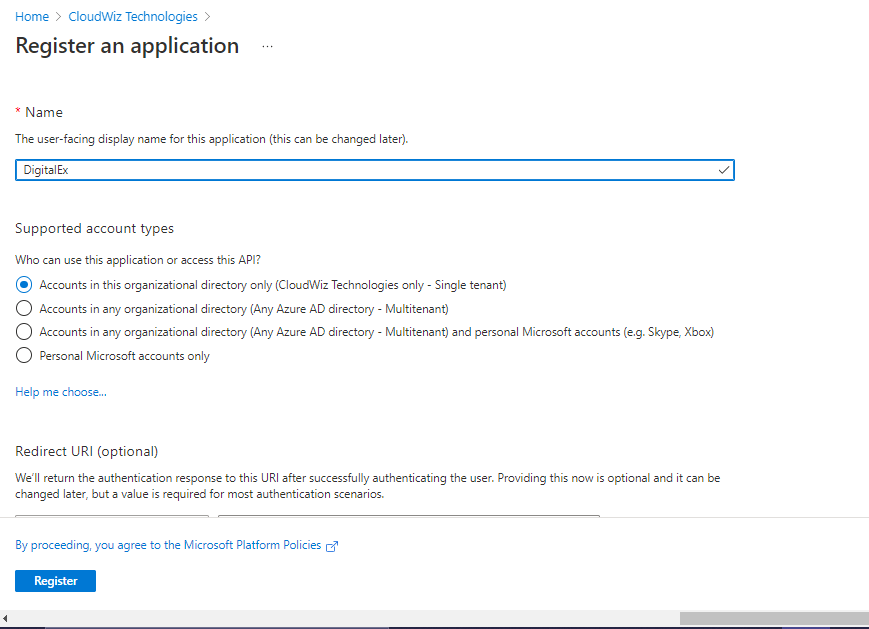
5. Enter Name of Application
6. Supported account type is selected automatically.
7. Click on Register
8. App will get created as shown below.

Copy Application Client id & Tenant id
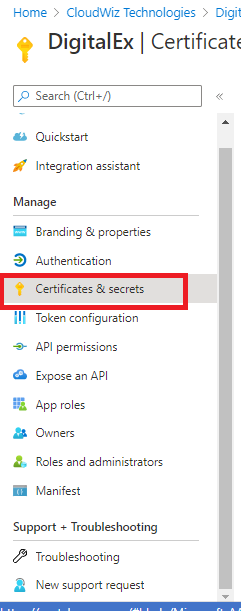
Steps to add client secret
Click on Certificates & Secrets
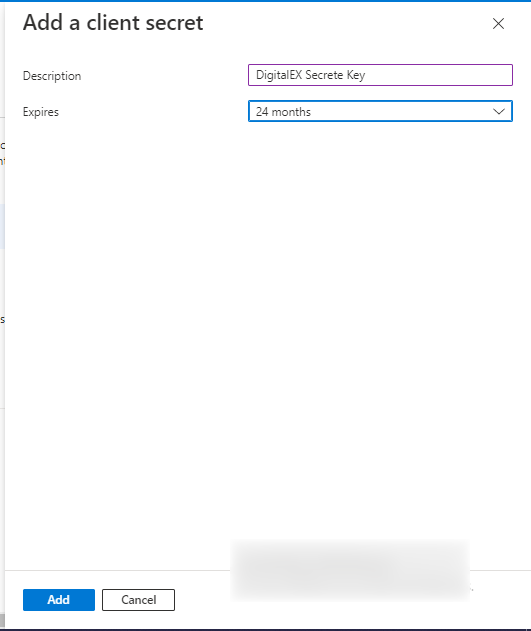
Click on New Client Secret
Enter Description
Select Expires as 24 months maximum
Click Add
6. Applied client secret will be displayed as shown below
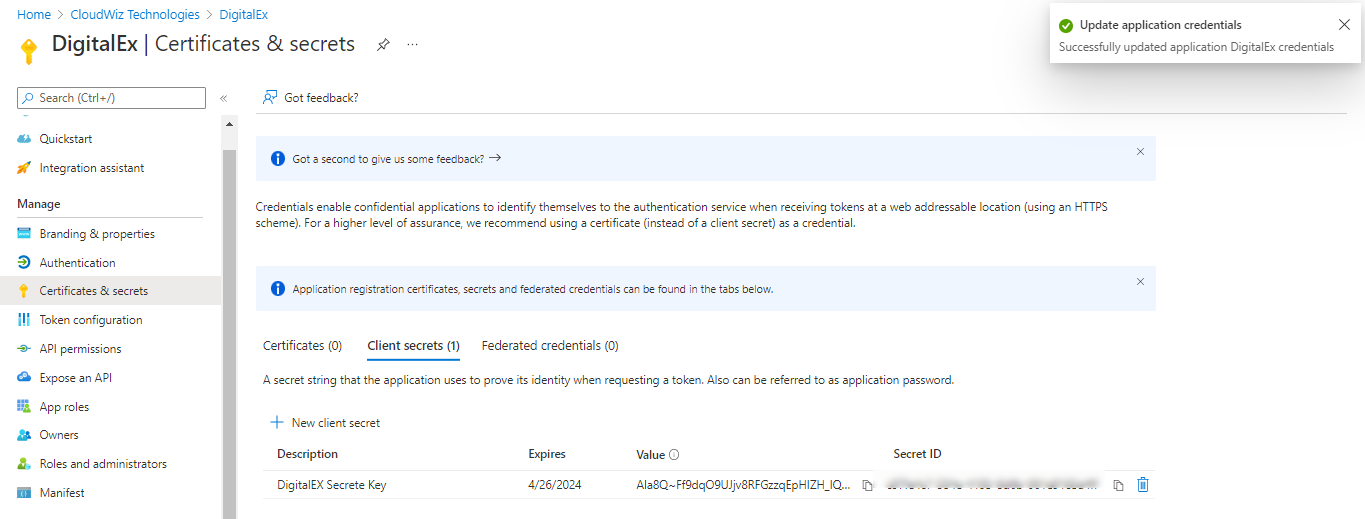
7.Copy the Value(not Secret ID) which is used later for manual creation of usage account .