Cost Allocations.
You can allocate IT costs, including cloud computing costs, to the business units or departments that are consuming the services, which help manage and control cloud computing costs, optimize resource utilization, and provide transparency into IT spending.
Steps to create Cost Allocation Groups:
Login to DigitalEx as Owner/Editor
Click on Menu
3. Click on Cost Allocations

4. Click on +Cost Allocation Group
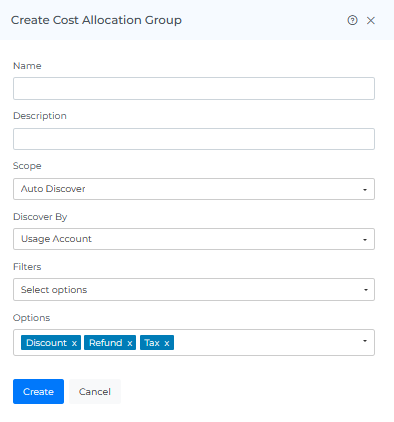
5. Enter Name & Description
6. Select Scope like Manual/Auto Discover
Manual: If you select manual you need to add Cost Allocations & Shared Cost manually & Select Cost Allocations while creating shared cost
Auto Discover: If you Select Auto Discover, The Cost Allocations & Shared Cost will be displayed automatically based on Your Selection.
7. Click on Create
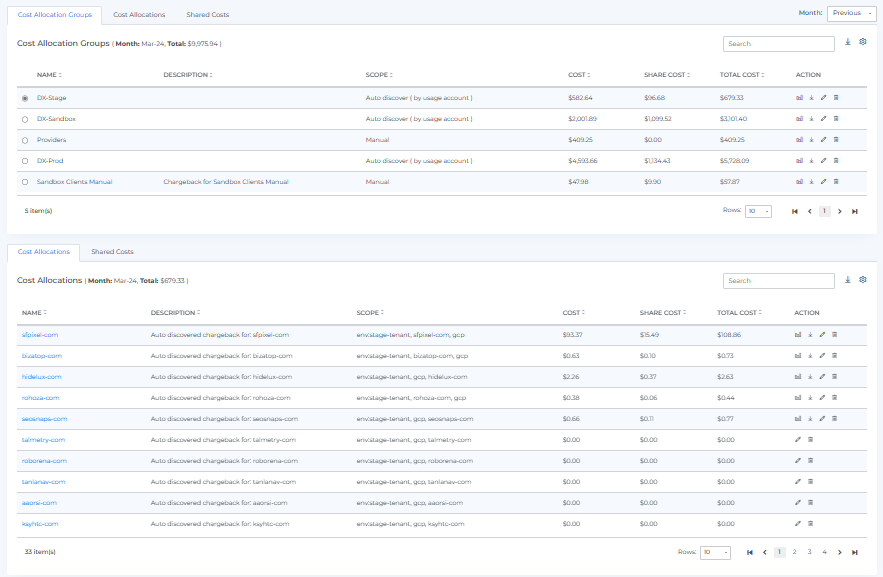
8. Cost Allocation Group is created and displayed as shown below
When you select the number of rows, you will be able to view that same quantity of rows on the page.
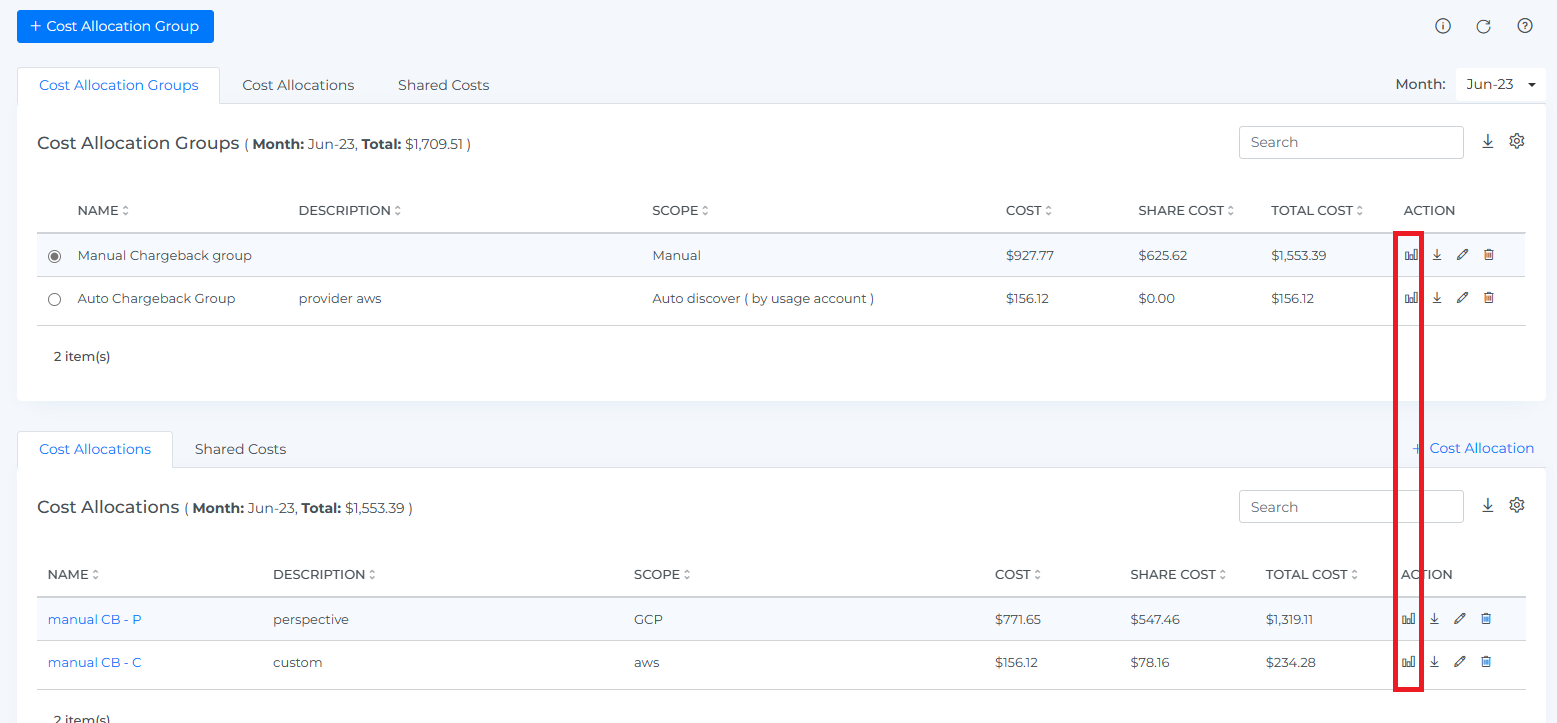
Steps to preview Cost Allocation Group:
Click on preview icon.
Preview will be displayed as shown below.
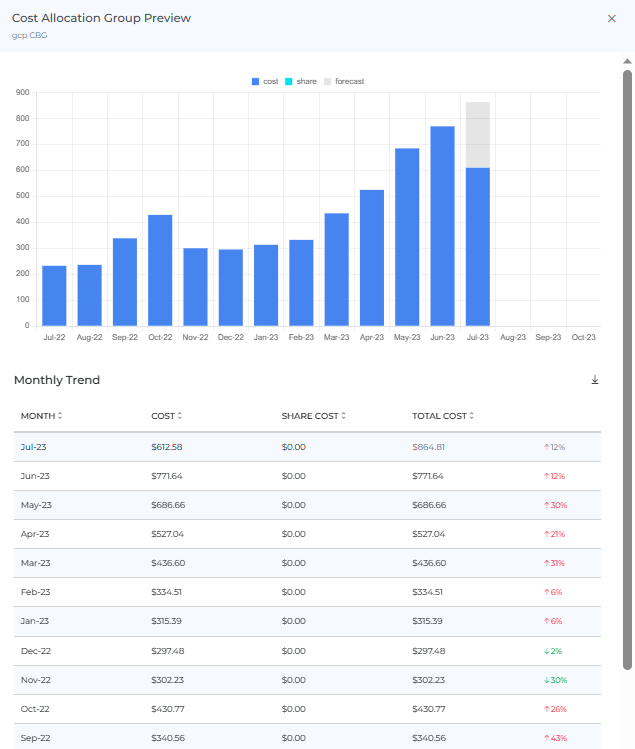
The percentage increase and decrease values shown in the widget are based on the previous month's data. This means that the widget will not show percentage increase or decrease values for the first month in which data is available nor for the current month.
Additionally, current month total cost includes forecast & current month's costs, which is greyed out.
Steps to download Cost Allocation Group:
Click on the download icon.
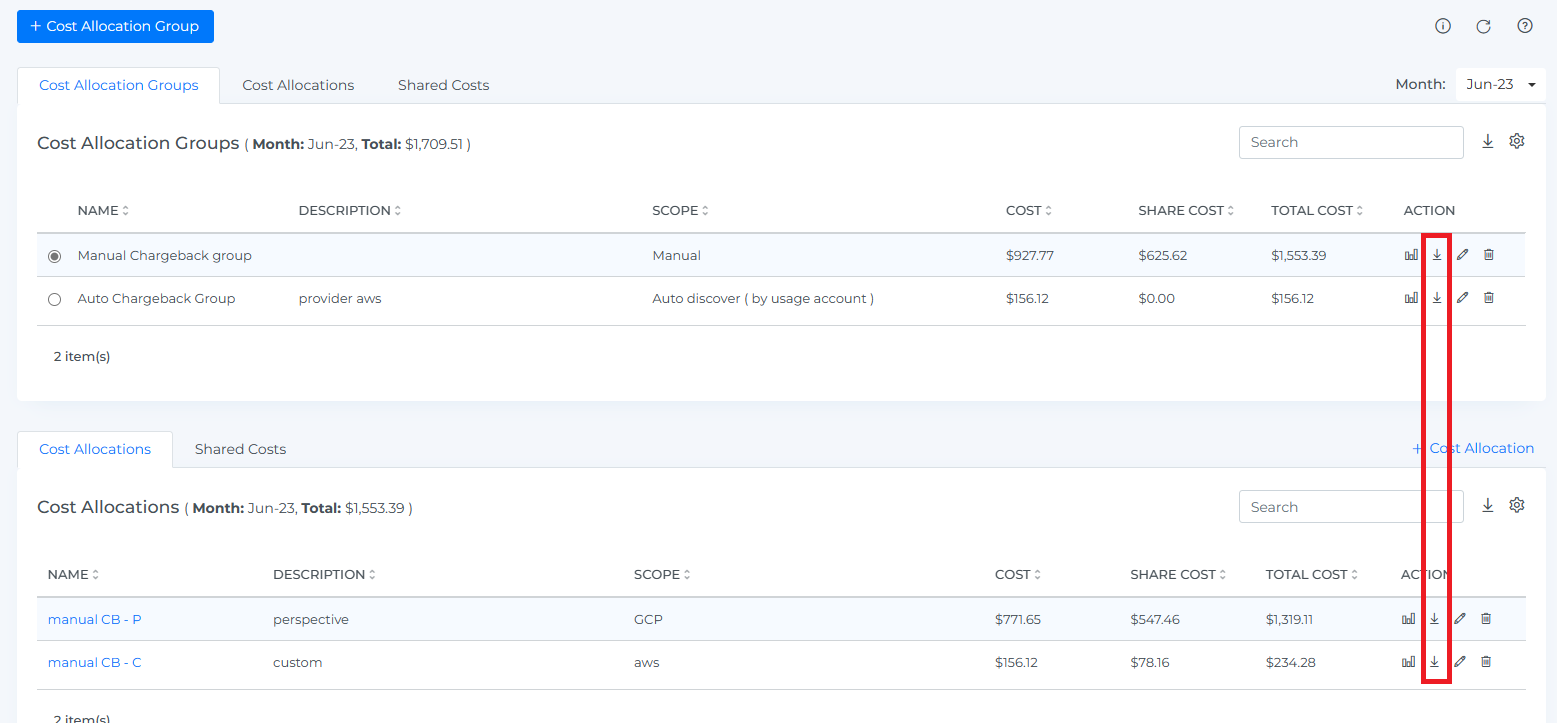
Steps to edit Cost Allocation Group:
Click on the edit icon
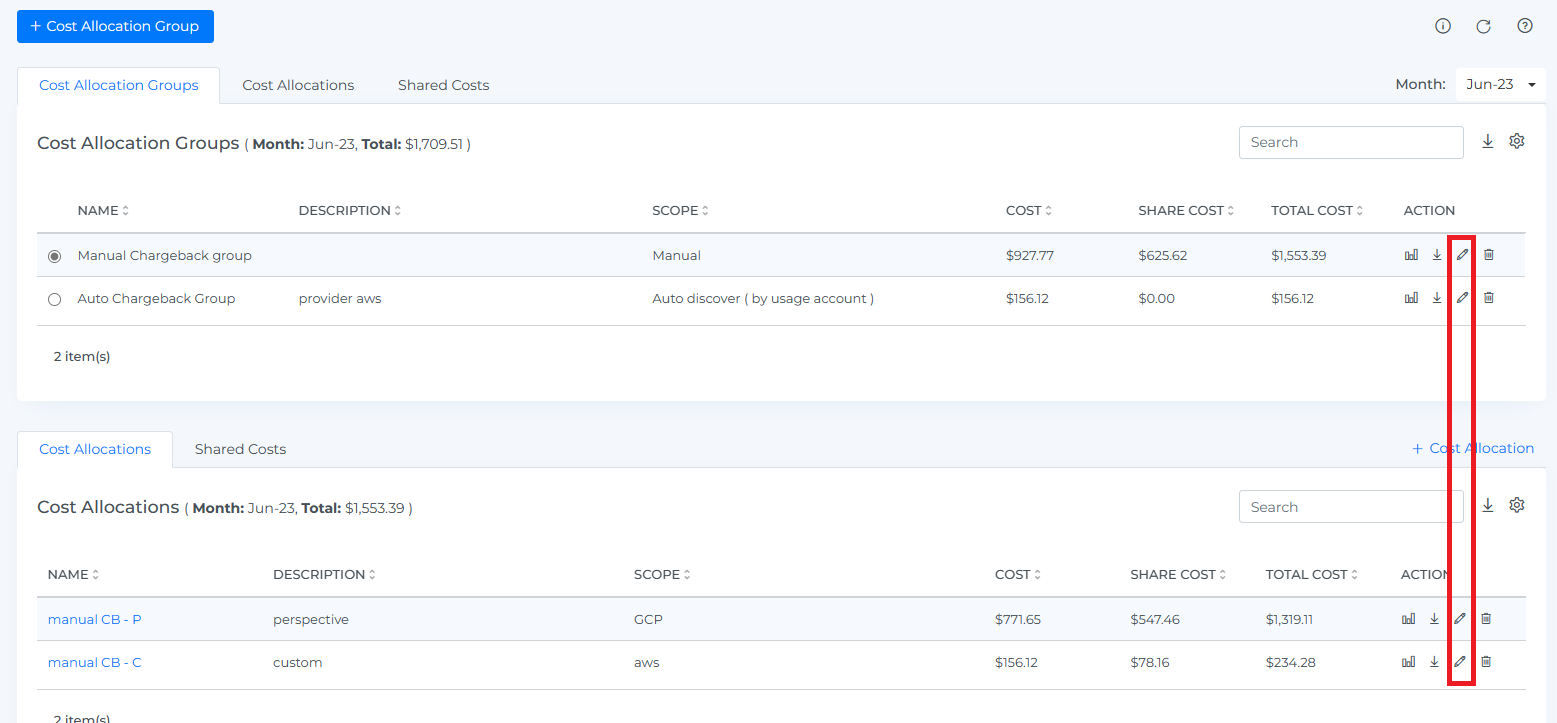
2. You can Update the Name/Description
3. Click on the Update Button
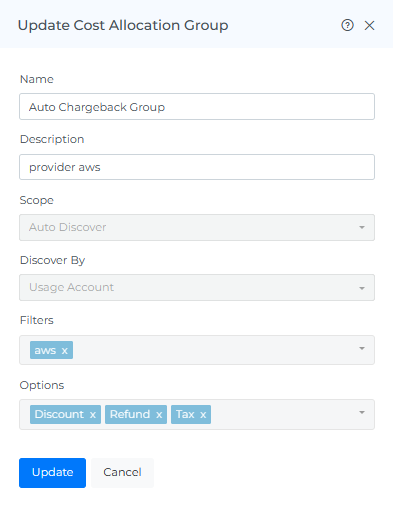
Info: The scope cannot be changed.
Steps to delete Cost Allocation Group:
Click on the delete icon.
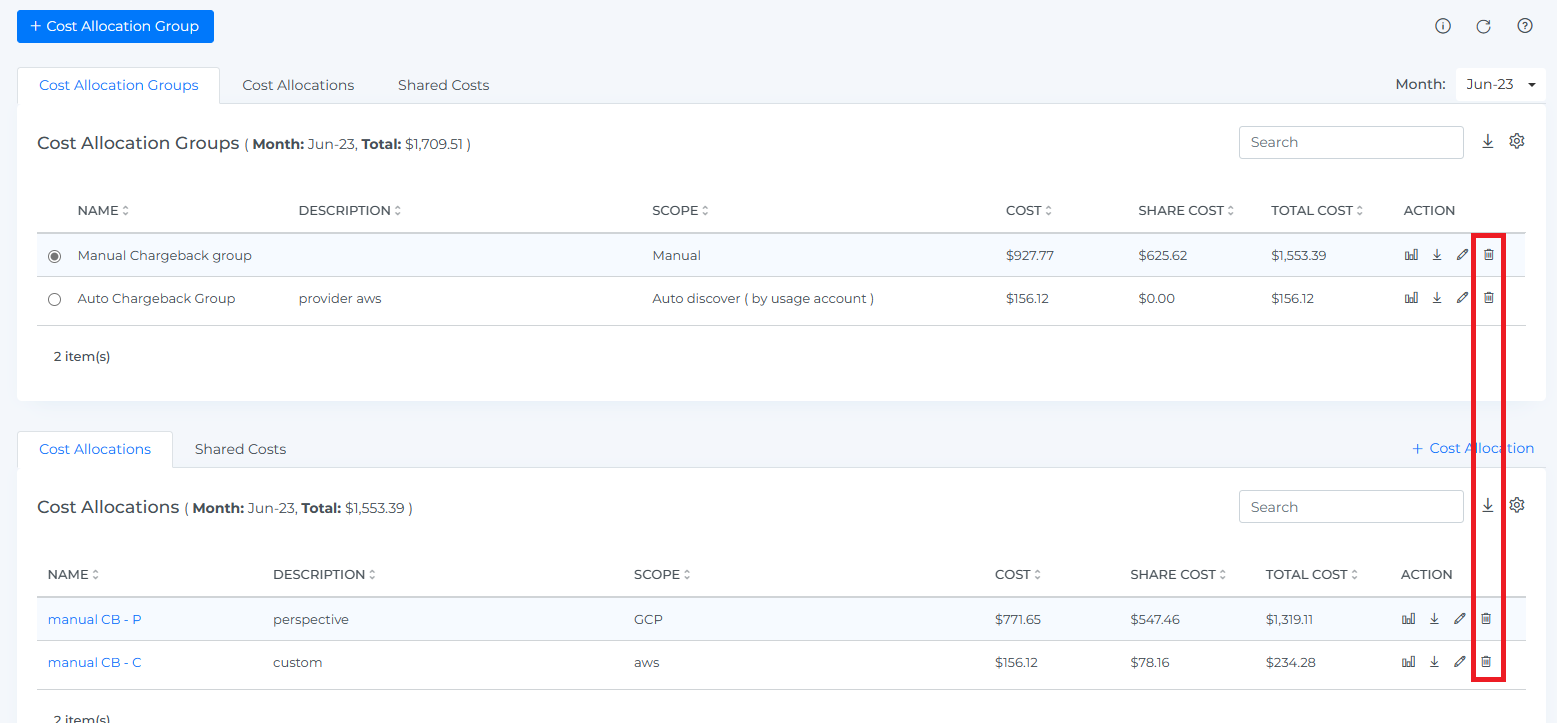
Click Delete from the pop-up.
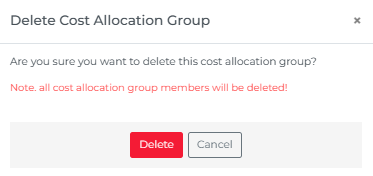
Before deleting any member Cost Allocations, it is important to ensure that they are not explicitly referred to by any shared cost. Once you have confirmed this, you can proceed with deleting the member Cost Allocations.
Steps to create Cost Allocations:
Login to DigitalEx as Owner/Editor
Click on Menu
3. Click on Cost Allocations

4. Click on +Cost Allocations
5. Enter Name & Description
6. Select Scope like Custom/Perspectives
Custom: create your own custom filters for Cost Allocations
Perspective: select perspectives that are already created (Perspectives ) & that perspective's filters will be applied to the Cost Allocations.
7. Select the Options.
8. Click on Create
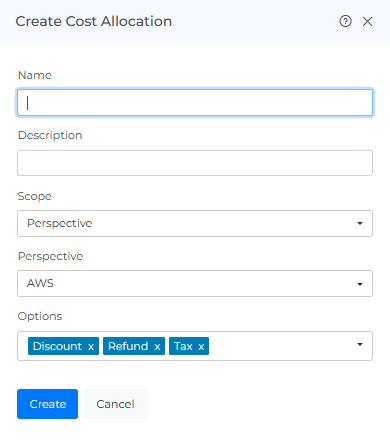
9. Cost Allocations is created and displayed as shown below

Steps to preview Cost Allocations:
Click on the preview icon.

Preview will be displayed as shown below.
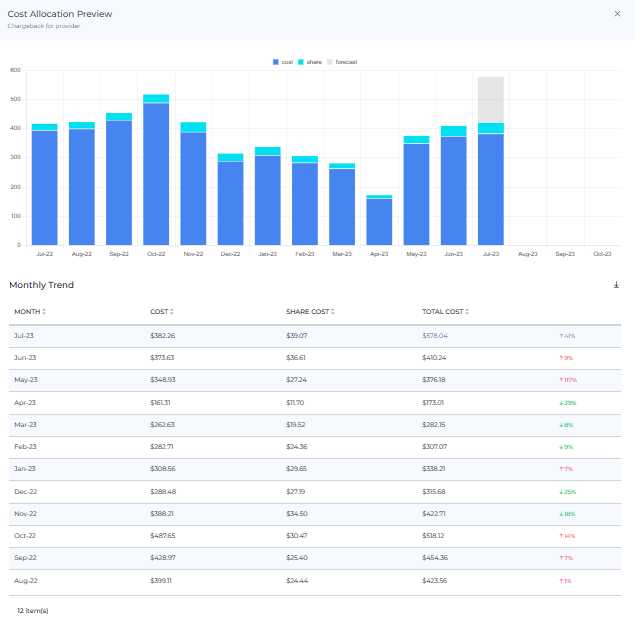
The percentage increase and decrease values shown in the widget are based on the previous month's data. This means that the widget will not show percentage increase or decrease values for the first month in which data is available nor for the current month.
Additionally, current month total cost includes forecast & current month's costs, which is greyed out.
Steps to download Cost Allocations:
Click on the download icon.

Steps to edit Cost Allocations:
Click on the edit icon.

2. You can Update the Name/Description
3. Click on the Update Button
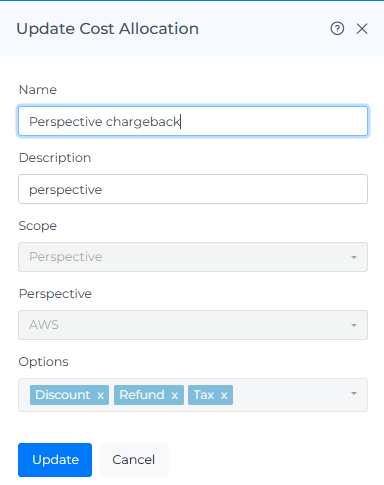
The scope cannot be changed.
Steps to delete Cost Allocations:
Click on the delete icon.

2. Click Delete from the popup
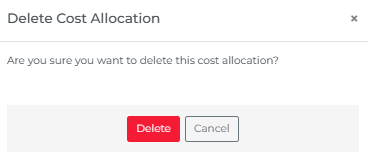
info: Deleting a Cost Allocations will permanently delete it.
Steps to create Shared Cost:
Login to DigitalEx as Owner/Editor
Click on Menu
Click on Cost Allocations

Click on the Shared Cost tab.
Click on +Shared Cost
Enter Name & Description
Select Scope like Custom/Perspectives
Custom: create your own custom filters for Cost Allocations
Perspective: select perspectives that are already created (Perspectives ) & that perspective's filters will be applied to the Cost Allocations.
Select Options
9. Select created Cost Allocations (Select the checkbox to share with all)
If you share Cost Allocations with all you can split, it equally & proportionally.
If you share with specific Cost Allocations you can split, it equally, proportionally & custom.
10. Select Split
Equally
Proportionally: The cost would be split into 60:40 ratio among the selected Cost Allocations
Custom (Select the checkbox to split by month with specific Cost Allocations with different value)
11. Click on Create
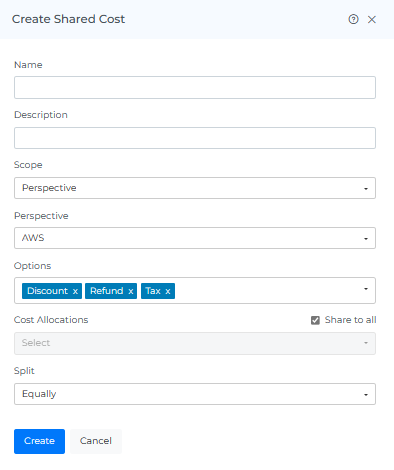
12. Shared cost is created and displayed as shown below

Steps to preview Shared Costs:
Click on the preview icon.

Preview will be displayed as shown below.
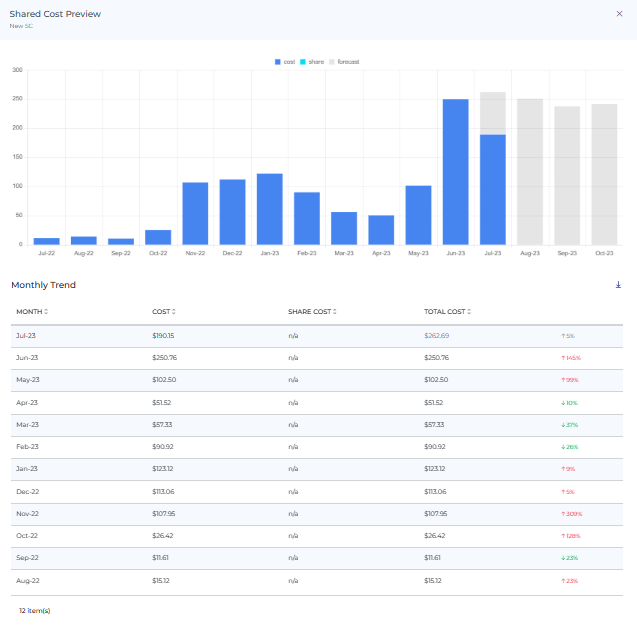
The percentage increase and decrease values shown in the widget are based on the previous month's data. This means that the widget will not show percentage increase or decrease values for the first month in which data is available nor for the current month.
Additionally, current month total cost includes forecast & current month's costs, which is greyed out.
Steps to download Shared Costs:
Click on the download icon.

Steps to edit Shared Costs:
Click on the edit icon.

2. You can Update the Name/Description/Cost Allocations & Split
3. Click on the Update Button
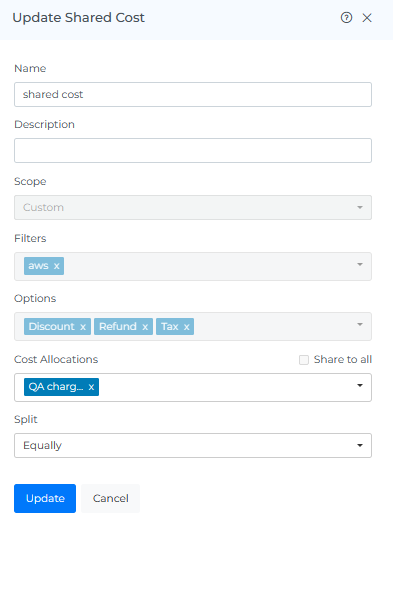
The scope cannot be changed.
Steps to delete Shared Cost:
Click on the delete icon.

Click Delete from the popup.
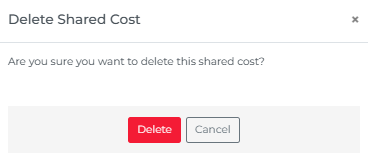
Deleting a Cost Allocations will permanently delete it.
Header Icons

Share
Click on the Share icon, copy the link of the current page, and filter if anywhere you can share it with other team members.
Screenshot
Clicking on the Camera icon, take a Screenshot of the current page, and download it in a pdf file.
Info
The "last updated" date and time stamp show when the data on the page was last refreshed. This can be useful for understanding the age of the data and determining if it is up to date.
Reload Option
The "reset" option allows you to clear all filters and selections from the page, returning it to the default view. This can be useful if you want to start over or view the data in its original form.
Help
If you click on the "?" icon, you can access the help documentation for the page. This can provide you with additional information and guidance on using the page and its features.
