Step-5: Configure SSO in DigitalEx
Below is the description of the steps to configure SSO in DigitalEx
Login to DigitalEx as owner.
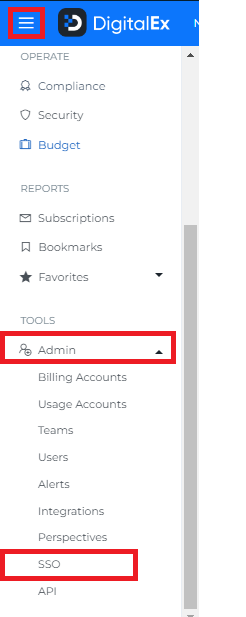
Click on Menu > Admin > SSO

Click on Configure SSO button

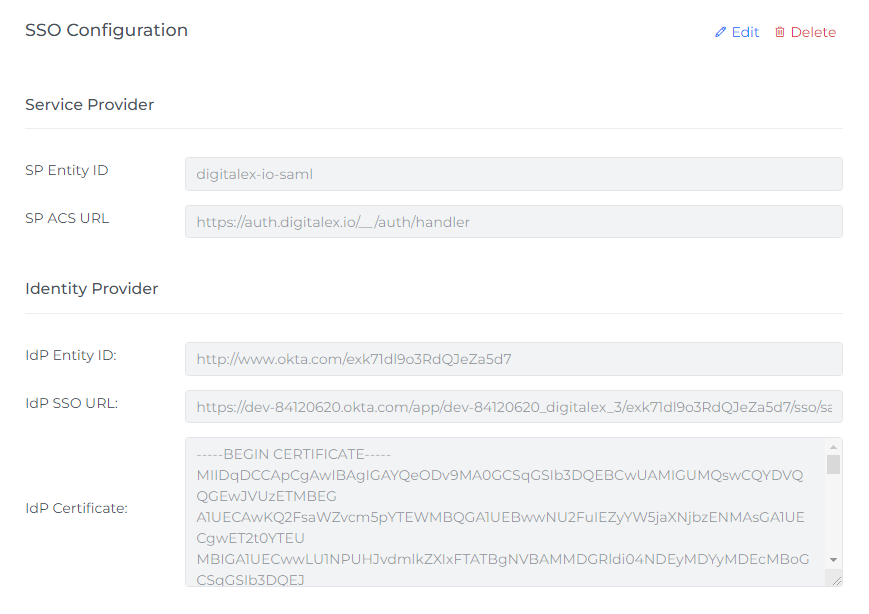
4. Enter IdP Entity ID which is the Identity Provider Issuer copied in Step-3
5. Enter IdPSSO URL which is the Identity Provider Single Sign-On URL copied in Step-3
6. Enter IdP Certificate which is Id Certificate copied in Step-3
7. Click Save

8. SSO is configured successfully, you can Edit or Delete the existing data if required.
9. Click on login with SSO
10. Pop-up/new page appears which navigates to Okta Sign-in page to let you sign in using your Okta account
11. Enter your Okta credentials and click login
Note: Once users have been added to DigitalEx and the integration has been set up with Okta, they should be able to log in to the application using their Okta accounts. The level of access that each user has will be determined by their privileges within DigitalEx. Users with the appropriate permissions will be able to access the features and functions of the application that are available to them

