Savings Plan Planner
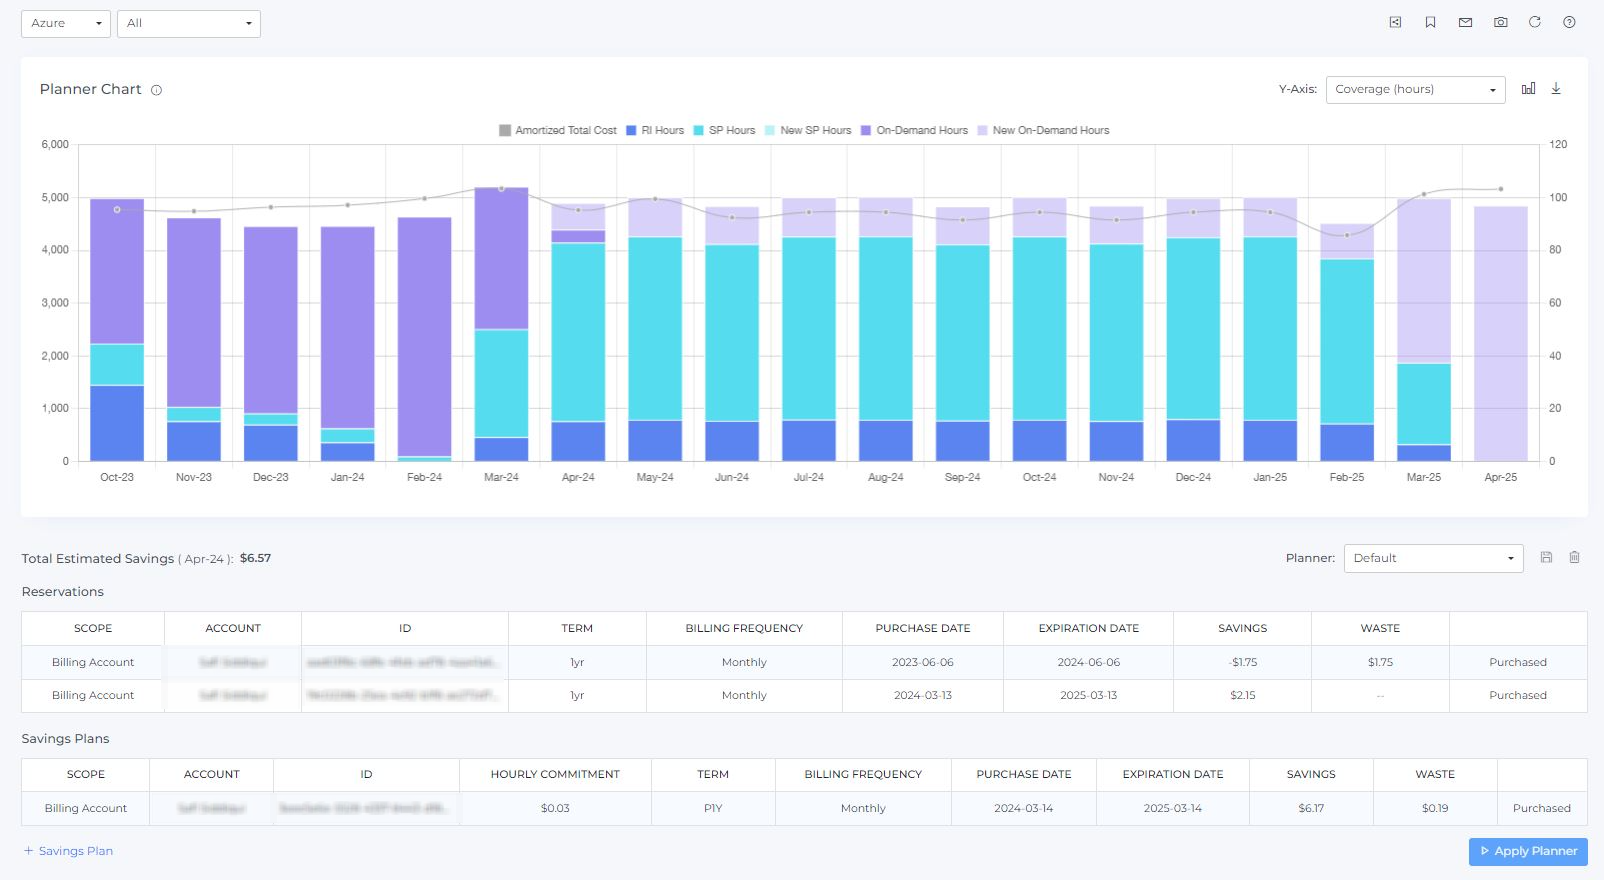
The Savings Plan planner provides a visual representation of net savings, total coverage, Reserved Instance (RI) hours, Savings Plan (SP) hours for the past 6 months, and the forecasted SP hours and forecasted net savings for the next 12 months. The chart is generated based on the reservations and Savings Plans purchased, and by creating/adding new savings plans you wish to purchase.

On the top row, we have the Provider dropdown used to select the provider, i.e., AWS or Azure. After selecting the provider, we can see the list of available accounts and select the account name for which you want to purchase the savings plan. In case of MPA accounts you also see the customer dropdown

Currently, we only support AWS and Azure providers, with EC2 instance types available for computing. Additionally, only EC2 machines are currently supported in compute category.
Planner chart
The planner chart displays simulations of Reserved Instances (RIs) and Savings Plans (SPs) for both past and future months. You can view the savings accumulated from RIs and SPs purchased in the past six months, as well as simulations for the next twelve months. Specifically, the chart illustrates purchased RIs, purchased SPs, total coverage of RIs & SPs,c for the upcoming twelve months.

By default, the planner chart is set to Coverage (hours). If you want to view the coverage or net savings, then you need to change the y-axis to Coverage (%) to see the total coverage and the forecasted coverage. To see the net savings, you need to change the y-axis to Net Savings to view the total net savings and forecasted net savings.

By default, the chart type is set as "Vertical Bar (stacked)". If you want to view it in table form, you need to change the chart type from "Vertical Bar (stacked)" to a table by clicking the chart icon. Additionally, you can download the table in CSV format by clicking the download CSV file icon located next to the chart type icon.

Planner details
The planner details contain three sections: total estimated savings, reservations details, and saving plan details.

The first row of the planner details section contains the Total estimated cost. The Total estimated cost represents the total savings from the purchased RIs, purchased SPs, and the new SPs you intend to purchase.
![]()
The second section contains the purchased Reservations. In this section, you can see details of the RIs which you have purchased.
Here are the details:
Scope: For which scope you have purchased the RIs i.e., for a Billing account or a Usage account.
Account: For which account you have purchased the RIs
ID: ID of the RIs Purchased
Term: For how many years the RIs are purchased
Instance type: Which instance type the RIs were purchased
Location: In which location the RIs were purchased
Payment type: What was the payment mode of purchased RIs
Purchased date: On which date the RIs were purchased
Expiration date: When the purchased RIs are expiring
Effective cost: What is the monthly cost from the particular RIs
Savings: what is the monthly savings from the particular RIs
waste: what is the monthly waste/unused cost from the particular RIs
.png?inst-v=990d0b9e-0422-4733-936b-b869f3bba9cc)
The third section consists of the purchased savings plans, and it also allows you to add details of any new savings plans you wish to purchase. You can then simulate how much you will save.
For the Purchased SPs you can see the below details
Scope: For which scope you have purchased the SPs i.e., for a Billing account or a Usage account.
Account: For which account you have purchased the SPs
ID: ID of the SPs Purchased
Hourly commitments: What are the hourly commitments for the particular SPs purchased.
Type: Which category it is covering i.e. EC2 instance or compute
Term: For how many years the SPs are purchased
Instance Family: Which instance type the SPs were purchased
Location: In which location the SPs were purchased
Payment Option: What was the payment mode of purchased SPs
Purchased date: On which date the SPs were purchased
Expiration date: When the purchased SPs are expiring
Savings: what is the monthly savings from the particular SPs
waste: what is the monthly waste/unused cost from the particular SPs
.png?inst-v=990d0b9e-0422-4733-936b-b869f3bba9cc)
If you want to purchase a new savings plan for an EC2 machine, you need to click on the "+Saving Plan" link and fill in the details.
Scope: For which scope do you want to purchase the new savings plan i.e., for a Billing account or a Usage account.
Account: For which account do you want to purchase the new savings plan.
Hourly commitments: Enter the hourly commitment.
Type: Select the type from the dropdown i.e., Compute/EC2 Instance.
Term: Select the term from the dropdown i.e., 1 year or 3 years.
Instance family: Select the instance family for which you want to purchase. Note: This option is only available for the type EC2 Instance.
Location: Select the location of the EC2 instance that you have selected in the above point. Note: This option is only available for the type as EC2 Instance.
Payment option: Select the payment option from the payment dropdown.
Purchase date: Select the date when you want to purchase the new savings plan from the date picker.
Expiration date: It will be auto-populated depending on the term you selected.
After filling all the above details, click on the "Apply Planner" button. Upon clicking the "Apply Planner" button, you will see the next 12 months' data, i.e., the SPs hours, coverage of SPs, and the total amortized cost in the planner chart.

To edit the newly added saving plan, click on the pencil icon present in the newly added saving plan row, edit the details you wish to change, and then click on the "Apply Planner" button. Upon clicking the "Apply Planner" button, you will see a new forecast for the next 12 months for the data you edited, i.e., the SPs hours, coverage of SPs, and the total amortized cost in the planner chart.
.png?inst-v=990d0b9e-0422-4733-936b-b869f3bba9cc)
To delete the newly added saving plan, click on the trash icon present in the newly added saving plan row next to edit icon,
.png?inst-v=990d0b9e-0422-4733-936b-b869f3bba9cc)
To save the planner, follow these steps:
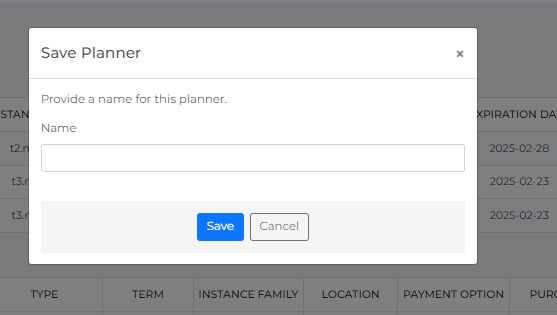
Click on the save icon located next to the planner dropdown.
A popup will appear
Enter the new planner name you wish to save.
Click on the save button.

To save the same planner once more with a different name, follow these steps:
Select the planner from the planner dropdown menu.
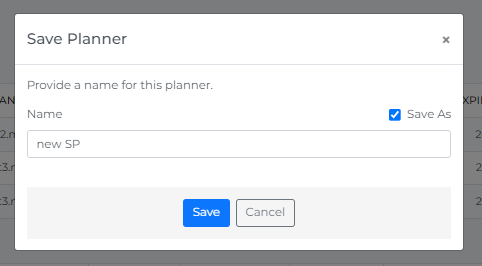
Click on the save icon located next to the planner dropdown.
A popup will appear; select the "save as" checkbox.
Enter the new planner name you wish to save.
Click on the save button.

To delete the planner, follow these steps:
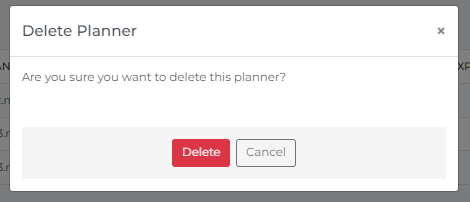
Click on the delete icon located next to the save planner icon.
A popup will appear
Click on delete

