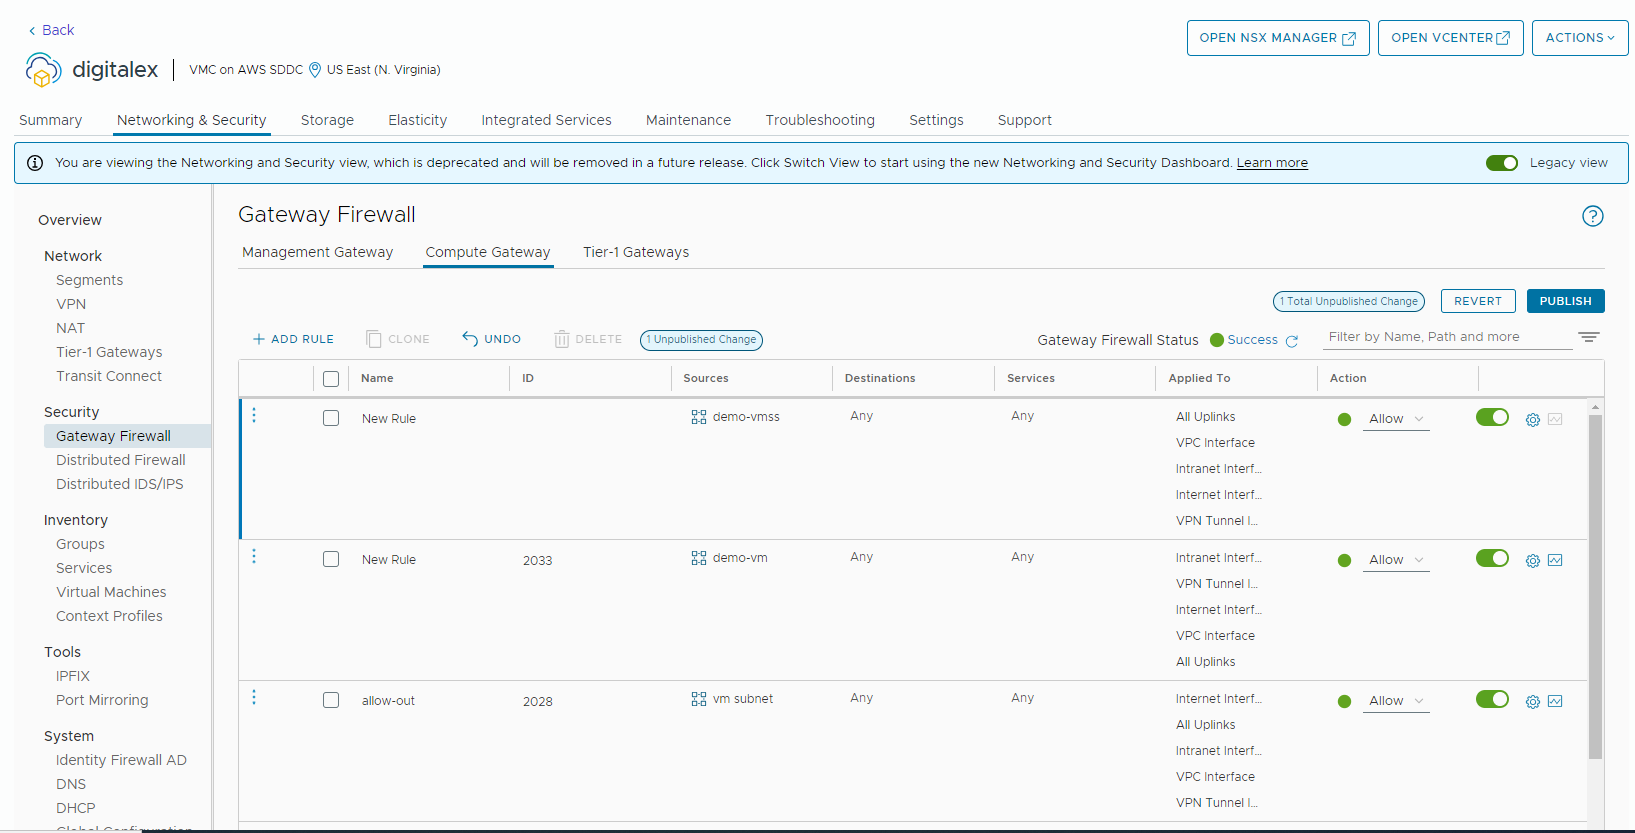
Datacenter Gateway firewall configuration
In Datacenter Gateway firewall Configuration we are adding two rules, they are
Management Gateway for (appliance access to vCenter)
Compute Gateway for (appliance access to internet for access to DigitalEx API via internet)
Below are the steps for configuring the gateway firewall
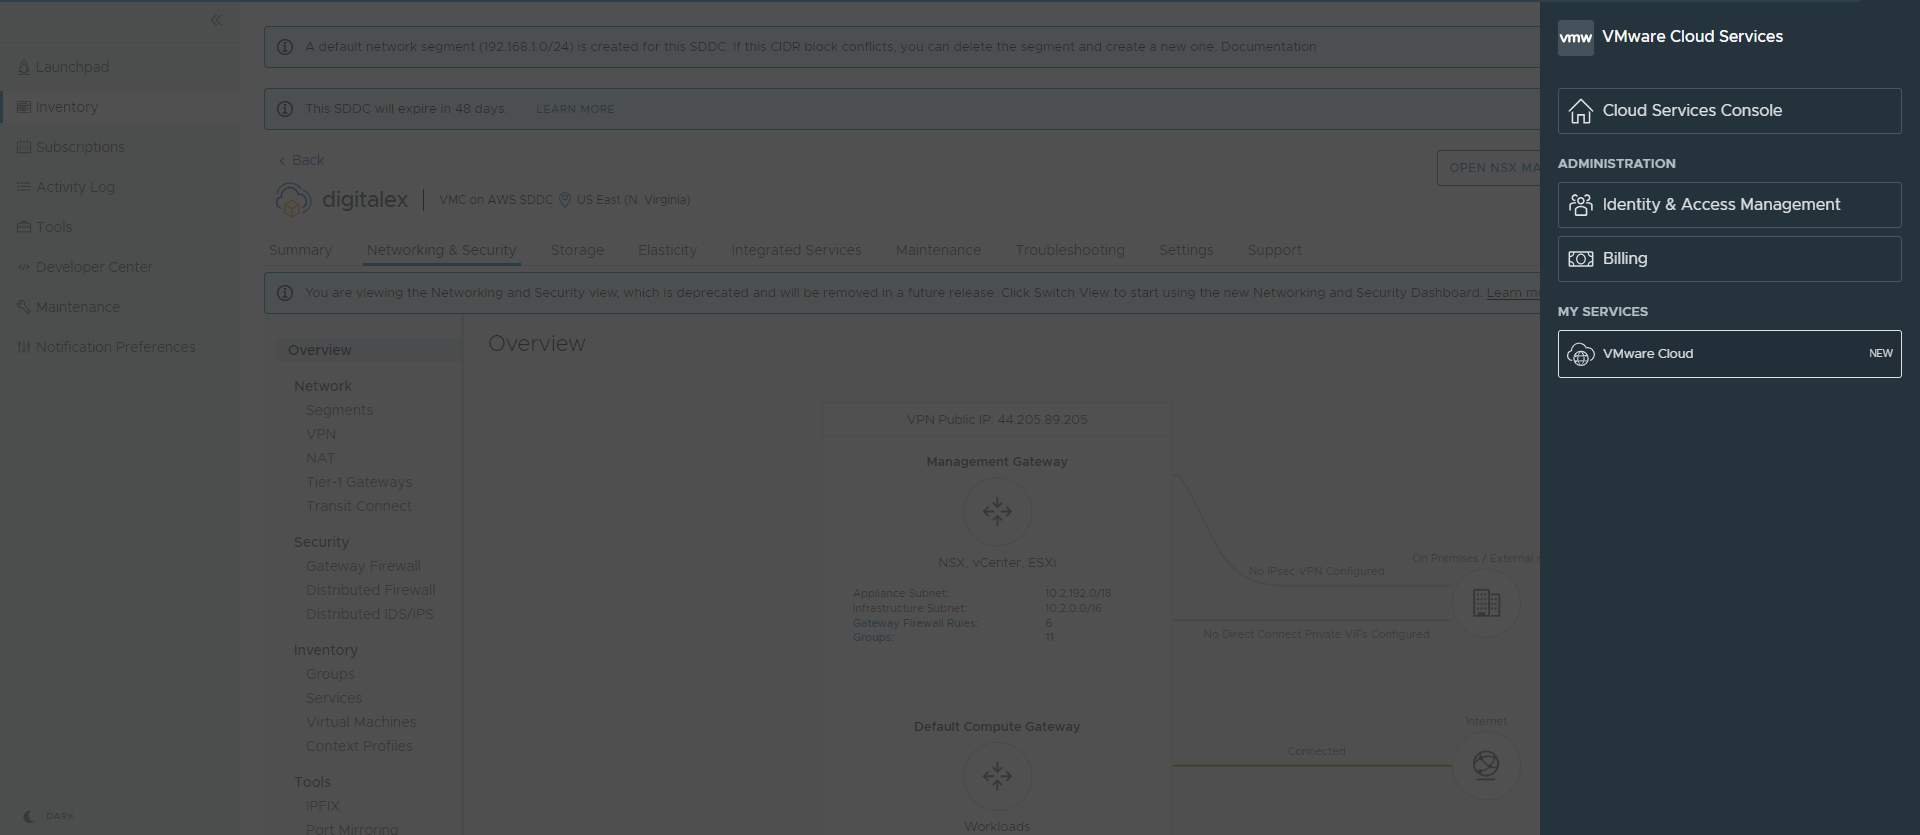
Login to vmware on cloud console and navigate to VMware cloud Tab under the Menu section
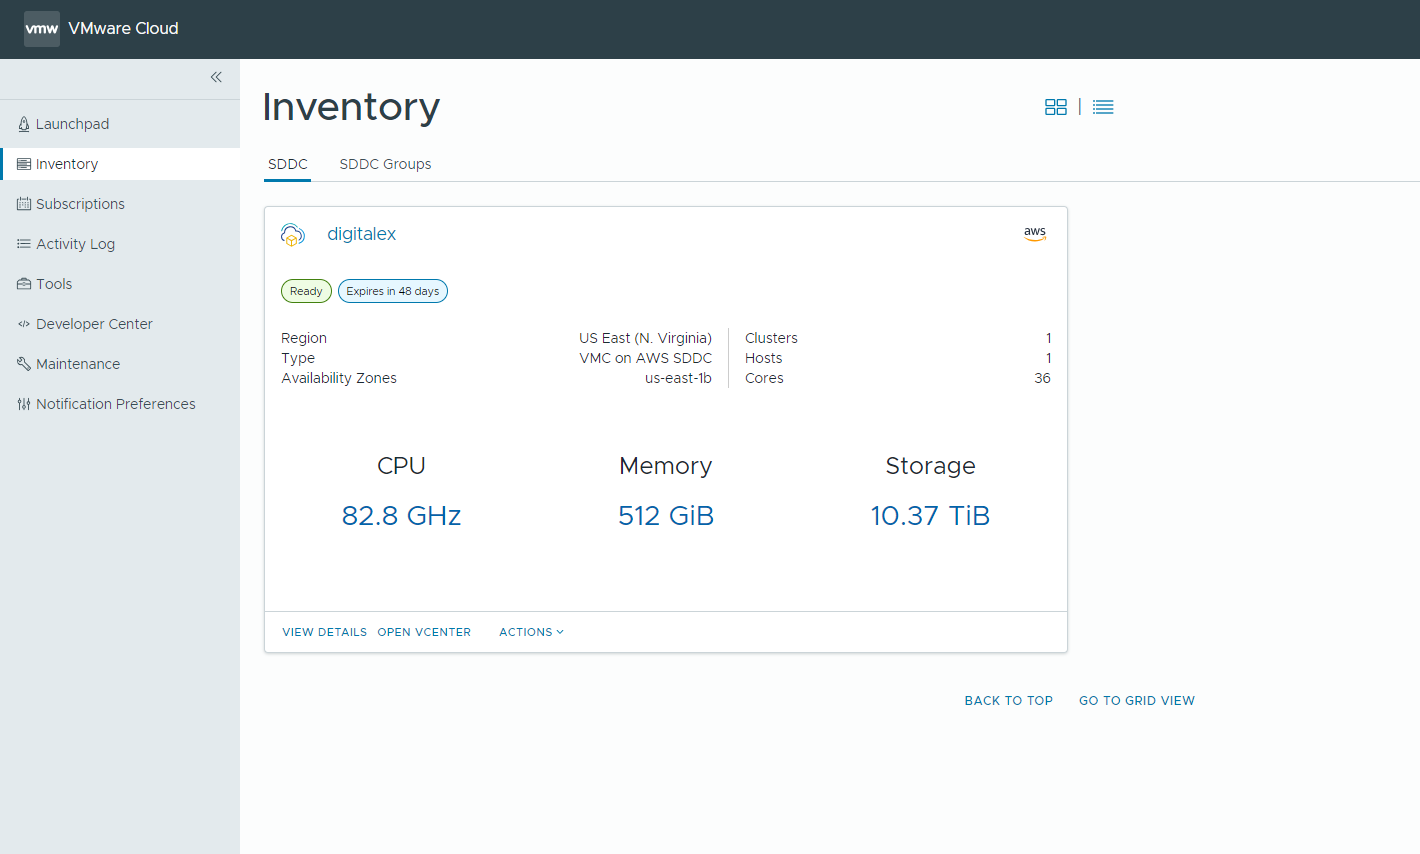
Under Left side nav bar > inventory > View details > Networking and security
Management Gateway
In networking and security click on Legacy View
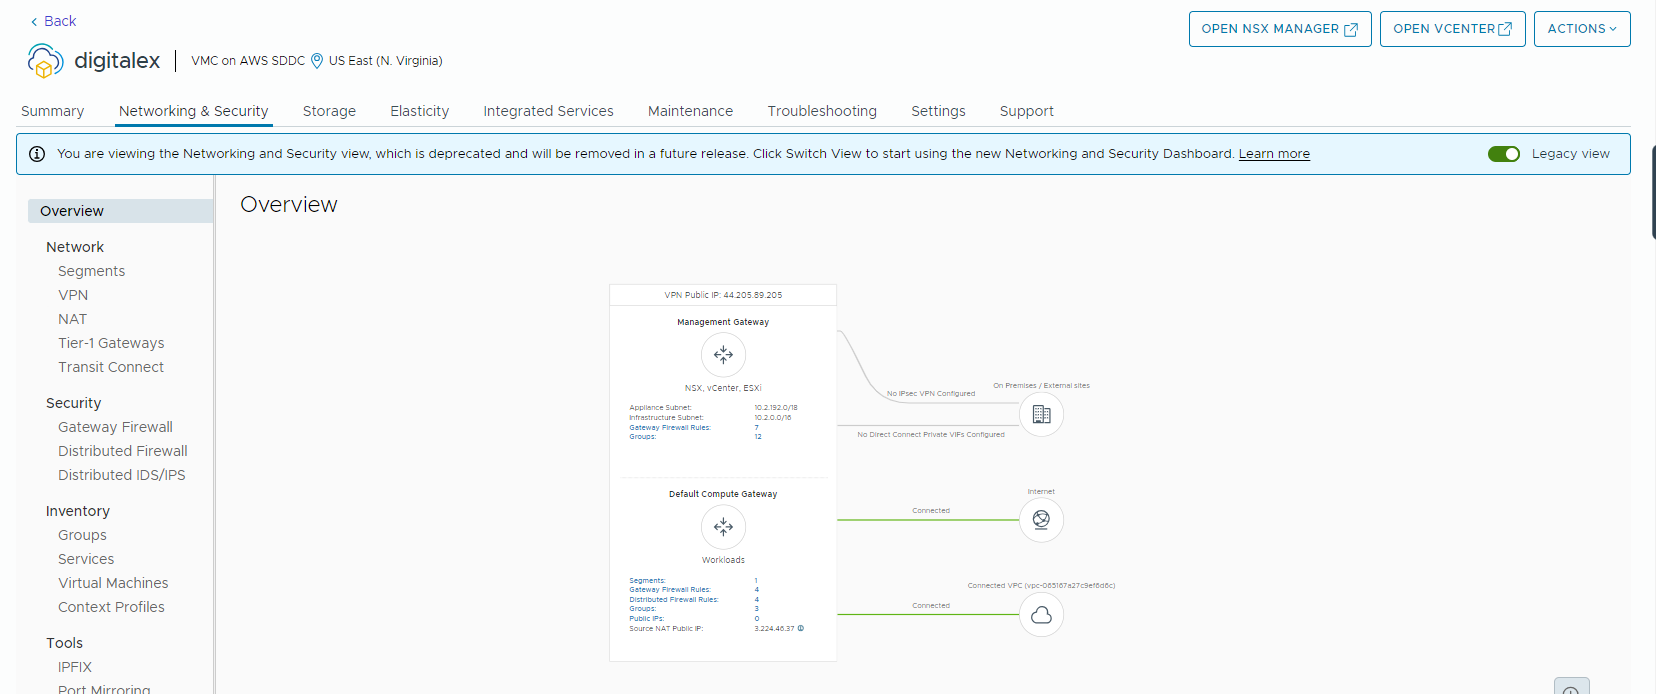
On Security > Click on Gateway firewall > Management Gateway > Enter all the required details
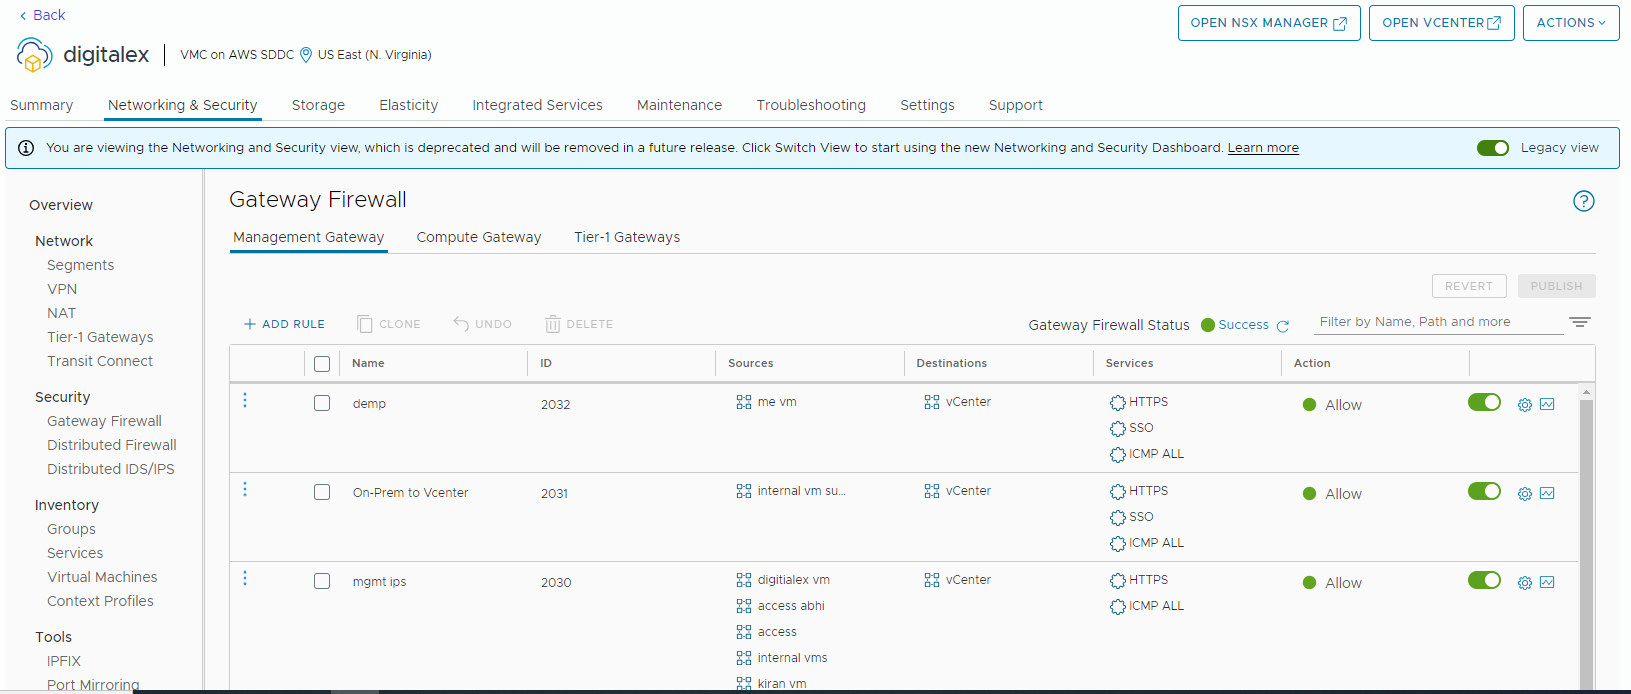
Then Click on Add rule
Then Enter the rule name
Then in the Source section click on edit icon > user-defined Group > Add Group,
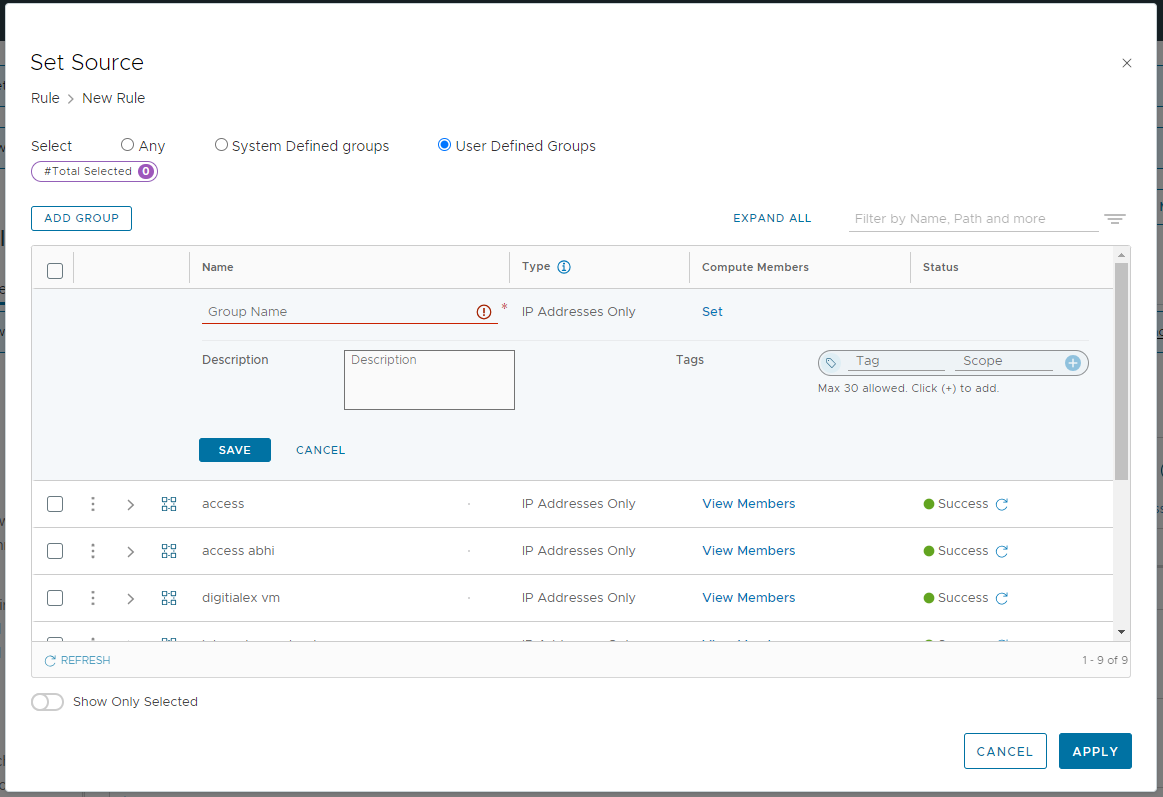
Then add Group name and click on set link and enter the IP
eg. 192.168.0.1 your network Ip and then click on apply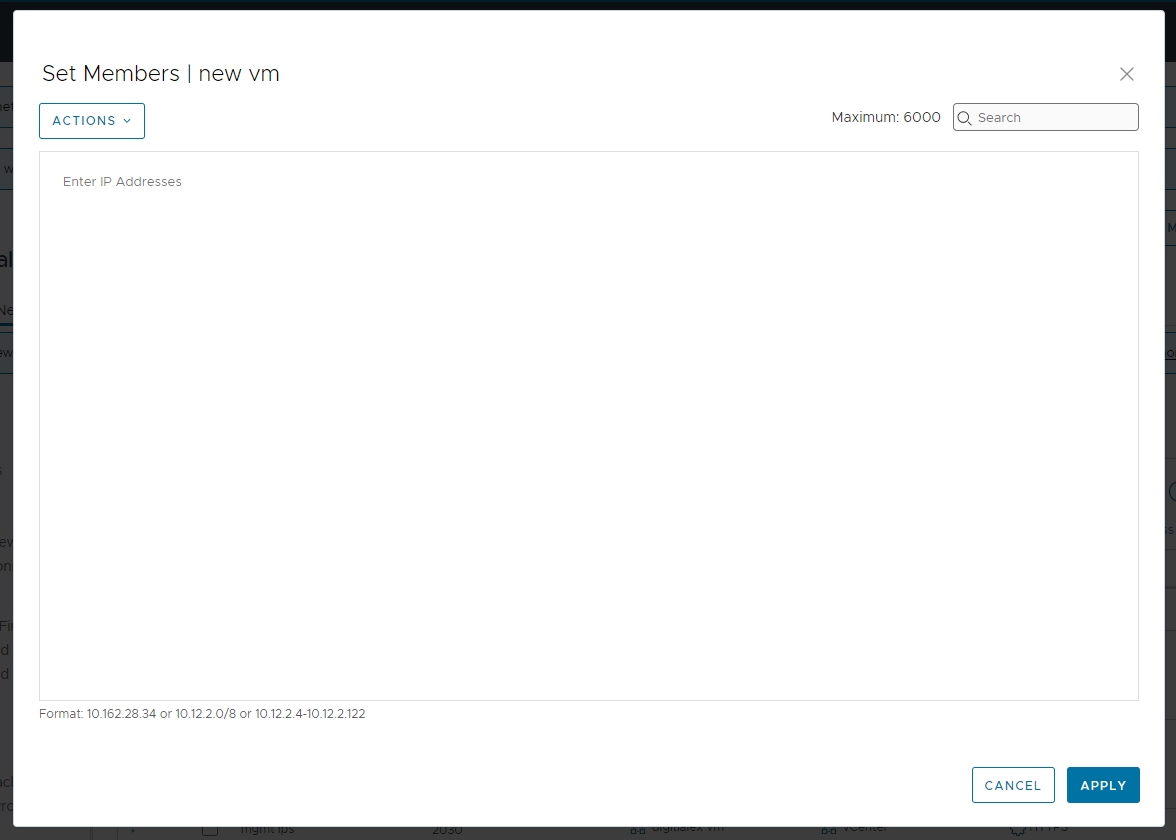
After setting up the Ip click on Save and then Apply
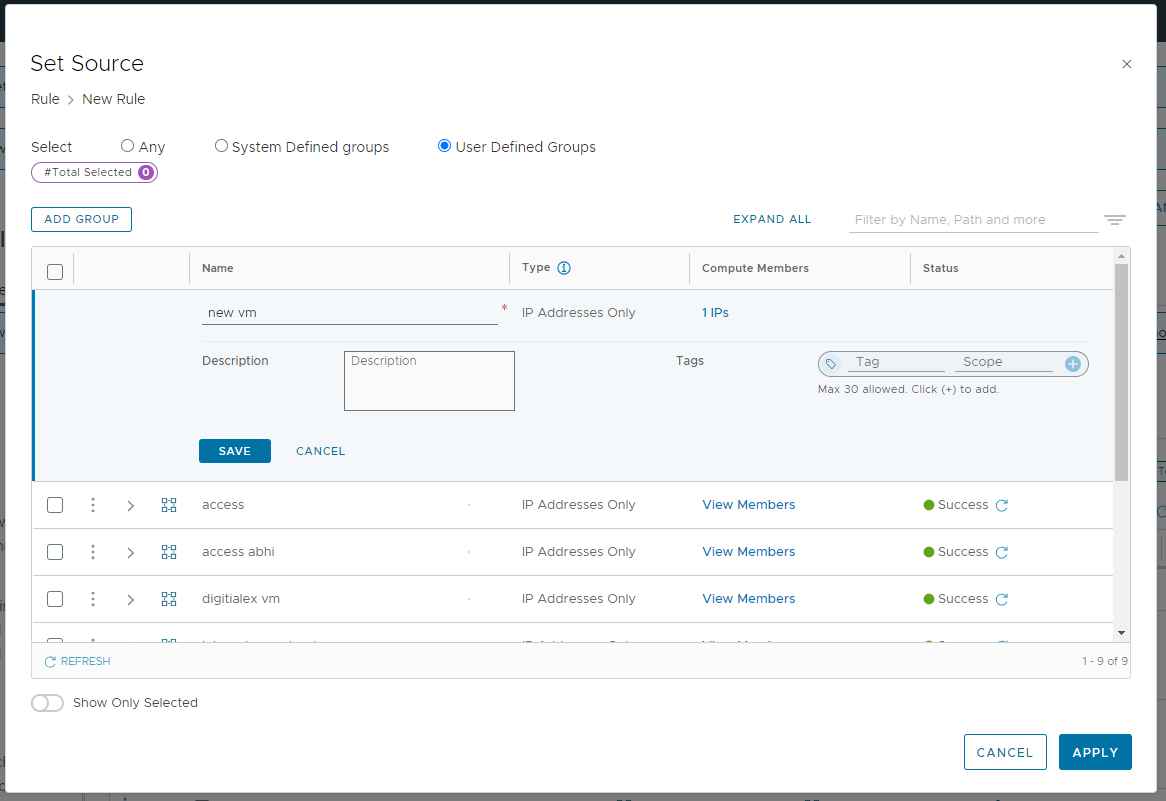
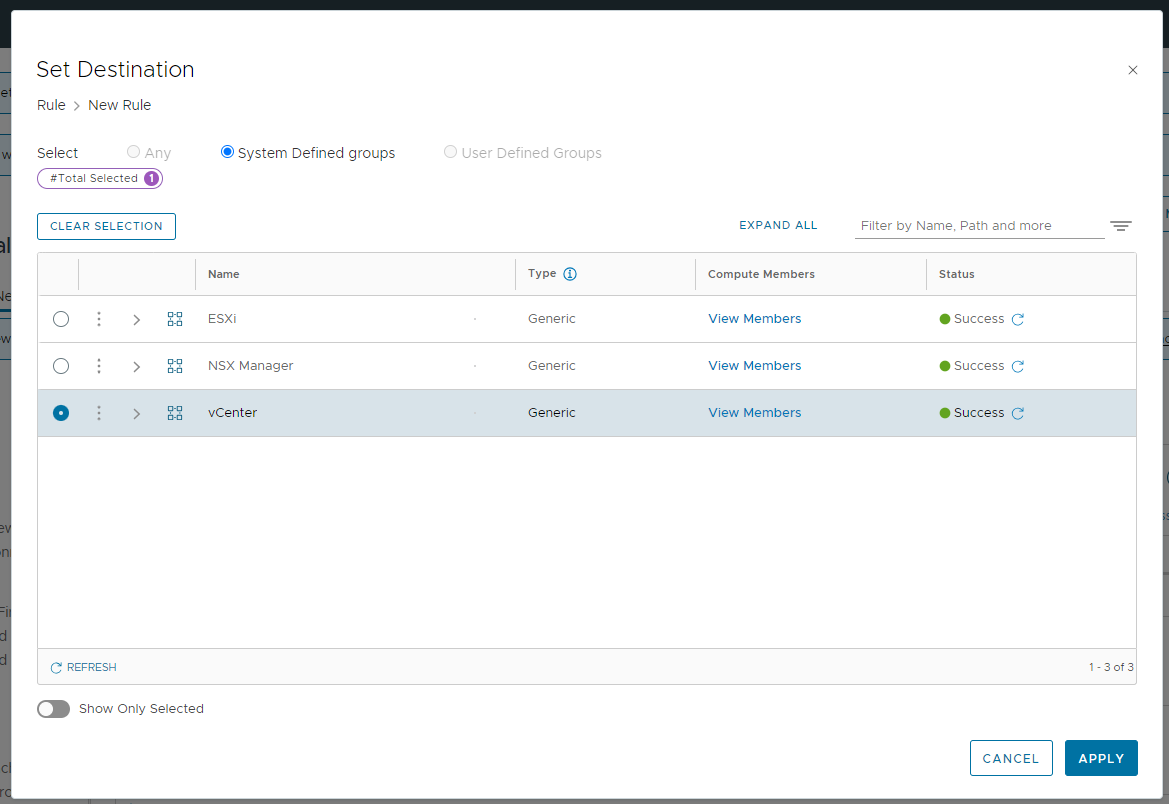
Then on the Destination column click on edit icon
Then select as vCenter from the list and click on apply
Then on the service column click on edit icon
Select “HTTPS”, “SSO”, “ICMP All” and click on Publish
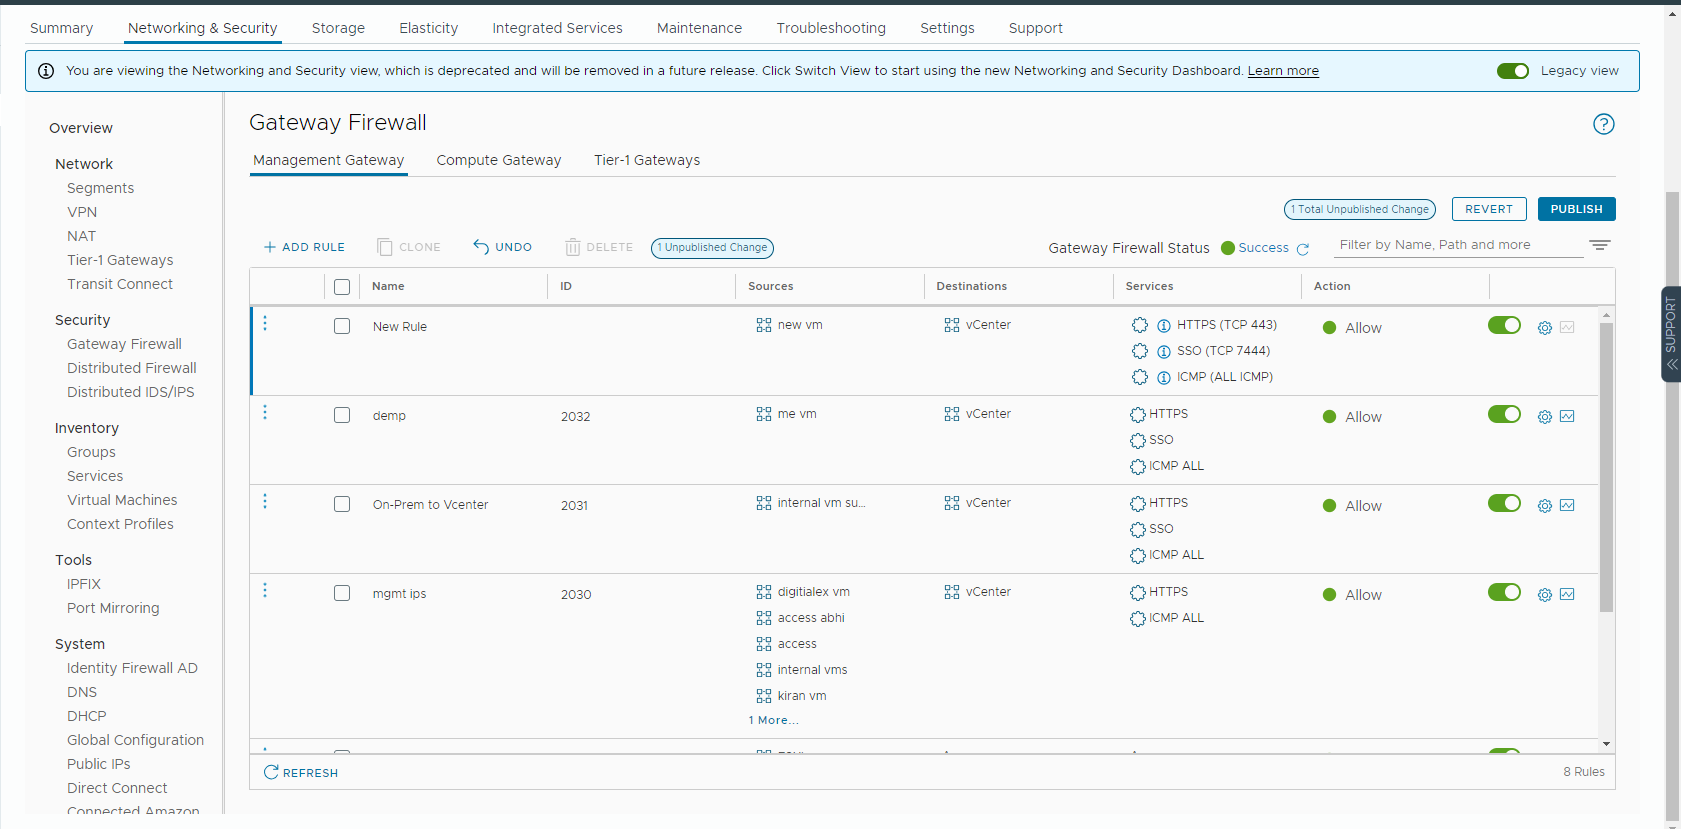
For digitalex appliances having internet access to connect to DigitalEx APIs
Compute Gateway
On Security > Click on Gateway firewall > Compute Gateway > Enter all the required details
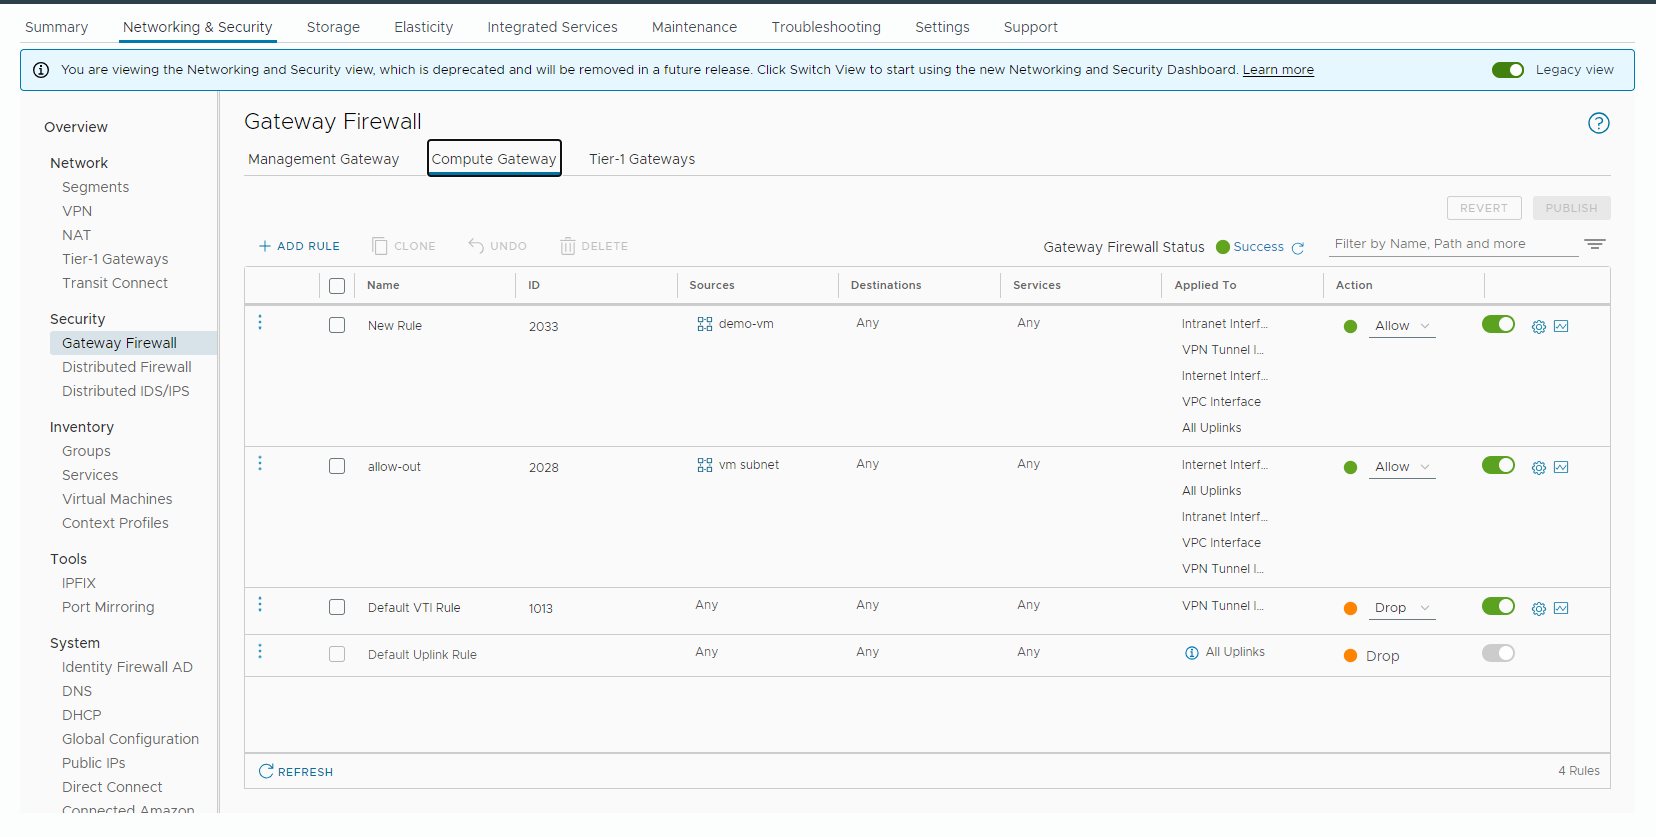
Then click on Add rule
Then Enter the rule name
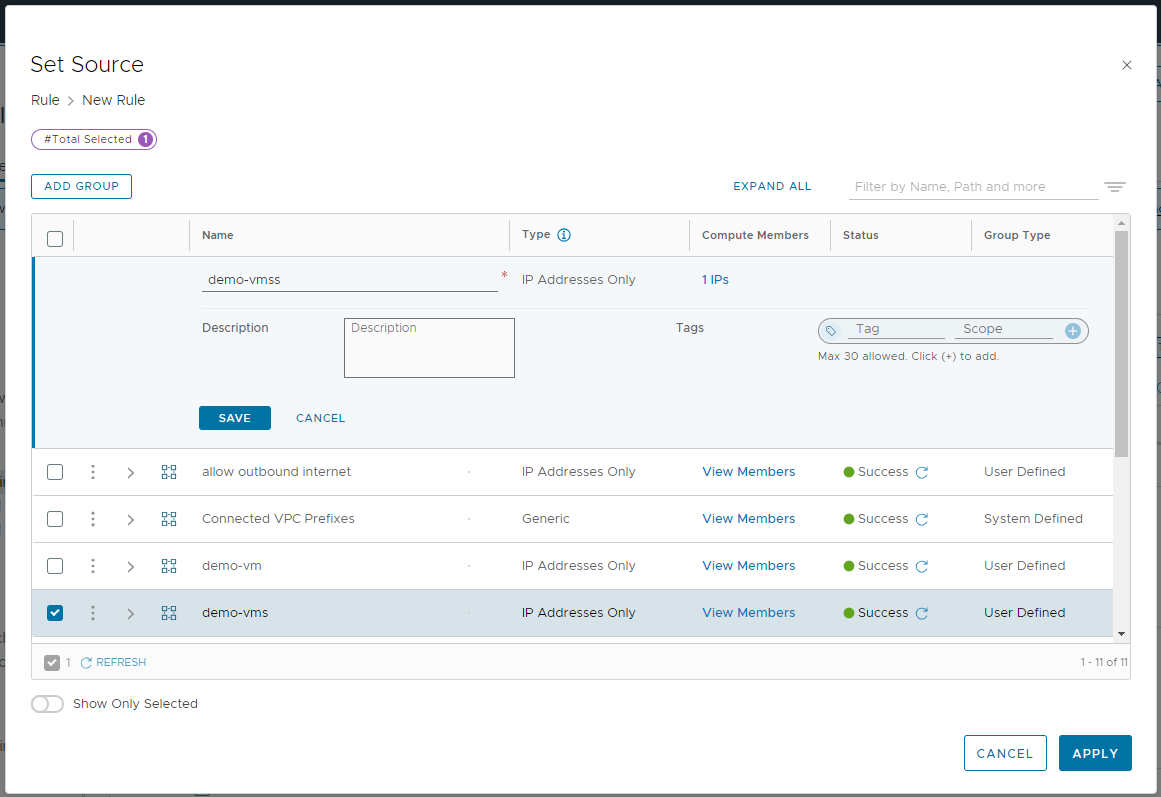
Then in the Source section click on edit icon > user-defined Group > Add Group,
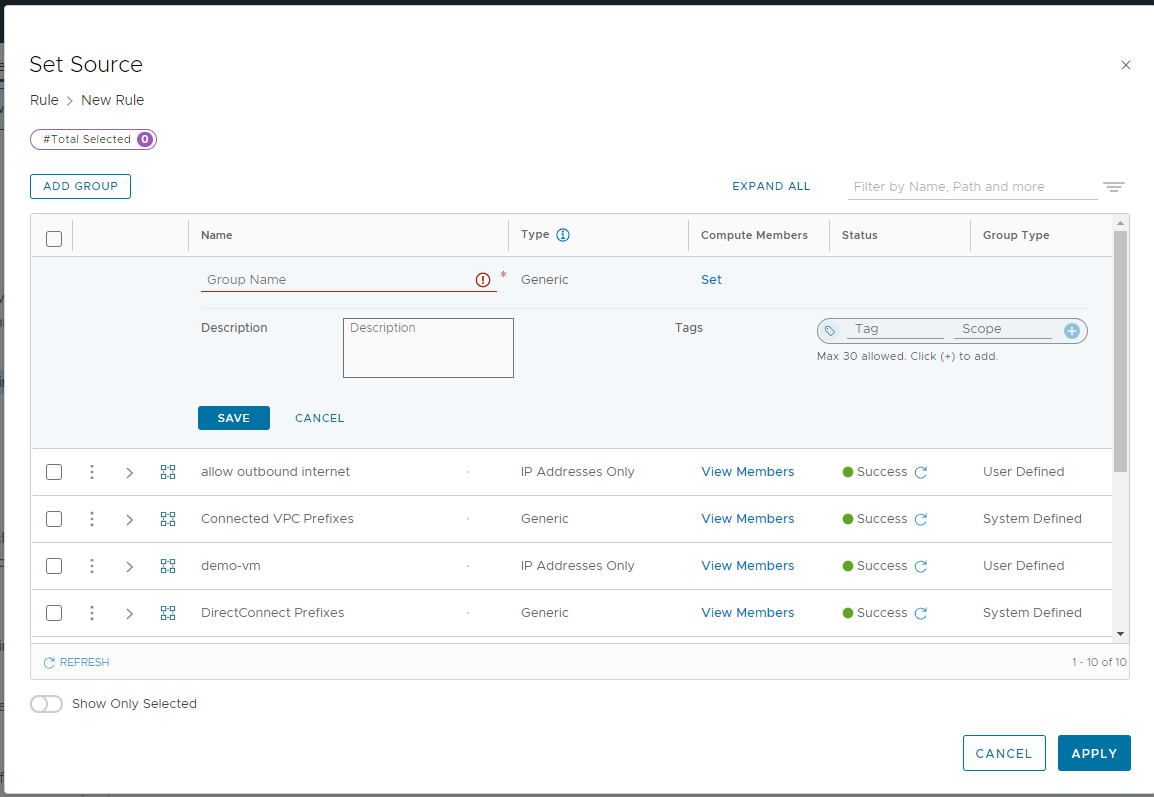
Then add Group name and click on set link and then click on ip address only and enter the IP
eg. 192.168.0.0/24 your network Ip and then click on apply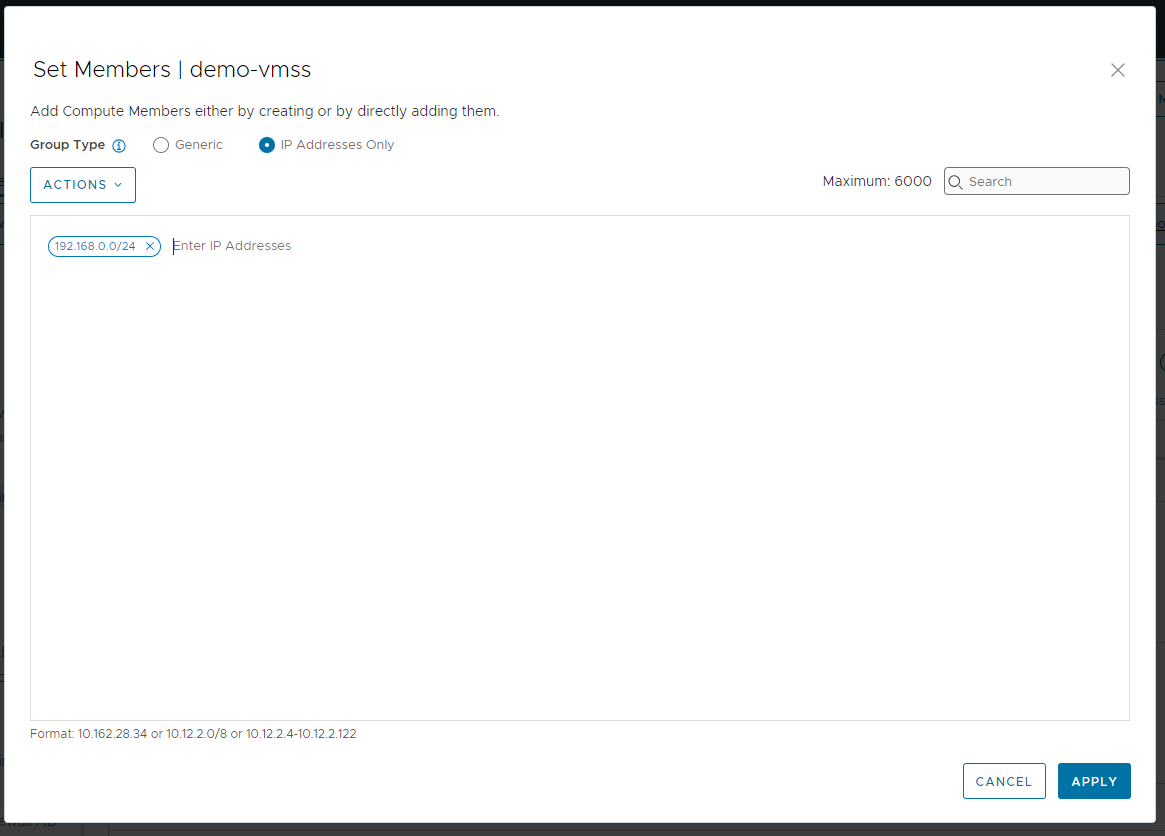
After setting up the Ip click on Save and then Apply
Then on the Applied to column click on edit icon
Select “All Uplinks”, “VPC Interface”, “Intranet Interface”, “Internet Interface“, “VPN Tunnel Interface” and click on Publish
